background image


User Manual 

Summary of Contents for Followspot 1200

Page 1: ...User Manual ...

Page 2: ...4 paper 210 x 297 mm configure your printer to scale the content of this document to A4 paper Intended Audience Any person in charge of installing operating and or maintaining the Followspot 1200 should read the Quick Start Guide that shipped with the Followspot 1200 unit and this manual in their entirety before installing operating or maintaining the Followspot 1200 Disclaimer CHAUVET believes th...

Page 3: ...Voltage Frequency Selection 7 Lamp 8 Lamp Removal 8 Lamp Installation 9 DMX Linking 10 DMX Connection 10 Mounting 11 Orientation 11 Rigging 11 4 Operation 12 Control Panel Description 12 Programming Panel 12 Navigation Functions 12 Followspot 1200 Menu Options 13 Normal Mode 13 Offset Mode 13 Programming Procedure 14 Normal Mode 14 Normal Mode Cont 15 Offset Mode 15 External Console 17 Controls 17...

Page 4: ...mber of Fixtures 27 DMX Data Cabling 27 Making your Own DMX Cable 27 DMX Cable Characteristics 27 DMX Cable Connectors 28 3 Pin to 5 Pin Conversion Chart 28 DMX Connection 28 Master Slave Linking 29 Master Slave Connection 29 ID Addressing 30 Single Row Connection 30 Standard Block Connection 30 Repeated Row Block Connection 30 Other Effects 30 Sizing the Circuit Breakers 31 Using the Spec Sticker...

Page 5: ...nvention Meaning 1 512 A range of values 50 60 A set of mutually exclusive values in the text 10 A DIP switch to be configured Claims A fixture function a new term a section or a chapter COLORado UM The name of another publication or manual SET A key to be pressed on the fixture s control panel Settings A menu option that can be selected but not modified MENU Settings A sequence of menu options to...

Page 6: ...0 is on Lamp explosion hazard Do not open the lamp cover within five minutes of having turned off the fixture The bulb remains hot for a long time after turn off Never touch the bulb barehanded and always hand it by its metallic contacts Always disconnect the Followspot 1200 from its power source before servicing Do not touch the Followspot 1200 s housing when operating because it may reach up to ...

Page 7: ...al console The Followspot 1200 features a bright 4 digit display and four buttons to perform all its programming functions The external console features four sliders and several buttons to control the fixture in a stand alone fashion However the user can connect the Followspot 1200 to a DMX daisy chain data link to control it from a standard DMX controller along with other DMX compatible fixtures ...

Page 8: ...the Control Panel refer to the Fuse Replacement and DMX Linking sections in the Setup chapter as well as the Operation chapter For details about the external console refer to the External Console section of the Operation chapter Housing Fans Yoke Tripod Safety loop Knob Control Panel External Console ...

Page 9: ...Introduction April 7 2010 5 Followspot 1200 User Manual Rev 03e Product Dimensions ...

Page 10: ...ers the control panel through a strain relief boot This side of the power cord is hard wired to the fixture Therefore there is no removable power connector on the control panel The outlet side of the power cord is bare ended This way the users will be able to equip it with the power plug that best matches the local standards and regulations Power Cord Pin Out Connection Wire US Wire Europe IP 66 P...

Page 11: ... 1 Unfasten the thumbscrew T and slide the front cover FC slightly forward 2 Unscrew the two Allen screws A and remove the bracket B 3 Carefully pick up and slide the back cover BC backward making sure not to pull the wires that run from its fans to the Fan Control PCB inside the housing Cover Removal Diagram Two black wires arrive to the terminal strip TS One wire labeled 1 and the other labeled ...

Page 12: ...n the lamp cover Opening the Fixture 1 Unfasten the thumbscrew T and slide the front cover FC slightly forward 2 Loosen the thumbscrew that hold the lamp cover LC and lift it to expose the lamp socket Lamp Removal Diagram Always wear safety goggles and soft gloves when handling the lamp The bulb remains hot for a long time after turn off Never touch the bulb barehanded and always hand it by its me...

Page 13: ...ed on page 8 2 Before installing the lamp loosen its end screws 3 Hold the lamp by its metallic contacts and slide it into the slots 4 Ensure that the flat washers on the lamp shafts are on the thumbscrew side of the slot to ensure maximum contact 5 Evenly push the clips backward to allow the lamp to go all the way into the slots 6 Rotate the lamp until the nipple is on the top of the bulb 7 Tight...

Page 14: ...a brief description of this mode and the Operation chapter to learn how to configure the Followspot 1200 to work in this mode The diagram below shows the Followspot 1200 DMX connectors DMX Connectors Diagram Pins 4 and 5 of the External Console Only socket carry power for the external console Therefore DO NOT connect the DMX cable to this socket Otherwise you could damage the DMX controller or the...

Page 15: ... platform When selecting an installation location consider ease of access to the fixture for operation programming adjustments and routine maintenance Never mount the fixture in places where rain high humidity extreme temperature changes or restricted ventilation may affect it Make sure that the location where you are mounting the fixture can support its weight 84 lbs 38 kg as well as the operator...

Page 16: ...ure s parameters as described in the Menu Map and the programming procedures Display The Followspot 1200 s display has four 7 segment blue LED modules Function Change To select a function press MENU repeatedly until the desired function shows on the display Alternatively if the display shows a function name you could press UP or DOWN to look for another function Function Selection To select a func...

Page 17: ...the built in self test program Fixture Hours N A Shows the amount of hours the fixture has been on Lamp On Off On Off Turns the lamp on or off Reset N A Resets the fixture to its factory default settings Offset Mode Function 1 st Level 2 nd Level Description Color Offset 127 127 Performs the fine position adjustment for the color wheel Effect Offset 127 127 Performs the fine position adjustment fo...

Page 18: ...new value press ENTER The display will show the next function name Color Wheel Blackout Enables disables the blackout fixture while changing colors 1 Press MENU repeatedly until the display shows 2 Press ENTER to show the current setting Yes No The display will start blinking 3 To exit without changing the value press MENU 4 To change the setting press UP or DOWN 5 To save the new value press ENTE...

Page 19: ...ult settings The reset function does not affect the Fixture Hours total Offset Mode The Offset mode provides fine position adjustment for the color wheel the effects color temperature wheel and the dimmer These fine adjustments allow the operator to position the wheels so the light goes through the center of the color or effect aperture thus preventing any filter border from showing In the case of...

Page 20: ...WN repeatedly until the display shows 2 Press ENTER The display will start blinking showing the current value 127 127 3 Press UP or DOWN to set the new value 4 Press ENTER to save the new value or MENU to exit without saving Exiting Offset Mode 1 After you are done wait eight seconds for the display timer to activate The display will show the current DMX address ...

Page 21: ...ider Resuming slider control after blacking out the dimmer is not possible however Shutter The shutter has no fixed position buttons to operate along with the slider This slider has a closed and an open position on the left side while the right side has another open position The shutter frequency changes from short yet separated openings to a fast strobe like action as the slider moves from left t...

Page 22: ...he external control console when operating this fixture with a third party DMX controller DMX Values 6 Channel DMX Mode Channel Function Value Percent Setting 1 Shutter 000 ó 007 008 ó 015 016 ó 247 248 ó 255 Blackout Open Strobe 1 12 Hz Open 2 Iris 000 ó 254 255 0 100 Closed 3 Color 000 ó 014 015 ó 028 029 ó 042 043 ó 056 057 ó 070 071 ó 084 085 ó 098 099 ó 112 113 ó 127 128 ó 191 192 ó 255 White...

Page 23: ...very 30 days CHAUVET recommends cleaning the fixture s external optics with a soft cloth using normal glass cleaning fluid Procedure To clean the Followspot 1200 follow the below recommendations Unplug the fixture from power Wait until the fixture is cold 15 minutes minimum Use a vacuum or dry compressed air and a soft brush to remove dust collected on the external vents and reachable internal com...

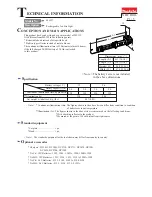
Page 24: ...Technical Information Followspot 1200 User Manual Rev 03e 20 April 7 2010 Photometrics ...

Page 25: ...No power Check for power on outlet Faulty or lose power cord Check power cord Faulty Noise Filter PCB Replace Noise Filter PCB Faulty Main PCB Replace Main PCB Followspot 1200 turns on but lamp does not come up Shutter closed Open shutter Dimmer set to 0 Set dimmer to 100 Faulty lamp Replace lamp Faulty igniter Replace igniter Faulty ballast Replace ballast Faulty Main PCB Replace Main PCB Follows...

Page 26: ...Technical Information Followspot 1200 User Manual Rev 03e 22 April 7 2010 Exploded View ...

Page 27: ...handle 25 P100 FS12MP1 Motor Plate 1 79 P100 FS12DCP Die cast part 26 P100 FS12POST Post 80 P100 FS12PFM 10 mm post 27 P100 FS12GAS Gasket 81 P170 FS12ISCW ISC 1200D PCB 28 P100 FS12TCFH Top cover 82 P100 FS12DCPB Bracket die cast part 29 P100 FS12MP2 Motor plate 2 83 P100 FS12HAND Handle 30 P100 FS12BER Bearing 84 P100 FS12LOOP Loop 31 P100 FS12BELT Belt 85 P100 FS12PFM1 10 mm post 32 P100 FS12TC...

Page 28: ...ting from inadequate packaging is the customer s responsibility As a suggestion proper UPS packing or double boxing is always a safe method to use CHAUVET reserves the right to use its own discretion to repair or replace returned product s Claims The carrier is responsible for any damage incurred during shipping Therefore if the received merchandise appears to have damages caused during shipping t...

Page 29: ...Power Factor PF 0 71 Fuse External 6 x 30 mm glass 15 A 250 V Light Source Metal Halide Lamp Osram HTI 1200 W D 7 60 6 500 K 2 000 hrs Quantity 1 Photo Optic Luminance 4º angle 202 000 lux 1 m Luminance 13º angle 7 000 lux 5 m 3650 lux 2 7 meter 1800 lux 10 m Beam angle range 4 38 Control Programming Data input locking 3 pin XLR male socket Data output locking 3 pin XLR female socket Data pin conf...

Page 30: ...e controller would interfere with the signals sent by the other controller s The Functions Each DMX channel can have any unitary value in the 000 255 range Each DMX compatible fixture uses as many consecutive DMX channels as features the user can control The sequential numbers assigned to each DMX channel 1 512 are also known as DMX addresses The function each DMX channel has and the results of it...

Page 31: ...icates to each fixture However the user should always define a physical location for the fixtures that provides for the easiest and most direct cabling Number of Fixtures When using a DMX controller the combined number of channels required by all the fixtures on the serial data link determines the number of fixtures the DMX controller has to support Conversely the number of onboard sliders page bu...

Page 32: ...ive signal Pin 2 Pin 2 Positive signal Pin 3 Pin 3 Not Used Pin 4 Not Used Pin 5 DMX Connection Make sure that the fixtures with which you are working can operate in DMX mode not in a proprietary connection mode Refer to the fixtures manual to learn how to enable their respective DMX modes The procedure below illustrates a possible DMX connection method 1 Connect the 3 pin male connector of the fi...

Page 33: ...at there is no DMX controller involved Refer to the fixtures manual to learn how to configure them to work in Master Slave mode The procedure below illustrates a possible connection method 1 Connect the 3 pin male connector of the first DMX cable to the DMX Output connector 3 pin female of the master fixture 2 Connect the 3 pin female connector of the first DMX cable coming from the master fixture...

Page 34: ...ser to control simultaneously the whole group of units at that DMX address by setting the ID Addressing channel to 0 Similarly the user can control each fixture at that DMX address independently by first selecting the DMX address and then using the ID Addressing channel to locate the target ID address Single Row ID Addressing Diagram Standard Block Connection In the Standard Block connection the f...

Page 35: ...act as the PF decreases the difference between the current calculated using the watts volts method and the actual current increases Therefore for fixtures with a PF below 0 9 the installer must always consider the fixture s PF when using the watts figure to calculate the current it draws For the above example if the published fixture s PF were 0 7 the resulting drawn current would be as follows 2 ...

Page 36: ...CHAUVET 3000 N 29th Ct Hollywood FL 33020 U S A 800 762 1084 954 929 1115 FAX 954 929 5560 www chauvetlighting com Followspot 1200 User Manual Rev 03e April 2010 ...

Reviews: