Charnwood BAY 5, Operating & Installation Instructions Manual
The Charnwood BAY 5 Operating & Installation Instructions Manual is available for free download on our website. This comprehensive manual provides users with step-by-step instructions for operating and installing their Charnwood BAY 5 product. Enhance your experience with this easy-to-access manual, available for download at manualshive.com.
Share
Download


Reviews:
No comments
Related manuals for BAY 5

Model OS10
Brand: Napoleon Pages: 2

GDS60-1N
Brand: Napoleon Pages: 112

Bayfield GDS25N-1
Brand: Napoleon Pages: 100
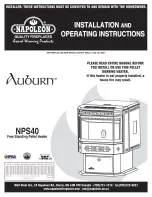
Auburn NPS40
Brand: Napoleon Pages: 36

5038673660912
Brand: Marksman Pages: 8

KODIAN ISLAND
Brand: Valkea Pages: 5

T-LINE?eco2
Brand: TONWERK Pages: 14

CLASSIC 400 Top Duo
Brand: Harvia Pages: 18

Solis Inset 500
Brand: Stanley Pages: 28

DV44
Brand: Quadra-Fire Pages: 20

INFINITY 780 FL
Brand: Charlton & Jenrick Pages: 32

JGBS14PCD
Brand: GE Pages: 4

JGA0200
Brand: GE Pages: 72

30M06AAG
Brand: GE Pages: 32

K10
Brand: HDG Pages: 64

ELSA Y PAULA
Brand: Bio Bronpi Pages: 154

34.GM
Brand: EOS Pages: 6

18D
Brand: MOA Pages: 34


