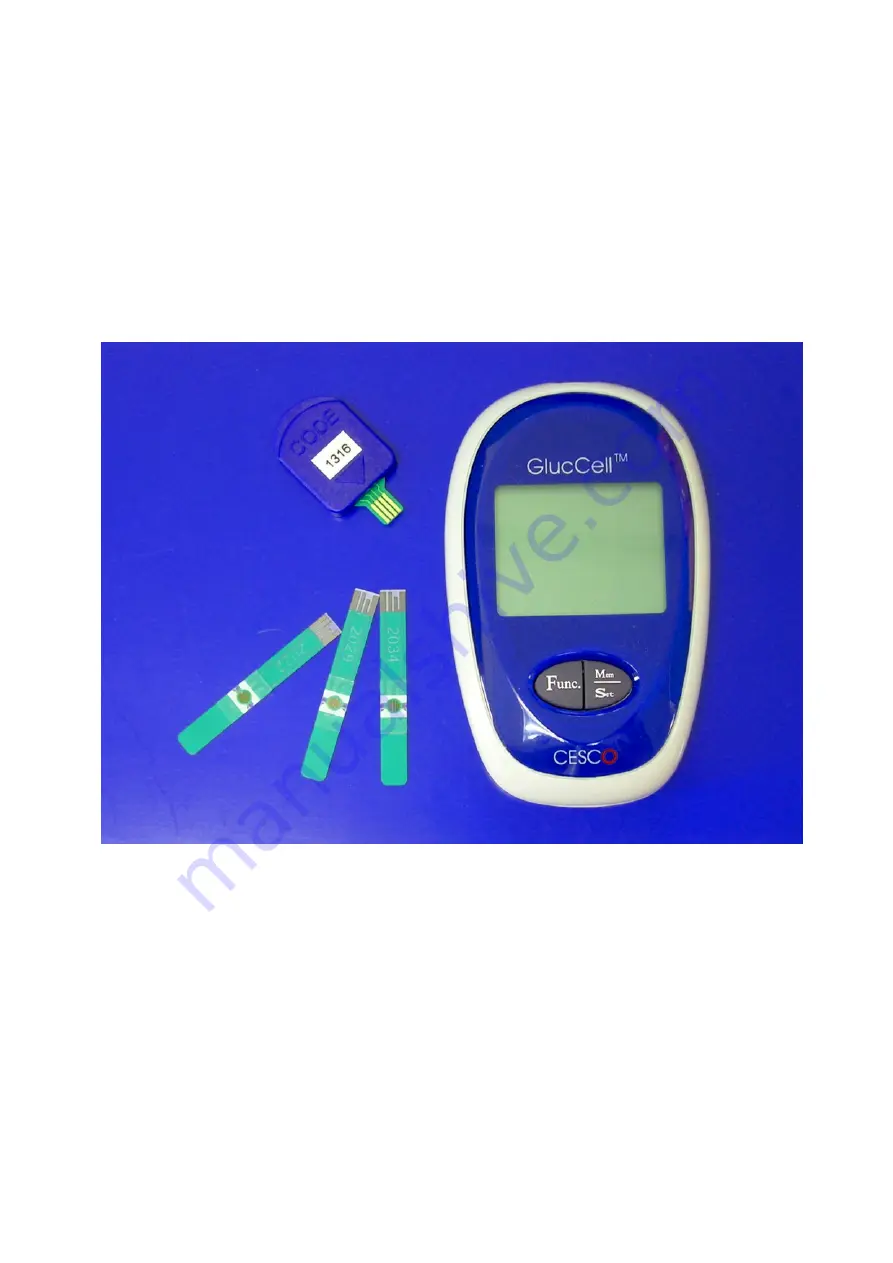
background image


GlucCell

TM

 Glucose Monitoring System

User Instruction Manual 

Ver. 1.

1


Caution 

 
Read the User’s Manual thoroughly before use. 
 
This User’s Manual is designed to guide you through the
operation of the GlucCell

TM

 Glucose Monitoring System with

detailed directions and illustrations. Read the entire the User’s
Manual before you begin test to ensure that you use this
system properly and receive accurate results. 

GlucCell

TM

 is a trade mark of CESCO Bioengineering Co., Ltd. 

Summary of Contents for GlucCell

Page 1: ...r s Manual is designed to guide you through the operation of the GlucCellTM Glucose Monitoring System with detailed directions and illustrations Read the entire the User s Manual before you begin test to ensure that you use this system properly and receive accurate results GlucCellTM is a trade mark of CESCO Bioengineering Co Ltd ...

Page 2: ...lace Battery 6 2 1 How to install replace the battery 6 WARNING 7 Chapter 3 Set the Glucose Meter 8 3 1 How to enter into Set Mode 8 3 2 Setting the Year 8 3 3 Setting the Month 8 3 4 Setting the Day 9 3 5 Setting the Hour 9 3 6 Setting the Minutes 9 3 7 Setting the Unit of Measurement 9 Chapter 4 Code the Glucose Meter 10 4 1 Why to code the meter 10 4 2 When to code the meter 10 4 3 How to Code ...

Page 3: ... Quality Control Test 15 8 1 Quality Control by using the Check Strip 15 Chapter 9 Display Message and Solution 15 Chapter10 Taking Care of your Glucose Meter 17 Chapter11 Specifications of the System 18 Chapter12 Customer Service 18 ...

Page 4: ...and held device with a large and easy to read display The meter can store 180 test results with corresponding times and dates 1 3 Limitations of the system 3 For in vitro research use only Not for diagnostic testing GlucCellTM Glucose Test Strips can be used only with GlucCellTM Glucose Meters The meter must be coded only with the corresponding code on the vial of glucose test strips being used th...

Page 5: ...esults and other information 2 Mem Set Button M S Button Turns the meter on off press and hold for 4 secs to turn off Enters into Memory Mode Changes parameters in Set mode 3 Func Button Func Button Turns the meter on Enters into Set Mode Confirms parameters in Set Mode 4 Strip Slot The slot is a connector for the glucose test strip Code Key and Check Strip 2 3 1 4 1 5 2 Backside of the Meter 1 Da...

Page 6: ...on indication 6 M188 Memory number display 7 mg dL mmol L Selected unit display 8 DAYAVG Number of days average display 9 Date Month day display 10 Time Time display 1 6 About the Glucose Test Strip 1 6 1 Glucose Test Strip 1 Connector End 2 Sample Chamber on the rear side of test strip 3 Reaction zone Rear Front 2 2 1 3 1 6 2 Test Strip Vial 1 Code Number 2 Expiration Date 3 Discard Date 90 days ...

Page 7: ...ode Key must match with code number on the test strip vial being used Chapter 2 Install Replace Battery 2 1 How to install replace the battery 1 Push the battery cover with two thumbs and slides down to open 2 Replace with a 3 0 volt lithium battery CR 2032 into the battery compartment with the positive side up 3 Slide the Battery Cover up until it snaps into place to close Notes ...

Page 8: ...s that are stored in memory will not be erased when you replace the battery if the new battery is installed needed within 30 minutes WARNING Discard the used battery according to your local environmental regulations ...

Page 9: ...Mode The year filed flashes will show up first 3 2 Setting the Year 1 The Year field flashes 2 Press the Mem Set button to change the Year 3 Press the Func button to confirm the new setting and to cycle on to the next setting i e month 3 3 Setting the Month 1 The Month field flashes 2 Press the Mem Set button to change the Month 3 Press the Func button to confirm the new setting and to cycle on to...

Page 10: ...ting i e Minutes 3 6 Setting the Minutes 1 The Minutes field flashes 2 Press the Mem Set button to change the Minutes 3 Press the Func button to confirm the new setting and to cycle on to the next setting i e Unit of Measurement 3 7 Setting the Unit of Measurement 1 The Unit field flashes 2 Press the Mem Set button to change the Unit 3 Press the Func button to confirm the new setting and to turn o...

Page 11: ... re coded when a new box of glucose test strips is being used for the first time 4 3 How to Code the Meter 1 Insert the Code Key firmly into the strip slot 2 Wait until a code number is displayed 3 Check to make sure that the code number displayed on the LCD matches the code number on the test strip vial exactly 4 Remove the Code Key 10 Note Do not perform the test if the code number DISPLAYED on ...

Page 12: ...e meter makes a long beep and turns off automatically 4 Pipet around 10 μl of culture medium and produce a small droplet in the tip of pipette 5 Turn the meter side down and allow the sample chambers on the strip side up Touch the culture medium drop to the sample chamber of the test strip until the chamber is fully filled The meter will beep to indicate that the test has started 6 The Measuring S...

Page 13: ...12 8 Record the test results in your log book 9 Remove the test strip to turn off the meter The test result has been stored in memory ...

Page 14: ...s will always include a decimal point mg dL results do not include a decimal point 6 2 Low Glucose Value The LO Symbol appears when your glucose test result is less than 30 mg dL 1 6 mmol L 6 3 High Glucose Value The HI symbol appears when your glucose test result is higher than 600 mg dL 33 3 mmol L Note In the situation please dilute the sample with PBS to proper concentration for next test 13 ...

Page 15: ... buttons to turn on the glucose meter 2 Press the Mem Set button to enter into Memory Mode 7 2 Memory Recall 1 Press the Mem Set button four times to recall the recent test result M01 2 Repeat the previous step to retrieve all stored test results Note The meter will turn off after the last test result is recalled Press the Func Button 4 times at any time to enter into Set Mode Hold the Mem Set but...

Page 16: ...er Note In the event that an error message is displayed e g E E please refer to chapter 10 for details Chapter9 Display Message and Solution Display Message LO reading Cause Solution Glucose concentration Your glucose test result is less than 30 mg dL 1 6 mmol L Meter malfunction Check to see if your meter is properly coded Perform the Check Strip Test refer to Section 8 1 Test Strip malfunction C...

Page 17: ...ip Test refer to Section 8 1 Test Strip malfunction Check expiration date Check Test Strip physical condition Display Message Cause Solution Battery low Change the battery Display Message Cause Solution Meter malfunction Perform Check Strip Test refer to Section 8 1 Ambient temperature is outside of the acceptable range Perform the test in an environment within the acceptable temperature range Tem...

Page 18: ...ase contact your local dealer for help Chapter 10 Taking Care of your Glucose Meter The glucose meter does not need special care When the meter is dirty clean it by wiping gently with a cotton swab or cloth Do not use any liquids to clean the meter The following tips will help to keep the meter working properly Keep the meter test strips and code card away from very high and very low temperatures ...

Page 19: ...ype CR2032 3V Lithium battery 9 Battery Life Approximately 1000 tests 10 Operating Temperature Range 10 40 50 104 11 Operating Relative Humidity 20 80 RH 12 Dimensions of the meter 96mm 60mm 18 5mm 13 Weight of the meter 70 g included battery 14 Automatic Shut off In 3 minutes Chapter 12 Customer Service If you have any questions about our products please contact us CESCO Bioengineering Co Ltd No ...

Reviews: