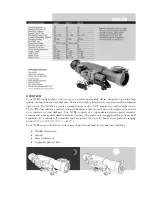
background image

The G-8

Model #11023

8" OPTICAL TUBE ASSEMBLY

Model #11023-1

CG-5 EQ Mount

Model # 91515

INSTRUCTION MANUAL

Summary of Contents for The G-8 11023

Page 1: ...The G 8 Model 11023 8 OPTICAL TUBE ASSEMBLY Model 11023 1 CG 5 EQ Mount Model 91515 INSTRUCTIONMANUAL...

Page 2: ...Balancing the Telescope in DEC 14 Adjusting the Mount in Altitude 15 Adjusting the Mount in Azimuth 15 DisassemblingandTransportingYourG 8 16 Storing Your G 8 16 THECELESTRON8OPTICALTUBEASSEMBLY 17 Se...

Page 3: ...etting Circles 39 StarHopping 40 ViewingConditions 42 Transparency 42 Sky Illumination 42 Seeing 42 CELESTIAL PHOTOGRAPHY 44 Short Exposure Prime Focus 45 Piggyback 47 EyepieceProjection 49 Long Expos...

Page 4: ...telescope that gives you a lifetime of pleasure with a minimal amount of maintenance Furthermore your Celestron C8 is versatile it will grow as your interest grows However your C8 telescope is not li...

Page 5: ...THISINSTRUMENTHASENOUGHLIGHT GATHERINGPOWERTOCAUSEPERMANENTANDIRREVERSIBLEEYE DAMAGE IN ADDITION THE IMAGE PROJECTED BY THE FINDER IS HOT ENOUGHTOBURNSKINORCLOTHING A telescope is an instrument that...

Page 6: ...iagram shows the light path of the Schmidt Cassegrain optical system Note that the light rays travel the length of the telescope tube three times making this a compact optical design Note that the cur...

Page 7: ...ghtBar Two Counterweights 3 6 Kg and 1 8 Kg Declination DEC Slow Motion Knob Right Ascension R A Slow Motion Knob Adjustable Aluminium Tripod Accessory Tray When setting up the telescope find a large...

Page 8: ...ghts shaft Lock Collar 5 R A Setting Circle 16 DEC Circle 6 Latitude Scale 17 DEC Lock Lever 7 Latitude Adjustment Screw 18 DEC Slow Motion Shaft 8 Azimuth Adjustment Knob 19 Dovetail Slide Bar 9 Trip...

Page 9: ...et This will help minimize any flexure or wobble of the legs Once the tripod is set up you can adjust the height at which it stands To do this 1 Loosen the knob on the leg clamp so that the tripod leg...

Page 10: ...and position it so the thread holes in the accessory tray are above the slotted holes in the bracket 3 Insert the wing bolts up through the slotted holes in the bracket see figure 2 3 4 Thread the wi...

Page 11: ...s straight up To attach the equatorial head 1 Locate the azimuth adjustment screws on the equatorial mount 2 Retract the screws so they no longer extend into the azimuth housing rectangular extrusion...

Page 12: ...of the two oval tabs by pulling tightly 3 Line up the flat area on the inner portion of the R A slow motion knob with the flat area on the R A shaft see figure 2 5 4 Slide the R A slow motion knob ont...

Page 13: ...ion knob fits over is toward the top of the mount just below the telescope mounting platform Once again you have two shafts to choose from Use the shaft that is pointing toward the ground This makes i...

Page 14: ...t bar lock nut fully for added support The counterweight bar is now installed With the counterweight bar in place you are ready to attach the counterweights 1 Lock the DEC clamp to hold the mount in p...

Page 15: ...at is attached to the telescope onto the CG 5 mount see figure 2 8 3 Tighten the knob on the CG 5 mount to hold the telescope in place NOTE Never loosen any of the knobs on the telescope tube or mount...

Page 16: ...GRADUALLY to see which way the telescope rolls 3 Loosen the set screw on one or both counterweights 4 Move the counterweights to a point where they balance the telescope i e it remains stationary whe...

Page 17: ...HE TELESCOPE TUBE COMPLETELY 5 Slightly loosen the balance bracket thumbscrew and slide the telescope eitherforwardorbackwarduntilitremainsstationarywhentheDECclamp is released Do NOT let go of the te...

Page 18: ...pointing The latitude adjustment on the CG 5 mount has a range of 40 starting at 20 going up to 60 For rough adjustments in azimuth simply pick up the telescope and tripod and move it For fine adjust...

Page 19: ...ver youmaywanttoremovethecounterweightsfrom thecounterweightbartolightenthemount If you are shipping the telescope via a common carrier you should completely disassemble the telescope and return all p...

Page 20: ...er this does not mean that the C8 Optical Tube Assembly can not be used for astronomical viewing It can also be used with your own heavy duty German equatorial mount or it can be used as an altazimuth...

Page 21: ...he C8 Optical Tube Assembly 11023 1 comes standard with a 6x30mm finder To ensure the finder and bracket are not damaged during shipping they are NOT attached to the telescope Begin by removing the fi...

Page 22: ...etched a little 3 Position the O ring on the main body of the finder so that it is toward the front i e objective end of the finder 4 Slide the finder eyepiece end first into the front ring of the bra...

Page 23: ...nt position and rotate the knurled slip ring clockwise until tight Once this is done you are ready to attach other accessories such as eye pieces diagonal prisms etc If you want to remove the visual b...

Page 24: ...t screw on the star diagonal and slide the eyepiece out You can then replace it with another ocular Eyepieces are commonly referred to by focal length and barrel diameter The focal length of each eyep...

Page 25: ...tar diagonal the image is inverted upside down and re versed from left to right This holds true for the 6x30 finder as well as the telescope For correct orientation through the telescope which is impo...

Page 26: ...any turns about 40 to go from close focus approximately 25 feet to infinity For astronomical viewing out of focus star images are very diffuse making them difficult if not impossible to see If you tur...

Page 27: ...you should align the finder during the day when it is easier to locate objects To align the finder 1 Choose a conspicuous object that is over 500 yards away This will eliminate any possible parallax...

Page 28: ...ENARE PRESENT 1 Begin by finding a distant object that is fairly bright 2 Insert the eyepiece one with a large focal length into the telescope 3 Release the R A and DEC clamps and point the telescope...

Page 29: ...the section on Polar Alignment 1 Orient the telescope so that the equatorial mount is pointing north as close to true north as possible You can use a landmark that you know faces north to get you in t...

Page 30: ...ospheric conditions most observing is done in the range of 20 to 35 power for every inch of aperture which is 160 to 280 power for the G 8 Determining the field of view is important if you want to get...

Page 31: ...al camera store If you wear corrective lenses specifically glasses you may want to remove them when observing with an eyepiece attached to your C8 When using a camera however you should always wear co...

Page 32: ...or carry a minus sign in front of the number and those north are often preceded by a plus sign The celestial equivalent of longitude is called Right Ascension or R A for short Like the Earth s lines o...

Page 33: ...ee the stars complete one circle because the sunlight during the day washes out the starlight However part of this circular motion of stars in this region of the sky can be seen by setting up a camera...

Page 34: ...y i e they will not drift out of the field of view If your telescope does not use a motor drive all objects in the sky day or night will drift out of the field This apparent motion is caused by the Ea...

Page 35: ...Big Dipper will change during the year and throughout the course of the night see figure 5 4 When the Big Dipper is difficult to locate try using Cassiopia Observers in the southern hemisphere are not...

Page 36: ...his means the pole is now 89 above the northern horizon If you move one degree further south the same thing happens again As you can see from this example the distance from the northern horizon to the...

Page 37: ...e telescope so that the optical tube is directly over the polar axis see figure 5 6 3 Move the mount in altitude and or azimuth until Polaris is in the field of view of the finder Rough azimuth adjust...

Page 38: ...ng due south with the scope on the side of the mount insert the diagonal so it points straight up Insert a cross hair ocular and align the cross hairs to be parallel to declination and right ascension...

Page 39: ...e Celestron Sky Maps 93722 or consulting a current astronomy magazine To align the R A setting circle 1 Locate a bright star near the celestial equator The farther you are from the celestial pole the...

Page 40: ...This effect is more noticeable at higher power If you are using a motor drive and have polar aligned the Moon will remain centered Consult your local newspaper or a current astronomy magazine to find...

Page 41: ...solar viewing use a Celestron solar filter 94162 This filter reduces the intensity of the Sun s light making it safe to view With this filter you can see sunspots as they move across the solar disk an...

Page 42: ...this will no longer be necessary 2 Look up the coordinates in an atlas or reference book 3 Move the telescope in declination until the indicator is pointing at the correctdeclinationcoordinate 4 Move...

Page 43: ...east corner The star is Alpha Andromedae 3 Move northeast approximately 7 There you will find two stars of equal brightness Delta and Pi Andromedae about 3 apart 4 Continue in the same direction anoth...

Page 44: ...ost stars that make up the parallelogram Beta and Gamma Lyrae see figure 6 3 4 Point the finder half way between these two stars 5 Move about 1 2 toward Beta Lyrae but remaining on a line that connect...

Page 45: ...on is out Seeing Seeing conditions refer to the stability of the atmosphere and directly effects the clarity of star images and the amount of fine detail seen in extended objects like the planets The...

Page 46: ...inversions also tend to produce good seeing If you can t get a better location wait until the early morning hours when the surroundings are uniformly cool and the seeing is generallybetter Type 3 see...

Page 47: ...are the mandatory features a camera needs for celestial photog raphy First a B setting which allows for time exposures This excludes point and shoot cameras and limits the selection to 35mm SLR camer...

Page 48: ...body onto the T Ring the same as you would any other lens With your camera attached to the telescope you are ready for prime focus photography Start with an easy object like the Moon Here s how to do...

Page 49: ...is will ensure that you will get a good photo If using black and white film try a yellow filter to reduce the light intensity and to increase contrast Keep accurate records of your exposures This info...

Page 50: ...er and start the motor drive 2 Load your camera with slide film ISO 100 or faster or print film ISO 400 or faster 3 Set the f ratio of your camera lens so that it is a half stop to one full stop down...

Page 51: ...t As you perfect your technique try specialized films that is films that are designed or specially treated for celestial photography Here are some popular choices Ektar 125 color print Fujichrome 100D...

Page 52: ...hand held black card placed over the aperture of the telescope to act as a shutter The card prevents light from entering the telescope while the shutter is released Once the shutter has been released...

Page 53: ...hot turn out Also don t expect to record more detail than you can see visually in the eyepiece at the time you are photographing Once you have mastered the technique experiment with different films di...

Page 54: ...iding eyepiece Unlike piggyback photog raphy which allows for fairly loose guiding prime focus requires meticulous guiding for long periods To accomplish this you need a guiding ocular with an illumin...

Page 55: ...stial photography Here are some popular choices Ektar 125 color print Fujichrome 100D color slide Tech Pan gas hypered black and white print There is no exposure determination table to help you get st...

Page 56: ...ctor 94175 f 10 and f 20 with the optional 2x barlow 93507 making it the most versatile imaging system available today This makes the system ideal for imaging deep sky objects as well as planetary det...

Page 57: ...lestron telescopes see figures below Figure 7 2 Light path at f 10 focus Figure 7 3 Light path at Fastar f 1 95 focus The key factors for good CCD imaging are exposure time field of view image size an...

Page 58: ...e slower f number will usually require you to guide the image while you are taking longer exposures Guiding can be accomplished by using an optional Radial Guider or a piggyback guidescope The exposur...

Page 59: ...s For every 10 exposures you might save 1 To image at f 20 you need to purchase a 2x Barlow and a T adapter or Radial Guider Imaging at f 20 1 Optical Tube Assembly 12 Pulstar Illuminator 2 Secondary...

Page 60: ...on If you want to continue observing the dew must be removed either with a Celestron Dew Eliminator 94122 or by pointing the telescope at the ground until the dew has evaporated The optional Dew Cap L...

Page 61: ...lished with the telescope in focus In this instance you are observing the Airy disk see figure 8 2 not the shadow of the secondary housing This stellar image appears as a bright point of light with a...

Page 62: ...It features a 10 000 object database 75 color images horizontal projection custom sky chart printing zoom capability Comet Hale Bopp coordinates and more A fun useful and educational product PC forma...

Page 63: ...30mm 35mm and 42mm These eyepieces are all parfocal The 35mm Ultima gives the widest possible field of view with a 1 1 4 diagonal and is ideal for use with or without the Reducer Corrector Lanthanum...

Page 64: ...p sky astronomical objects when viewed from urban areas LPR Filters selectively reduce the transmission of certain wavelengths of light specifically those produced by artificial lights This includes m...

Page 65: ...north The finderscope has an eyepiece with etched reticle for quick polar alignment Radial Guider 94176 The Celestron Radial Guider is specifically de signed for use in prime focus deep sky astrophoto...

Page 66: ...ntrast This filter can be used for both visual observation and photography of the Sun NOTE NEVER LOOK DIRECTLY AT THE SUN WITH THE NAKED EYE OR WITH A TELESCOPE NEVERPOINTYOURTELESCOPEATTHESUNUNLESS Y...

Page 67: ...11 NGC6705 Sct 18 51 1 6 16 5 8 Op Cl Wild Duck Cluster M12 NGC6218 Oph 16 47 2 1 57 6 6 Gl Cl M13 NGC6205 Her 16 41 7 36 28 5 9 Gl Cl HerculesCluster M14 NGC6402 Oph 17 37 6 3 15 7 6 Gl Cl M15 NGC707...

Page 68: ...0 3058 7 0 Gl Cl M56 NGC6779 Lyr 19 16 6 30 11 8 2 Gl Cl M57 NGC6720 Lyr 18 53 6 33 02 9 0 P Neb RingNebula M58 NGC4579 Vir 12 37 7 11 49 9 8 Sp Gx M59 NGC4621 Vir 12 42 0 11 39 9 8 El Gx M60 NGC4649...

Page 69: ...68 Leo 10 46 8 11 49 9 2 Sp Gx M97 NGC3587 UMa 11 14 9 55 01 11 2 P Neb OwlNebula M98 NGC4192 Com 12 13 8 14 54 10 1 Sp Gx M99 NGC4254 Com 12 18 8 14 25 9 8 Sp Gx Pin Wheel Nebula M100 NGC4321 Com 12...

Page 70: ...2 0 01 Vega Lyr 18 36 56 38 47 01 0 04 Capella Aur 05 16 41 45 59 53 0 05 Rigel Ori 05 14 32 08 12 06 0 14 Procyon CMi 07 38 18 05 13 30 0 37 Betelgeuse Ori 05 55 10 07 24 26 0 41 Achernar Eri 01 37 4...

Page 71: ...inson Costanzo Chaple NGC2000 0 Sinnott General Observational Astronomy TheCambridgeAstronomyGuide Liller Mayer A Complete Manual Of Amateur Astronomy Sherrod The Guide To Amateur Astronomy Newton Tee...

Page 72: ...repair Further product malfunction or deterioration due to normal wear is not covered by this warranty CI DISCLAIMS ANY WARRANTIES EXPRESS OR IMPLIED WHETHER OF MERCHANTABILITY OF FITNESS FOR A PARTI...

Page 73: ...Street Torrance CA 90503 Tel 310 328 9560 Fax 310 212 5835 Website http www celestron com Copyright1999CelestronInternational Allrightreserved Productsorinstructionsmaychange withoutnoticeorobligatio...

Reviews: