CDA EVCK41, Installation, Use And Maintenance Manual
The CDA EVCK41 is a versatile and high-quality product that requires careful installation and regular maintenance for optimal performance. You can easily download the Installation, Use And Maintenance Manual for free from our website, providing you with all the necessary information to ensure the longevity of your product.
Share
Download


Reviews:
No comments
Related manuals for EVCK41

Scrubmaster B 120 R
Brand: HAKO Pages: 10

X-3300
Brand: XPower Pages: 30

BR 40/25 C Bp
Brand: Kärcher Pages: 136

Predator PRED750EC
Brand: Abatement Technologies Pages: 21

TE-12
Brand: Pacific Pages: 19

SCE-8
Brand: Pacific Pages: 20

SCRUBTEC BOOST R4
Brand: Nilfisk-ALTO Pages: 124

Convertamatic 260B
Brand: Nilfisk-Advance Pages: 58

MX 307 H
Brand: Nilfisk-Advance Pages: 72

290 Series
Brand: Factory Cat Pages: 48

MC20115
Brand: Minuteman Pages: 23

MC17026-00
Brand: Minuteman Pages: 20

E320CE
Brand: Minuteman Pages: 28

Scrubmaster B400 R
Brand: HAKO Pages: 170

KF50B
Brand: Kruger Pages: 40

AP-2000
Brand: XPower Pages: 16

46429
Brand: Lakeland Pages: 12
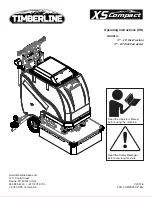
XS Compact 17" Disk Pad Assist
Brand: Timberline Pages: 30


