background image

PUB. DIM-388

DIGITAL VIDEO CAMCORDER

Instruction Manual

CAMESCOPE ET LECTEUR VIDEO NUMÉRIQUES

Mode d’emploi

VIDEOCÁMARA Y  GRABADORA  DIGITAL

Manual de Instrucciones

ENGLISH

FRANÇAIS

ESPAÑOL

Mini

Digital

igital

Video

ideo

Cassette

A (NTSC)

E

F

Es

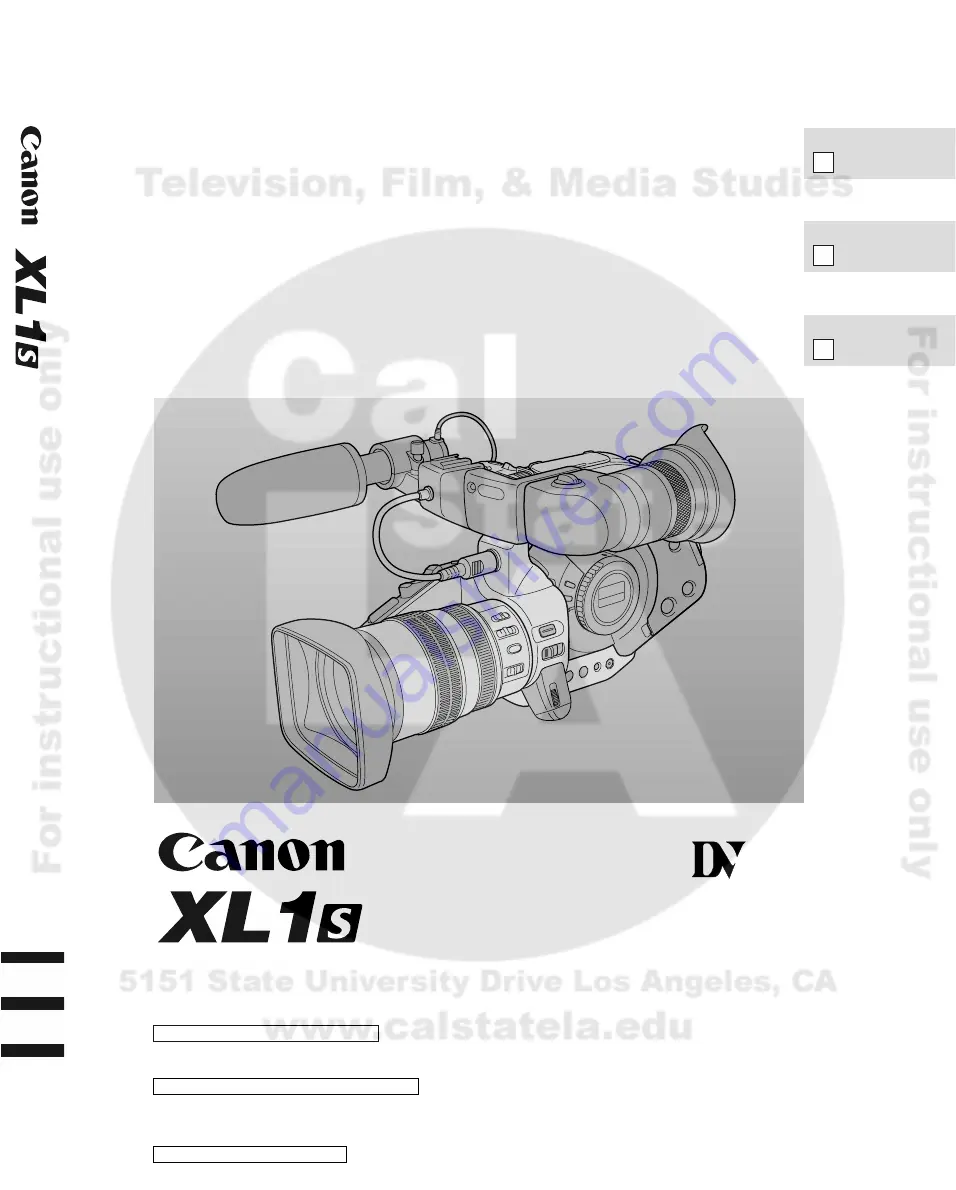
This instruction book explains the use of the Complete Kit (XL1S plus the color viewfinder and 16

×

1S

2

zoom lens) and the Body

Kit (XL1S alone). Please note the illustration and descriptions in this book refer to the Complete Kit.

Ce mode d’emploi vous explique comment utiliser le kit complet (XL1S plus viseur couleur et objectif zoom 16

×

1S

2

) et le kit de

boîtier (XL1S seulement). Veuillez noter que les illustrations et les descriptions de ce manuel représentent le kit complet.

Este manual de instrucciones explica el uso del Equipo Completo (XL1S más el visor en color y el objetivo zoom IS

2

de 16

×

) y

del Body Kit (sólo la XL1S). Tenga a bien tener presente que las ilustraciones y las descripciones de este manual se refieren al
Equipo Completo.

PUB

.

DIM-388

The Body kit is available only in the U.S.A.

Le kit de boîtier n’est disponible qu’aux Etats-Unis.

Unicamente en el “equipo completo”

Summary of Contents for XL1SA

Page 1: ...ete Kit Ce mode d emploi vous explique comment utiliser le kit complet XL1S plus viseur couleur et objectif zoom 16 1S2 et le kit de boîtier XL1S seulement Veuillez noter que les illustrations et les descriptions de ce manuel représentent le kit complet Este manual de instrucciones explica el uso del Equipo Completo XL1S más el visor en color y el objetivo zoom IS2de 16 y del Body Kit sólo la XL1S...

Page 2: ...outlet on a circuit different from that to which the receiver is connected Consult the dealer or an experienced radio TV technician for help Use of shielded cable is required to comply with class B limits in Subpart B of Part 15 of FCC Rules Do not make any changes or modifications to the equipment unless otherwise specified in the manual If such changes or modifications should be made you could b...

Page 3: ...an to replace your obsolete outlet Do not defeat the safety purpose of the polarized plug 12 Power Cord Protection Power cords should be routed so that they are not likely to be walked on or pinched by items placed upon or against them Pay particular attention to plugs and the point from which the cords exit the product 13 Outdoor Antenna Grounding If an outside antenna is connected to the product...

Page 4: ...of other controls may result in damage and will often require extensive work by a qualified technician to restore the product to its normal operation e If the product has been dropped or the cabinet has been damaged f When the product exhibits a distinct change in performance This indicates a need for service 20 Replacement Parts When replacement parts are required be sure the service technician h...

Page 5: ...amera Analog Line in 88 Important Usage Instructions 2 IMPORTANT SAFEY INSTRUCTIONS 3 Thank you for choosing a Canon 7 Introducing the XL1S 8 Finding Your Way Around the XL1S 9 Attaching and Detaching the Color Viewfinder Unit 13 Mounting and Unmounting XL Lenses 14 Adjusting the Color Viewfinder Unit 16 Attaching the Provided Microphone 18 Powering the XL1S 19 Loading a Cassette 22 Supporting the...

Page 6: ... The XL1S System Diagram Availability differs from area to area 110 Optional Accessories 111 Screen Displays 114 Specifications 120 Index 121 Menu at a Glance 122 Additional Information The serial number of this product may be found on the bottom of the camera No others have the same serial number as yours You should record the number and other vital information here and retain this book as a perm...

Page 7: ...crophone Color Viewfinder 16 IS II Zoom Lens with soft case Dust cap Lens hood First we d like to thank you for purchasing this Canon camcorder Its advanced technology makes it very easy to use you will soon be making high quality videos which will give you pleasure for years to come For quick reference in addition to the contents and index please refer to Finding your way around the camcorder p 9...

Page 8: ...subject when shooting still images in the Photo Mode FA 200 Flash Adapter optionally required SLR Style Flash Photography XL1S is equipped with a DV terminal that conforms to IEEE 1394 By connecting the XL1S to your computer you can capture still images or motion images on your PC DV Terminal IEEE 1394 When recording in 12bit ST1 2 mode you can record 4 channels simultaneously In addition you can ...

Page 9: ...O 2 p 53 INPUT SELECT switch AUDIO 1 p 51 BALANCE dial AUDIO 1 p 51 REC LEVEL switch AUDIO 1 p 51 LEVEL dial AUDIO 1 p 51 AUDIO MONITOR button p 51 54 LIGHT button p 9 LENS RELEASE switch p 14 CUSTOM key 1 p 55 USER PRESET ON OFF button p 70 USER PRESET SELECT button p 70 CUSTOM key 2 p 55 Microphone attachment screw p 18 Light Button Push the LIGHT button to illuminate the main and audio panels f...

Page 10: ...9 Microphone cable p 18 PHOTO button p 42 Lens hood locking screw p 15 Grip belt p 24 Start stop button p 35 DV terminal p 65 REMOTE terminal p 85 Tripod socket p 101 Socket for attaching the SP 100 Shoulder Pad or MA 100 or MA 200 Microphone Adapter Shoulder Pad Do not attach a tripod to this socket Backup battery compartment p 99 Flash adapter terminal p 60 Grip zoom control p 38 ...

Page 11: ...itch p 66 PUSH AF button p 66 Attachment bar p 24 PHONES LEVEL dial p 54 phones terminal p 54 Video terminal p 83 DC out terminal AUDIO 1 RCA jacks p 83 S video terminal p 83 POWER dial p 25 Main LCD panel p 119 STANDBY button p 35 WHITE BALANCE set button p 75 White balance selector knob p 75 GAIN dial p 73 MENU button p 25 REC record SEARCH button p 45 REC record SEARCH record review button p 45...

Page 12: ...EEN button p 114 MENU button p 25 Cursor key p 25 AUDIO MONITOR button p 51 54 SEARCH SELECT button p 81 REW button p 76 PLAY button p 76 STOP button p 76 REC PAUSE button p 87 PAUSE button p 77 Transmitter ZOOM buttons p 38 DATA CODE button p 79 114 EXECUTE button ZERO SET MEMORY button p 82 Cursor key p 25 MIX BALANCE buttons p 96 AUDIO DUB button p 94 SEARCH buttons p 81 FF button p 76 button p...

Page 13: ... the locking screw to hold the unit in place 2 Connect the viewfinder cable to the socket at the front of the camera body Attaching the Color Viewfinder Unit 1 Detach the viewfinder cable 2 Loosen the unit locking screw and slide the viewfinder unit off the bracket Detaching the Viewfinder Unit Attaching and Detaching the Color Viewfinder Unit ...

Page 14: ...corder 2 Align the red dot on the camera body with the mount positioning point the red dot on the lens then turn the lens clockwise until it clicks and locks into place Mounting the lens 1 Slide and hold the LENS RELEASE switch and turn the lens counter clockwise until it stops Then remove the lens from the camera body 2 When you are not using the lens or camera be sure to replace the dust cap and...

Page 15: ...us p 66 Manual Focus p 66 Notes Make sure that the camera is turned off before mounting or removing the lens To avoid damaging the lens or camera place them on a table or secure surface when mounting or removing the lens Use only lenses bearing the mark You cannot use VL mount lenses with this camcorder If you turn the camera on without a lens attached the caution CHECK THE LENS is displayed for a...

Page 16: ...nd if necessary Slide and hold the release lever on the underside of the viewfinder and then twist the eye cup counter clockwise until the mark on the eye cup lines up with the mark on the viewfinder to allow you to remove it from the viewfinder Replace with the eye cup facing the opposite direction by lining up the marks and twisting the cup clockwise until it locks into place Adjusting for left ...

Page 17: ...ough 270 to give a choice of shooting positions Adjusting to your eyesight 1 Open either the camera menu or the VCR menu and select DISP SET UP 2 Select EVF COLOR then adjust the color by turning the IRIS SELECT dial 3 Close the menu Turn the IRIS SELECT dial up to make the viewfinder reddish and down to make it greenish Adjusting the viewfinder color Adjusting the viewfinder brightness Adjust the...

Page 18: ...amp 2 Align the mark on the microphone with the mark on the clamp and tighten the screw to hold the microphone firmly in place 3 Plug the microphone cable to the camera s MIC terminals Note Make sure that the camera is turned off before attaching or removing the microphone cable 1 2 3 3 MIC DC IN Attaching the Provided Microphone ...

Page 19: ... TV or the antenna cable Connecting the camera to an AC outlet 1 2 3 4 Use the power adapter and the DC coupler to provide your camera with instant power from an AC outlet 1 Attach the DC coupler to the camera Align the triangle on the DC coupler with the line on the camera Slide the coupler up in the direction of the arrow until it clicks into place 2 Connect the DC coupler to the adapter 3 Plug ...

Page 20: ...e than 75 charged The indicator glows steadily when the battery pack is fully charged 3 Take the battery pack off the adapter and attach it to the camera Align the triangle on the battery pack with the line on the camcorder then slide the battery up in the direction of the arrow until it clicks into place 4 Remove the battery pack after use Press and hold the BATT RELEASE button while you slide th...

Page 21: ...10 g Weight and dimensions are approximate Errors and omissions excepted Sbject to change without notice When replacement of power supply is required please return it to the responsible nearest Canon Service Center and please replace it with the same type number CA 910 or equivalent The Adapter can be used with a power suppy between 100 and 240 V AC For areas where 120 V AC power is not usecd you ...

Page 22: ...l it clicks 5 Click the cover back into place D is a trade mark Notes After loading a cassette use record search p 45 to find the point where you want to start recording Do not interfere with the cassette compartment while it is opening or closing automatically or attempt to close the cover Do not leave the cassette in the camera after use return it to its case and store it in a cool clean dry pla...

Page 23: ...C SAVE REC Cassette memory You are unable to use the cassette memory function with this camcorder Handling cassettes To protect the tape heads transfer cassettes directly from the tape case to the camcorder do not open the tape protect cover or touch the tape itself Do not use cassettes where the tape has been damaged or rejoined they may damage the camcorder Do not insert anything into the small ...

Page 24: ...n Notes Place the camera on a table or secure surface when attaching the shoulder pad grip belt or strap Adjust the length of the grip belt strap so that you can operate the start stop button and zoom control effectively For extra security and portability attach the shoulder strap before using the camera Pass the ends through the attachment bars and adjust the length as shown Be careful not to lea...

Page 25: ...lect You return to the main menu 11 Press the MENU button The main menu disappears Notes Pressing the MENU button at any time closes the menu Selecting RETURN takes you back one menu or closes the main menu Items that are unavailable due to the setting of other menu items or program AE modes appear in purple You may find it convenient to use the wireless controller to move around the menus Press t...

Page 26: ...sensitivity 8 Audio 2 input sensitivity 9 Power save 0 Self timer 1 To INTERVAL TIMER submenu 2 Return SE L SETSET MENUCLOSE CAM MENU CAM SET UP CSTM PRESET VCR SET UP D I SP SET UP SYSTEM CUSTOM KEYS RETURN q w e r t y u SE L SETSET MENUCLOSE C M 1 Z Z Z Z C AM SET UP OV I E MODE NORMA L 6 9 OF F EBRA OF F EBRA L EVE L 9 0 OOM GR I P VAR I AB L E OOM HANDL E MED I UM L EAR SCAN RETURN q w q e r t...

Page 27: ... time set 4 Return y Custom key submenu 5 Custom key 1 select 6 Custom key 2 select 7 Return SE L SETSET MENUCLOSE D E 1 T G I SP SET UP VF COLOR 6 9 GU I DES OF F V SCREEN ON U I DE I NFO OF F RETURN 3 4 r 5 6 7 SE L SETSET MENUCLOSE S S T C D T D YSTEM ENSOR ON A L L Y L AMP ON HAR REC OF F V CONTROL OF F ZONE DST T I ME SET RETURN 8 9 t 0 1 2 3 4 SE L SETSET MENUCLOSE C K K USTOM KEYS EY 1 I ND...

Page 28: ...RETURN 5 6 e VCR MENU Appears when the POWER dial is set to VCR There are 4 submenus within the VCR MENU q To VCR set up submenu w To display set up submenu e To system submenu r To custom key submenu t Close the main menu q VCR set up menu q Record mode w Output channel e Audio 1 in sensitivity r Audio 2 in sensitivity t Mix select y Audio mode u Return w Display set up submenu i EVF color o Disp...

Page 29: ...Preparation 29 E r Custom key submenu 7 Custom key 1 select 8 Custom key 2 select 9 Return SE L SETSET MENUCLOSE C K K USTOM KEYS EY 1 TV SCREEN EY 2 DATA CODE RETURN 7 8 9 r ...

Page 30: ...pecial playback p 78 Zero set memory p 82 Index photo date search p 81 Audio mix p 96 Insert two AAA batteries following the and markings Be careful not to reverse the polarity of the batteries Inserting batteries Notes When using the wireless controller in brightly lit places or outdoors the effective range will be less The camera may have difficulty picking up the remote control signals at extre...

Page 31: ...M 2 Select TALLY LAMP then select OFF setting 3 Close the menu The tally lamps no longer flash during recording but they will still light up when the camera receives a signal from the wireless controller SENSOR OFF SYSTEM The remote sensors can be turned off to prevent interference from other Canon wireless controllers being used nearby Turning off the remote sensors 1 Open either the camera menu ...

Page 32: ...and select SYSTEM 2 Select T ZONE DST The time zone display appears in the viewfinder Your camcorder s time zone is factory preset to New York If you are at another time zone select your time zone first and daylight saving time DST setting if necessary 3 Move up or down the list of time zones with the IRIS SELECT dial Select the option that represents your time zone If you are now in daylight savi...

Page 33: ...1 24 1 2 3 4 5 6 7 8 9 10 11 12 13 14 15 16 17 18 19 20 21 22 23 2 3 5 6 7 9 8 10 4 12 11 13 24 19 20 18 17 21 23 22 15 14 16 Notes After you have selected your time zone and set the date and time when you travel to another time zone there is no need to reset the date and time Just set the time zone to your destination and the camera s clock will automatically change to display the correct time fo...

Page 34: ...date and time you leave the menu and the clock starts If you press the IRIS SELECT dial in after setting the minutes you can set the date and time again from the start Setting the clock D TIME SET JAN 1 2001 12 00 AM SYSTEM see p 27 To turn it on open the camera menu and select DISP SET UP Then select D T DISPLAY set it to ON and close the menu Date and time display D TIME SEL DATE TIME DISP SET U...

Page 35: ...der the camera is now in record pause mode 2 Press the start stop button to begin recording There are two start stop buttons to give you control from both gripping positions The tally lamps flash rapidly and REC appears in the viewfinder 3 Press the start stop button again to pause recording The camera returns to record pause mode and PAUSE reappears in the viewfinder You can stop and restart reco...

Page 36: ...ording first Before making important recordings clean the video heads using a Canon DVM CL Digital Video Head Cleaning Cassette or a commercially available digital video head cleaning cassette The camera will turn itself off if you leave it in the record pause mode for more than about 5 minutes You can select this 5 minute timer between power off the whole camera SHUT OFF or turn off the recorder ...

Page 37: ...cording mosaic like noise may appear in the image and the sound may be distorted during playback For important recordings therefore set the camera to SP mode If you record in both modes on the same tape the picture may become distorted during playback and the time code may not be written correctly A tape recorded in LP mode on other digital equipment may produce mosaic like noise and the sound may...

Page 38: ...re quickly The further you turn the zoom control ring the faster the zoom speed The T and W buttons on the wireless controller and the camera handle adjust the picture angle but not the zoom speed Notes When the lens is at the extreme wide angle position you can focus on a subject as close as 3 4 in 2 cm Since the zoom changes the picture angle when using the high speed zoom there are cases when t...

Page 39: ...ARS ON OFF button to activate the digital zoom D ZOOM is shown constantly in the viewfinder 4 The digital zoom will remain activated until you press the D E BARS ON OFF button to deactivate it When deactivated D ZOOM flashes in the viewfinder and you can then press the D E BARS SELECT button to select a different digital effect or to turn the digital effects off completely by choosing the blank di...

Page 40: ...ore you start recording slide the STABILIZER switch on the video lens to turn the image stabilizer on or off Notes The image stabilizer is designed to deal with a normal degree of camera shake Keep the image stabilizer turned off when the camera is mounted on a tripod Sliding the switch to OFF has no effect when the camera is set to the Easy Recording program The image stabilizer is not as effecti...

Page 41: ...s in the viewfinder to advise you to switch the ND filter on ND ON with the ON flashing advises you to fit an external ND filter or that the light conditions are still too bright despite having switched the ND filter on ND OFF with the OFF flashing warns you that the ND filter is no longer suitable for the current conditions Set the ND FILTER switch to OFF When you don t have an external ND filter...

Page 42: ...ts up to 6 seconds as the camcorder records the picture The camera returns to record pause mode POWER VCR OFF Tv Av M A STANDBY PHOTO PHOTO 1 Press the Photo button halfway down and hold it PHOTO flashes in the viewfinder Exposure is locked During autofocus F flashes white in the viewfinder as the camcorder adjusts the focus and it is displayed continuously as a green mark when the camera is ready...

Page 43: ...mera returns to record pause mode Notes While the camera records the still you cannot use the camera functions POWER dial STANDBY button do not respond until recording is complete This applies even when you haven t loaded a cassette The wireless controller s PHOTO button has no half way setting press the button and the camera soon takes the photo Only take photos where it is bright enough to see t...

Page 44: ...rite still pictures to a PC for image enhancement and print out Since the frame rate is close to that of a movie this mode can be used to create cinematic like appearance 1 Turn the POWER dial to any recording program except Easy Recording 2 Open the camera menu and select CAM SET UP 3 Select MOVIE MODE then select FRAME setting 4 Close the menu FRAME appears in the viewfinder Notes To return to n...

Page 45: ...rns to record pause mode Note Noise may appear on the screen during record search and record review REC SEARCH When the camera is in record pause mode you can use record search to play the tape forwards or backwards to find the point where you want to start or restart recording Record search Record review 1 Make sure the camera is in record pause mode 2 Press and hold the REC SEARCH or button whil...

Page 46: ...recording program appears constantly on the left of the display with the exception of the Easy Recording program whose mark is displayed and then disappears after 4 seconds Notes Avoid changing programs during recording as the brightness of the image may change suddenly The specialized AE programs are not suitable for all kinds of lighting The image may flicker or a bright line may appear on the s...

Page 47: ...cy selection of Clear Scan Clear Scan Colour Bars Digital zoom Fade trigger h Available i Not available 1 Available when the Exposure is locked 2 Available during the Clear Scan 3 The SHUTTER buttons have no effect you lock the exposure during Clear Scan operation in Tv mode Easy Recording i i i i fixed at 0 i fixed at auto i fixed at auto i h i i h h i fixed at normal i fixed at off i i i Auto i ...

Page 48: ...cording program Manual focus ring Zoom ring Image Stabilizer 1 ND filter Focus mode Push AF button Easy Recording i fixed at on i fixed at autofocus i Except Easy Recording h h h 1 16 IS2 16 IS lens only h h h 16 manual lens Recording program Zoom ring ND filter Zoom speed Easy Recording i Except Easy Recording h h h ...

Page 49: ...utomatically adjusted for glare free recordings of subjects lit by a concentrated light source Auto In normal recording conditions set the POWER dial to n Auto This is the same as the Easy Recording program except that you now have the option of using any of the camera s manual functions you can adjust focus and exposure set the white balance and so on A M AUTO SPOTLIGHT The simplest way to use th...

Page 50: ...F number to f 16 blurring of the image may occur Check the image in the viewfinder while setting the aperture When a lens that has a built in ND filter is attached if you switch the filter on the intensity of the light is reduced and the image in the viewfinder may go dark In such a case switch the filter off and change the aperture setting When shooting in the Easy Recording or n Auto programs on...

Page 51: ...1 MIC REC LEVEL A M MIN MAX MIN MAX L R AUDIO 2 AUDIO MONITOR 0 2 6 20 40 30 50 R L dB 12 1 To switch between the 3 modes open the camera menu and select VCR SET UP 2 Select AUDIO MODE then select a mode 3 Close the menu The name of your chosen mode is displayed in the viewfinder and main LCD panel After selecting the audio mode you can set the audio input The settings for 16 bit and 12 bit stereo...

Page 52: ...nes Adjust the headphone volume by rotating the PHONES LEVEL dial 12 Setting the recording level for 2 channel recording A Using the supplied microphone or attaching an external microphone to the mini jacks AUDIO 1 IN LINE VCR SET UP see p 26 3 Open the camera menu and select VCR SET UP 4 Select AUDIO 1 IN then select a mode LINE To record sound from a VCR CD or other line in devices MIC ATT20 To ...

Page 53: ...ones Adjust the headphone volume by rotating the PHONES LEVEL dial Setting the recording level for 4 channel recording 1 Set the audio mode to 12 bit ST 1 2 2 Set the input for stereo 1 in exactly the same way as for 2 channel recording AUDIO 2 IN LINE VCR SET UP 3 Set the input for stereo 2 by connecting a device to the AUDIO 2 RCA jacks and then selecting the appropriate option for AUDIO 2 IN LI...

Page 54: ...in VCR mode you cannot mix the balance at this point even if VARIABLE is chosen at the VCR menu it is fixed during camera mode You can monitor the sound while recording by attaching stereo headphones to the camera s H terminal Adjust the headphone volume by rotating the PHONES LEVEL dial Headphones Making a Sound Check REC LEVEL A M INPUT SELECT MIC ATT AUDIO 1 MIN MAX L R BALANCE LEVEL AUDIO 1 MI...

Page 55: ...KEYS from DISP SET UP in the camera menu or VCR menu Functions listed below can be assigned to custom keys Functions with an asterisk can be operated only by the custom key The assignable functions are the same for custom keys 1 and 2 Camera mode Index write Zebra pattern VCR stop TV screen Audio 1 in Audio 2 in Grip zoom speed Handle zoom speed No function assigned VCR mode TV screen Data code Au...

Page 56: ... is a series of diagonal stripes that appear in the viewfinder to highlight areas of overexposure Use a guide to setting the aperture iris and shutter speed This function can also be selected from CAM SET UP in the camera menu ZEBRA The zebra pattern level can be adjusted in the same submenu ZEBRA LEVEL p 26 Press the ZEBRA button to display the zebra pattern Press the button again to eliminate th...

Page 57: ...EDIUM and FAST 2 Close the menu by pressing the IRIS SELECT dial Press the ZOOM HANDLE button to display the handle top zoom speed select menu 1 Select the zoom speed from LOW MEDIUM and FAST 2 Close the menu by pressing the IRIS SELECT dial Press the DATA CODE button once to display the data code Press the button again to hide the data code AUDIO 2 IN LINE see p 26 ZOOM GRIP VARIABLE see p 26 ZOO...

Page 58: ... recording it gradually fades out Fade trigger Fading In and Out Between Scenes E T F AD No Display OOM D Z B C L R S AR The flashing display changes to show which effect you can select 3 Press the D E BARS ON OFF button to set the fade trigger ready for use FADE T is shown constantly in the viewfinder 4 Start or stop recording The fade trigger is now activated the scene will fade in or out FADE T...

Page 59: ...he menu Notes 16 9 is shown in the viewfinder when you switch the 16 9 mode on You cannot use the 16 9 mode with the Easy Recording program If you play back a recording made for 16 9 on a normal TV screen the image will appear to be vertically squashed compressed If you connect the camcorder to a TV with an S1 terminal or the Video ID 1 system recordings made in the 16 9 mode for wide screen TVs w...

Page 60: ...Speedlite is still charging the flash will not go off In addition the Speedlite cannot charge while you are holding the PHOTO button halfway down S disappears from the display while the camera records the still picture If the S mark does not appear in the viewfinder when you turn the flash on make sure that the flash unit is slid fully locked on the hot shoe cube Notes For full details of how to u...

Page 61: ...era only displays selectable effects 3 Press the D E BARS ON OFF button to activate the CLR BARS CLR BARS is shown constantly in the viewfinder 4 The color bars will remain activated until you press the D E BARS ON OFF button to deactivate it When deactivated CLR BARS flashes in the viewfinder and you can then press the D E BARS SELECT button to select a different digital effect or to turn the dig...

Page 62: ...de you cannot hide the viewfinder information at a later time 1 Open the camera menu and select SYSTEM 2 Select CHAR REC then select ON setting 3 Close the menu Note Once you set ON setting the information in the viewfinder will remain recorded within the picture until you select OFF setting Note you cannot hide the viewfinder information at a later time CHAR REC OFF SYSTEM see p 27 ...

Page 63: ...ng The interval recording starts and INTERVAL appears in the viewfinder When the interval time is set to 30 seconds or 1 minute the camera repeats record and record pause and 5 minutes or 10 minutes the camera repeats record and stop To pause interval recording press the start stop button The camera returns to record pause and INTERVAL flashes in the viewfinder To restart the recording press the s...

Page 64: ...focus 2 seconds before the countdown is complete The F mark flashes white then returns green after the focus and exposure are set If you are using the wireless controller the F mark starts flashing immediately after you press the PHOTO button The camera takes the picture for approximately 6 seconds Notes Initially the tally lamps flash once a second then just before recording starts they flash mor...

Page 65: ... stop button starts recording on the XL1S and the connected equipment continues recording Pressing the start stop button the second time puts both the XL1S and the connected equipment in record pause mode same as B above When the connected equipment is recording REC appears in the viewfinder if the equipment is in stop STOP appears When the equipment is not in record record pause and stop mode app...

Page 66: ...ens use the zooming ring to reframe the subject To resume autofocus slide the focus switch to AF auto If you focus manually then leave the camcorder with the power turned on you may lose focus on your subject This possible slight shift in focus is due to a rise in temperature in the camcorder interior and lens Check the focus before resuming shooting You can adjust the focus temporarily without tu...

Page 67: ... automatically set exposure level Exposure lock 1 Turn the POWER dial to the Manual recording program 2 Press the SHUTTER r and t buttons to increase or decrease the shutter speed Set the shutter to one of 27 speeds between 1 8 and 1 15 000 of a second 3 Turn the IRIS SELECT dial to open or close the iris Set the aperture value to one of 28 F numbers between f 1 6 and f 16 or select CLOSE to close...

Page 68: ...ght tones Using AE Shift 1 Turn the POWER dial to the Auto Tv or Av recording program 2 Turn the AE SHIFT dial to adjust the AE to your desired level To make the image brighter turn the controller towards the settings To make the image darker turn the controller towards the settings Note AE shift does not function in the Easy Manual or Spotlight Recording programs 1 0 5 0 0 5 1 2 2 AE SHIFT POWER ...

Page 69: ...Repeat steps 1 and 2 to adjust other functions as needed 3 Close the menu Your settings are saved and valid until new changes are made Adjust toward for a deeper color and toward for a lighter color Adjusting the color gain Selecting the custom preset number Setting the custom preset function Adjust toward R for a redder picture and toward G for a greener picture Adjusting the color phase Adjust t...

Page 70: ...ect the custom preset number you want to use by pressing the CSTM PREST SELECT button When you do not use the custom preset select CP OFF 3 Press the CSTM PRESET ON OFF button to turn the custom preset on The picture now reflects your preferences CP1 CP2 CP OFF CP3 Using the custom preset function ...

Page 71: ... the zebra pattern level 1 Open the camera menu and select CAM SET UP 2 Select ZEBRA LEVEL then select the level 3 Close the menu Activating the zebra pattern 1 Open the camera menu and select CAM SET UP 2 Select ZEBRA then select the ON setting 3 Close the menu Using the Zebra Pattern POWER VCR OFF Tv Av M A MENU IRIS SELECT ZEBRA ON CAM SET UP see p 26 ZEBRA LEVEL 90 CAM SET UP see p 26 Note The...

Page 72: ...requencies of the PC screen and the camera causes the black band Frequency range is from 61 9Hz to 201 5Hz 1 Turn the POWER dial to Tv or M 2 Select CS Clear Scan by pressing the SHUTTER r button 3 Open the camera menu and select CAM SET UP 4 Select CLEAR SCAN then select the frequency to hide the black band in the viewfinder You can select the frequency from 117 steps 5 Close the menu CLEAR SCAN ...

Page 73: ...in level you select appears in the viewfinder Push the knob back in when you have finished making adjustments 3dB Low noise recording for indoor low light or low contrast scenes 0dB Low noise life like color reproduction of illuminated scenes at night 6dB 12dB 18dB 30dB Brighten indoor or low light scenes when the iris is fully open Gain up to enable you to increase the depth of field from using a...

Page 74: ... Although slight variations are unavoidable colors will appear natural in virtually every situation In some cases you will get better results by setting the white balance manually The XL1S has 2 modes other than fully auto A and manual W T Indoor mode 3200K light U Outdoor mode 5600K sunlight You can memorize up to 3 manual settings ...

Page 75: ...tor knob back to A to return to the auto setting Push the knob back in when you have finished making selections d You can recall any of the 3 manual white balance settings by turning the knob to the desired number Setting the white balance manually will probably work better than auto white balance when shooting Subjects with one dominant color such as sky sea or forest Close ups In rapidly changin...

Page 76: ...in SP or LP modes 1 Attach a power source and turn the POWER dial to VCR 2 Load the cassette 3 Press the PLAY e button to start playback To end playback press the STOP 3 button To wind the tape forwards stop playback and press the FF 1 button To wind the tape backwards stop playback and press the REW button If the playback picture is rough mosaic like noise clean the video heads using a Canon DVM ...

Page 77: ...he REC SEARCH buttons during playback while you check the picture in the viewfinder The button plays the recording forwards and the button plays it backwards Release the button when you find the point where you want to start editing The camera returns to playback pause Fast Forward Playback To play back the recording at about 9 5 times normal speed press and hold the FF 1 button during normal play...

Page 78: ...s the PLAY e button to return to normal forward playback Forward 2 Playback Press the 2 button during normal playback Press the PLAY e button to return to normal playback Reverse 2 Playback Press the 4a button and then the 2 button during normal playback Press the PLAY e button to return to normal playback Special playback REVERSE FORWARD Fast forward playback Forward 2 playback Forward 1 playback...

Page 79: ...splayed as during fast forward rewind reverse playback forward and reverse 2 playback Press the DATA CODE button on the wireless controller while the camera is in play slow or still mode Press it once to display once more to hide it Select whether you want the date the time or both to show up on your data code display p 32 see p 28 POWER VCR OFF Tv Av M A MENU IRIS SELECT PHOTO SELF TIMER W T ZOOM...

Page 80: ... 2 0 0 1 J AN 1 1 2 3 4 5 PM 3dB F 1 6 1 1 5 0 0 0 3dB F 1 6 1 1 5 0 0 0 AM 1 2 0 0 0 0 1 2 3 4 5 PM J AN 1 0 2 0 1 3dB F 1 6 1 1 5 0 0 0 3dB F 1 6 1 1 5 0 0 0 2 0 0 1 AM J AN 1 2 0 0 0 0 1 Notes The data code will read in the following situations During playback of a blank section of tape If the tape was recorded before entering the date and time in the camera s memory If the tape was recorded on...

Page 81: ...aximum of 10 times e g press the button 5 times to move forward 5 still pictures days or index signals PHOTO SEARCH DATE SEARCH INDEX SEARCH appears in the middle of the viewfinder alongside the or mark and number to search through You can change direction easily by pressing the button for the opposite direction Notes Press 3 stop to stop mid search If you begin a search very close to the start of...

Page 82: ...ion RTN1 or RTN appears in the display The tape counter with  indication disappears from the display and the time code reappears Notes The zero set memory may not function correctly where there is a break between recordings on the tape You can also use zero set memory to mark a position on a tape in camera mode When you then play back the tape pressing rewind will take you back to the pre marked ...

Page 83: ...amera to a VCR set the input selector on the VCR to LINE L R V S S VIDEO VIDEO STV 150 Stereo Video Cable S 150 S video Cable R L AUDIO If your TV or VCR has an S video input terminal If your TV or VCR has audio video input terminals R L AUDIO VIDEO STV 150 Stereo Video Cable L R V S Connect the camera using the STV 150 Stereo Video Cable Connect the white plug to the white audio terminal 7 left C...

Page 84: ...will be slightly lower than that of the original By connecting the camera to another VCR you can edit your recordings in order to remove unwanted scenes or combine different shots to create your own video productions 1 Connect the camera to the VCR See Connections for Playback on a TV screen on p 83 2 Prepare the TV and VCR Turn on the TV and set it to the video channel or set the TV VIDEO selecto...

Page 85: ...at are m LANC compatible Some buttons on editing equipment may operate differently from those on the camera m LANC terminal Notes m LANC is a trademark It stands for Local Application Control Bus System We cannot guarantee the results when connecting to equipment not bearing the LANC m symbol REMOTE ...

Page 86: ...ubbing to from a Cassette with Digital Video Equipment Digital video equipment fitted with the DV terminal lets you edit copy and transfer data digitally with virtually no generation loss in image and sound quality The DV terminal is for both line in and line out since a single DV cable can handle data in both directions If a digital VCR is connected and an anomalous signal is sent from the VCR th...

Page 87: ... cable is not connected properly or if the cable is unconnected when you press REC PAUSE the camera displays the caution CHECK THE DV INPUT An anomalous image may also flash onto the screen Blanks between recordings on the playback tape are recorded as anomalous images on the tape that is being recorded to Copyright signal Certain pre recorded software tapes are copyright protected If you try to p...

Page 88: ...low REC AUDIO DUB AV INSERT L R V S STV 150 Stereo Video Cable S 150 S video Cable S VIDEO VIDEO R L AUDIO Recording from a VCR TV or Analog Camera Analog Line in You can record a video played on your VCR or analog camcorder for digital camcorder see p 86 or a TV program onto a tape in the XL1S if the TV or other device has audio video outputs By selecting the 12bit ST 1 2 of the AUDIO MODE from V...

Page 89: ...ecord pause mode 3 Start playback on the other device or turn on the TV to see the desired program while you monitor the picture 4 Press the play pause e a button on the camera body or PAUSE a button on the wireless controller Recording starts 5 When you get to the point where you want to stop recording press the stop button or the pause button Recording stops 6 Stop playback on the other device N...

Page 90: ...ideo and audio When you make AV insert editing using the DV in terminal you cannot insert new scenes from a tape recorded in SP or LP modes The video and audio of the new scene replace that of the old The playback tape Before inserting After inserting The tape in the camera The tape in the camera Insert start point Insert end point Scene to be inserted Signal flow L R V S S VIDEO STV 150 Stereo Vi...

Page 91: ...back fast forward playback rewind playback or slow playback etc analog only TV You cannot insert AV from a TV program with anomalous synchronized signals such as when the program itself received poor signals 1 Connect the camera to the VCR 2 Prepare the VCR and TV Set the TV Video selector on the television to Video For further details see Connections for Playback on a TV Screen on p 83 Turn on th...

Page 92: ...SERT and 2a appear in the viewfinder 4 Play back the cassette in the VCR 5 To start inserting press the play pause e a button on the camera 2a changes to 2 6 To stop inserting press the STOP button on the camera Inserting stops and AV INSERT disappears from the viewfinder The camera returns to stop mode If instead of pressing STOP you press play pause e a the camera returns to the AV insert pause ...

Page 93: ...e with 12 bit ST 1 sound we recommend dubbing your original tape onto a blank tape using the XL1S s analog line in function then dubbing audio onto the new tape Make absolutely sure to set the audio mode of the new tape to 12 bit ST 1 and the recording mode to SP You cannot add audio using the AUDIO 2 terminal R L L R V S AUDIO OUTPUT An audio device i e CD player STV 150 Stereo Video Cable Signal...

Page 94: ...nt where you want to start audio dubbing then press the PAUSE button You can use the playback buttons on the body of the camera or the special playback functions on the wireless controller in the same way as in playback mode The camera becomes set to playback pause mode 4 Press AUDIO DUB AUDIO DUB and appear on the viewfinder 5 Press the PAUSE button on the wireless controller or play pause e a bu...

Page 95: ... dubbing then every time you return to that position audio dubbing will cancel If instead of pressing STOP you press PAUSE the camera will return to the playback pause mode Notes You cannot use the DV terminal while adding sound You might want to adjust the audio mix p 96 when playing back a tape with added sound There may be a loss of sound quality if you add sound to a tape recorded on a camera ...

Page 96: ...lect the output Stereo 1 Stereo 2 4 channel recording or audio dubbing or a mixture of the two Audio from the 16 bit mode only contains stereo 1 sound therefore it is not possible to select the audio mix The same is true for the 12 bit stereo 1 mode unless new sound has been added post recording Go directly to stage ii You only need to release the fixed level step 2 if your aim is to mix the balan...

Page 97: ...ose stereo 1 for the output at stage i stereo 1 L R will be sent to the RCA jacks labeled Audio 1 L R In addition stereo 2 L R will be sent to the RCA jacks labeled Audio 2 L R This gives you four independent audio signals If you chose stereo 2 for the output at stage i stereo 2 L R will be sent to Audio 1 L R If you mixed the balance at stage i the combination of left channels from stereo 1 and s...

Page 98: ... than usual it has reached the end of its life and must be replaced 100 75 50 25 0 CHANGE THE BATTERY PACK The indicator in the display shows you approximately how much charge the battery pack has left Notes CHANGE THE BATTERY PACK appears in the display for 4 seconds when the power is completely exhausted The empty battery mark then appears and starts to flash The power indicator light also flash...

Page 99: ... with a dry cloth or tissue if necessary Storing the battery pack If you do not use a battery pack for a period of more than a few months any remaining charge may cause damage to the battery pack and reduce usage time To prevent damage therefore aim to use a battery pack s complete charge before storage When it needs replacing or if it has not been installed the j mark flashes in the display Remov...

Page 100: ...avoid the risk of explosion DANGER Treat the battery pack with care Keep it away from fire or it might explode Do not expose the battery pack to temperatures greater than 140 F 60 C Do not leave it near a heater or inside a car in hot weather for example Do not try to disassemble or modify it Do not drop or knock it Do not get it wet WARNING The battery used in this device may present a fire or ch...

Page 101: ... W PHOTO START STOP LOCK Standard holding style Grip the camera using the top handle and steady the lens with the other hand Low angle recording To prevent any unwanted movement mount the camera on a tripod and operate it from the remote control Be careful not to leave the viewfinder in bright sunlight or it may damage the LCD the light is concentrated by the viewfinder lens Either turn the EYE PO...

Page 102: ...ory counter h h h h h Returns to off Returns to off h Returns to normal display Returns to off h Additional Information E 102 The following function settings are saved when the power is turned off with the POWER dial or when the STANDBY button is pressed with the backup battery installed Camera mode Turning power off with the POWER dial Returns to off Reset Reset except digital zoom Reset except d...

Page 103: ... h h h Camera mode Change to other recording program h h Change to Easy recording Reset except digital zoom Reset except digital zoom TV screen on off LCD light Zero set memory counter Data code display Audio 12bit output Mix balance select Search select VCR menu Only an output channel returns to L R VCR mode Returns to off Returns to off h Returns to off Returns to stereo 1 h Returns to photo sea...

Page 104: ...er Cover the camera when you are recording in rain or mist There is a risk of electric shock if water gets inside the camera contact qualified service personnel as soon as possible Protect the lens Sand and dust can damage the lens be especially careful on windy days Handle the camera gently Vibration or shock can cause damage Do not use the viewfinder unit or microphone as a carrying handle Do no...

Page 105: ...road Viewfinder Clean the viewfinder screen Slide and hold the release lever on the underside of the viewfinder and then twist the eye cup counter clockwise until the mark on the eye cup lines up with the mark on the viewfinder to allow you to remove it Clean the surface with a cotton swab When finished replace the eye cup p 16 The viewfinder screen scratches easily Take care when cleaning Camera ...

Page 106: ...room temperature before you take it out of the bag What happens when condensation is detected CONDENSATION HAS BEEN DETECTED is displayed for approximately 4 seconds Then the power indicator flashes and the h mark flashes in the viewfinder If there is a cassette in the camera it stops automatically and REMOVE THE CASSETTE is displayed for approximately 4 seconds and then EJECT flashes in the viewf...

Page 107: ...d for a long while it is not a malfunction Switch off the camera Take off the battery and reattach it Then switch on the camera again You are attempting to play back or record from a copyright protected cassette p 87 The tape heads are badly contaminated p 105 The camera is on manual focus p 66 The viewfinder lens needs adjusting p 17 The lens is dirty p 105 Refer to this checklist first if you ha...

Page 108: ...WER dial is not set to VCR p 76 The cassette is not loaded p 22 The tape has reached the end When recording in dark places a bright light in the scene may cause a vertical light bar smear to appear This is a normal feature of camcorders The video heads need cleaning p 105 The video heads need cleaning p 105 The TV VIDEO selector on the TV isn t set to VIDEO p 83 A tape recorded in SP or LP modes c...

Page 109: ...ff and back on again Make sure the lens has clicked fully into position If necessary turn the POWER dial to OFF remove the lens and retry p 14 Problem The wireless controller doesn t work The tally lamps don t flash There are air bubbles inside the lens 16 IS2 lens The camera malfunctions The viewfinder displays are unclear The DV cable is connected correctly but there s nothing in the display The...

Page 110: ... 910 Dual Battery Charger Holder TV VCR DC 900 DC Coupler MA 100 Microphone Adapter Shoulder Pad MA 200 Microphone Adapter Shoulder Pad SS 1000 Shoulder Strap VL 10Li Battery Video Light FA 200 Flash Adapter 420EX Speedlite S 150 S video Cable STV 150 Stereo Video Cable BP 930 BP 945 Battery Pack HC 3100 System Case SP 100 Shoulder Pad BP 930 BP 945 Battery Pack Video Head Cleaning Cassette ZR 100...

Page 111: ...onal accessory The optional BP 945 provides 50 more recording time than the BP 930 CB 910 Car Battery Adapter Power your camera or recharge battery packs on the move The car battery adapter plugs into your car s cigarette lighter socket and runs off a 12 24V DC negative ground battery Call or visit your local retailer dealer for genuine Canon video accessories You can also obtain genuine accessori...

Page 112: ...L1S s 1 3 CCD s and 35mm film means that the effective focal length of still camera lenses is multiplied by 7 2 A 300mm lens for example is transformed into an incredible 2 160mm super telephoto Consult your local service outlet to make sure there are no compatibility problems with your chosen lens FA 200 Flash Adapter Facilitates use of a Canon Speedlite 420EX 550EX with the XL1S 3 Zoom XL 3 4 10...

Page 113: ...t only 16 XL IS 2 5 5 88mm Zoom Lens 7121A002AA Lens Hood YG9 5739 000 Lens Cap YF1 0008 000 Dust Cap YA1 1715 000 Lens Soft Case YA1 1717 000 Optional accessories BP 945 Battery Pack 4244A002AA CB 910 Car Battery Adapter 3035A002AA CH 910 Dual Battery Charger Holder 3036A002AA MA 100 Microphone Adapter Shoulder Pad 3153A002AA MA 200 Microphone Adapter Shoulder Pad 7048A002AA ZR 1000 Zoom Remote C...

Page 114: ...power remains p 98 The battery pack is exhausted p 20 98 No cassette is loaded or it is set for erasure prevention p 23 Remaining tape Green more than 5 mins Yellow less than 5 mins Red final few secs finally it tells you when you have completely run out of tape DATA CODE ON SCREEN REC PAUSE END 5 min E JECT The camera is ejecting the tape p 22 The safety mechanism is activated Unload the cassette...

Page 115: ... PRESET VCR SET UP D I SP SET UP SYSTEM CUSTOM KEYS RETURN W T W T T W 5 PHOTO SEA CH R 5 PHOTO SEA CH R W T SE L SETSET MENUCLOSE VCR MENU VCR SET UP D I SP SET UP SYSTEM CUSTOM KEYS RETURN 0 0 0 0 0 I N T E R V A L T Camera menu p 25 VCR menu p 28 The remote sensor is turned off p 31 Zero set memory p 82 Interval timer recoding p 63 Self timer countdown p 64 Audio mode p 51 Data code p 79 The ca...

Page 116: ...ng S mark flashes white p 60 or charged S mark lights up green p 60 Manual exposure display p 67 Exposure locked Brighter than standard exposure level Darker than standard exposure level Manual setting of shutter speed F number The iris is closed ND Filter p 41 Manual focus is selected p 66 White balance is set manually p 74 1 E LOCK E LOCK S 1 6 0 F 1 6 CLOS E ND FF O MF 1 6 9 E LOCK DV IN C H A ...

Page 117: ... which are shorter than 10 seconds may be difficult to edit later On the other hand if you are not planning to edit the recording remember that a shot which does not contain action should generally last no longer than 10 seconds Time Code 0 sec 0 1 sec 1 0 2 3 4 2 5 This records counter information including hour minute second and frame number on a special data code area on the tape itself It is r...

Page 118: ...CONDENSATION HAS BEEN DET CTED E REMOVE THE CAS ETTE S R E COPY D PROTECT CTED RIGHT PLAYBACK IS STRI E R E COPY D PROTECT CTED RIGHT DUBBING STRI E CHECK THE CASSETTE REC MODE CHECK THE CASSETTE AUDIO MODE CHECK THE CASSETTE BLANK HEADS DIRTY USE CLEANING CASSETTE Caution phrases The camera displays various caution phrases they appear for 4 seconds before disappearing Appears each time you turn t...

Page 119: ...mode p 37 Exposure lock p 67 F number aperture size p 49 Audio mode p 51 L R Recording levels p 52 Shutter speed p 49 Remaining battery power p 98 Time code p 117 Cassette set for erasure prevention or not loaded p 23 Tape has reached the end p 118 Manual recording level p 49 Audio mix p 96 When only is shown 16 bit mode PB ...

Page 120: ...ter 72mm XL lens Viewfinder 0 7 inch color LCD approx 180 000 pixels Microphone Stereo electret condenser microphone DV Terminal Special 4 pin connector based on IEEE1394 Output level Video terminal RCA jack 1 Vp p 75Ω unbalanced synchronized load S video terminal 4 pin mini DIN 1 Vp p Y signal 0 286 Vp p C signal Audio terminal RCA jack L R 2 sets 4dBm 47kΩ load 3kΩ or less unbalanced Headphone t...

Page 121: ...7 Ò LANC 85 LCD Panel 109 Lens Cap 24 Lens Hood 15 Light Button 9 Loading Cassettes 22 Low angle Recording 101 LP Mode 37 Maintenance 104 Manual Focus 66 Manual Recording Program 67 Menu 25 Menu at a Glance 122 Microphone 18 Mix Balance 96 Movie Mode 44 ˆ ND Filter 41 Ø Optional Accessories 111 Photo Mode 42 Photo Search 81 Playback 76 Playback Pause 77 Power Adapter 19 Powering Your Camcorder 19 ...

Page 122: ...P DISP SET UP DISP SET UP VCR SET UP VCR SET UP VCR SET UP SYSTEM CAM SET UP CSTM PREST CSTM PREST CUSTOM KEYS CUSTOM KEYS DISP SET UP DISP SET UP CSTM PREST DISP SET UP DISP SET UP SYSTEM DISP SET UP SYSTEM CAM SET UP CAM SET UP VCR SET UP VCR SET UP CAM SET UP VCR SET UP VCR SET UP SYSTEM CSTM PREST CSTM PREST SYSTEM SYSTEM DISP SET UP VCR SET UP DISP SET UP CAM SET UP CAM SET UP VCR mode VCR mo...

Page 123: ... Service Facility and proven to be defective upon inspection will be repaired or exchanged for new or comparable rebuilt parts or DV Camcorders The warranty period for repaired or replacement parts or DV Camcorders shall begin upon shipment of the same but shall in no event exceed the original warranty period of the defective part or DV Camcorder Non Canon brand peripheral equipment and software w...

Page 124: ... INC MONTREAL 5990 Côte de Liesse Quebec H4T 1V7 If you have any questions call the Canon Canada Information Center toll free at 1 800 828 4040 Canada only Si vous avez des questions veuillez téléphoner sans frais au Canada 1 800 828 4040 Canada seulement MEXICO CANON MEXICANA S DE R L DE C V Periferico Sur No 4124 Col Ex Rancho de Anzaldo C P 01900 México D F México CENTRO Y SURAMÉRICA CANON LATI...

Reviews: