


Source: Canon PowerShot G12 Camera User’s Guide
1
Canon PowerShot G12 Digital Camera Basics
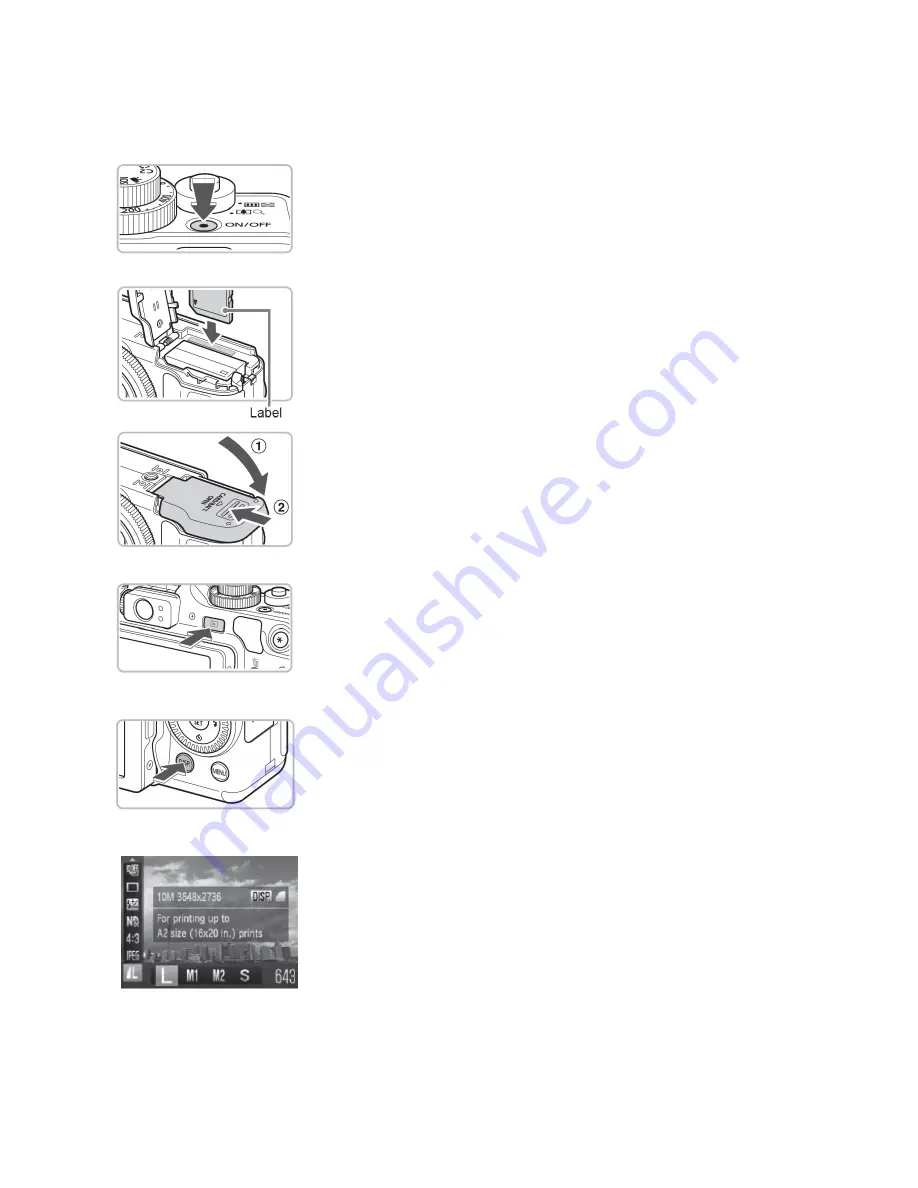
Turn on the Camera
Press the power button on the top of the camera to turn it on. The
lens will open, the startup screen will appear in the viewfinder, and
the camera will automatically go into shooting mode. If prompted to
enter the date and time, choose cancel.
Insert Memory Card
If no memory card is installed in the camera, you will be prompted
on screen to insert one. Slide open the cover on the bottom of the
camera to access the battery and memory card slots. Insert a standard
size SD memory card as shown until it locks in place with a click.
Close the cover. Press down while sliding it back into place with a
click.
Playback/Shooting Mode
Shooting mode allows you to take pictures while playback mode
allows you to review images already acquired and saved to the
memory card. Press the playback button to alternate between
shooting mode and playback mode.
Display Button
•
Press once for Normal view in LCD viewfinder
•
Press twice to turn on Rule of Thirds grid lines
•
Press three times to turn off LCD display
•
Press and hold 1 sec. to decrease/increase LCD brightness
Resolution and Compression Settings
Press the FUNC SET button on the Control Dial to open up the
function settings menu. Navigate to the resolution settings and
select L (3648x2736 pixels). Next, press the DISP button to access
the JPEG compression settings. Set the compression to FINE
(highest quality).


