background image

Black

Please read this guide before operating this equipment.
After you finish reading this guide, store it in a safe place for future reference. 
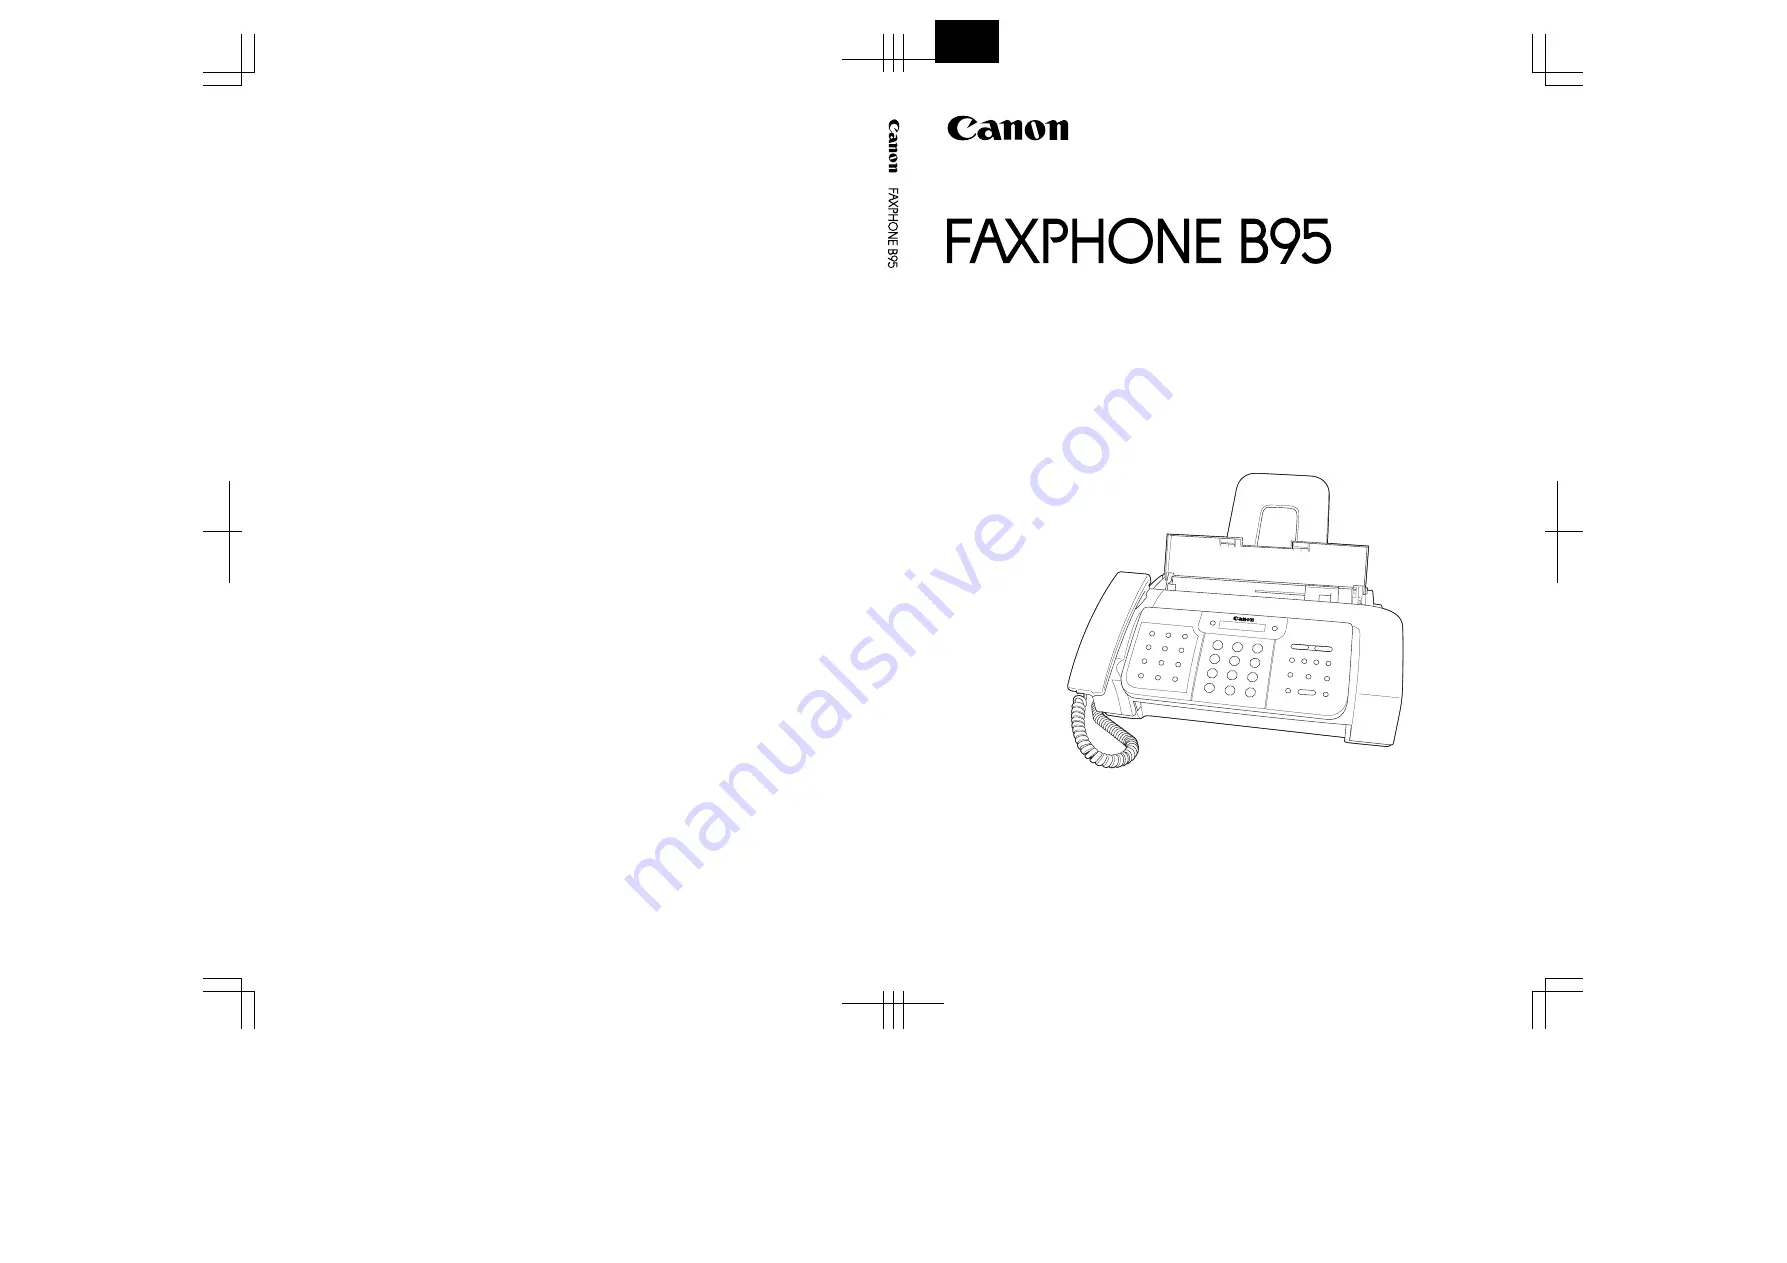
USER’S GUIDE

User’s Guide

CANON INC.

30-2, Shimomaruko 3-chome, Ohta-ku, Tokyo 146-8501, Japan

CANON U.S.A., INC.

One Canon Plaza, Lake Success, NY 11042, U.S.A.

CANON CANADA INC.

6390 Dixie Road, Mississauga, Ontario L5T 1P7, Canada

CANON EUROPA N.V.

Bovenkerkerweg 59-61 P.O. Box 2262, 1180 EG Amstelveen, The Netherlands

CANON FRANCE S.A.

17, quai du President Paul Doumer 92414 Courbevoie Cedex, France

CANON (U.K.) LTD.

Woodhatch, Reigate, Surrey, RH2 8BF, United Kingdom

CANON DEUTSCHLAND GmbH

Europark Fichtenhain A10, 47807 Krefeld, Germany

CANON ITALIA S.p.A.

Via Milano, 8 20097 San Donato Milanese (MI) Italy

CANON LATIN AMERICA, INC.

703 Waterford Way, Suite 400, Miami, Florida 33126, U.S.A.

CANON AUSTRALIA PTY. LTD

1 Thomas Holt Drive, North Ryde, Sydney, N.S.W. 2113, Australia

CANON SINGAPORE PTE. LTD.

1 Harbour Front Avenue #04-00 Keppel Bay Tower, Singapore 098632

CANON HONGKONG CO., LTD

9/F, The Hong Kong Club Building, 3A Chater Road, Central, Hong Kong

HT7-0004-000-V.2.0

XXXXXXXXXX

C

 CANON INC. 2004

PRINTED IN CHINA

Summary of Contents for FAXPHONE B95

Page 1: ... A 17 quai du President Paul Doumer 92414 Courbevoie Cedex France CANON U K LTD Woodhatch Reigate Surrey RH2 8BF United Kingdom CANON DEUTSCHLAND GmbH Europark Fichtenhain A10 47807 Krefeld Germany CANON ITALIA S p A Via Milano 8 20097 San Donato Milanese MI Italy CANON LATIN AMERICA INC 703 Waterford Way Suite 400 Miami Florida 33126 U S A CANON AUSTRALIA PTY LTD 1 Thomas Holt Drive North Ryde Sy...

Page 2: ...hone number and name 2 8 Setting the daylight saving time 2 9 Registering one touch speed dialing numbers and names 2 11 Registering coded speed dialing numbers and names 2 13 Registering voice dialing voice tags 2 14 Registering voice tags with one touch coded speed dialing numbers and names 2 14 Adding voice tags to the one touch coded speed dialing numbers 2 14 Modifying voice tags 2 15 Deletin...

Page 3: ... 3 Setting TAM MONITOR 7 4 Setting TOLL SAVER 7 5 Recording voice memos 7 6 Deleting messages 7 7 Playing telephone messages 7 9 Remote control features 7 10 Registering the password for remote control 7 10 Using remote control 7 11 Forwarding telephone messages 7 13 Setting the forwarding number 7 13 Setting the number of redial times 7 14 Setting PIN ENTRY 7 15 When a forwarded call is received ...

Page 4: ... Support program specifics are subject to change without notice Refer to the warranty information starting on p I 6 for details Copyright Copyright 2004 by Canon U S A Inc All rights reserved No part of this publication may be reproduced transmitted transcribed stored in a retrieval system or translated into any language or computer language in any form or by any means electronic mechanical magnet...

Page 5: ...ting that remains in effect unless you change it document The original sheet s of paper you send receive or copy with your fax menu A list of settings from which you select an item to set up or change A menu has a title which appears on the LCD and buttons Used to select an item in a menu Press to select the next item and press to select the previous item transaction number When you send or receiv...

Page 6: ...o avoid spillage in or around the fax do not eat or drink near it If you spill liquid or if any substance falls into the fax unplug the fax immediately and contact the Canon Customer Care Center see p iv Keep the fax clean Dust accumulation can prevent the fax from operating properly Unplug the fax from the wall outlet and refer service to qualified personnel under the following conditions When th...

Page 7: ...diator or other heat source unless proper ventilation is provided Install the fax approximately 4 in 10 cm away from walls and other equipment For the dimensions of the fax see p S 1 Do not stack boxes or furniture around the power outlet Keep the area free so you can reach the outlet quickly If you notice anything unusual smoke strange odors noises around the fax unplug it immediately Contact the...

Page 8: ...rs electric typewriters copiers and machines of this sort generate electrical noise which often interferes with communications equipment and the sending and receiving of documents Connection of the Equipment__________________ This equipment complies with Part 68 of the FCC rules and the requirements adopted by the ACTA On the rear panel of this equipment is a label that contains among other inform...

Page 9: ... service The telephone company also retains the right to make changes in facilities and services which may affect the operation of this equipment When such changes are necessary the telephone company is required to give adequate prior notice to the user FCC Notice FAXPHONE B95 Facsimile Transceiver Model H12414 This device complies with Part 15 of the FCC Rules Operation is subject to the followin...

Page 10: ...28 5600 The Telephone Consumer Protection Act of 1991 makes it unlawful for any person to use a computer or other electronic device to send any message via a telephone fax machine unless such message clearly contains in a margin at the top or bottom of each transmitted page or on the first page of the transmission the date and time it is sent and an identification of the business or other entity o...

Page 11: ...r Duplex It should be independent from copiers heaters air conditioners or any electric equipment that is thermostatically controlled The rated value is 120 volts and 15 amperes The CA11A modular jack should be relatively close to the power outlet to facilitate installation Notice __________________________________________ This equipment meets the applicable Industry Canada Terminal Equipment Tech...

Page 12: ...of devices subject only to the requirement that the sum of the RENs of all the devices does not exceed five CANON CANADA INC 1 800 652 2666 24 HOURS A DAY SEVEN DAYS A WEEK For Canadian Users ____________________________ Canon Canada Inc offers a full range of customer technical support options For interactive troubleshooting e mail technical support the latest driver downloads and answers to freq...

Page 13: ... hold the box while you lift the fax and its protective packaging out of the carton Make sure you have the following items You should also have the following Power cord Telephone line cord Documentation Registration Card USA only Warranty Destination labels If any of these items are damaged or missing contact the Canon Customer Care Center see p iv immediately Main unit Handset BX 3 Black BJ Cartr...

Page 14: ...cover by gently pulling it towards you 3 Open the document tray 4 Remove the shipping tapes b and the protective pieces c Close the printer cover until it locks into place 5 Close the document tray The actual shipping materials may differ in shape quantity and position from the ones shown above 1 2 3 3 ...

Page 15: ...s_________________________ For user convenience the destination labels provided with your fax should be fitted over the one touch speed dialing buttons on the left of the operation panel 1 Insert the tabs on the multi purpose tray into the slots on the fax ...

Page 16: ...ollowing Be sure to connect any external devices before using the fax 1 Connect the supplied telephone line cord to the jack then the other end to the telephone line jack on your wall 2 Connect the handset to the jack and place it in its cradle Handset Extension phone a telephone that you may wish to have placed away from the fax to use at a different location Telephone line 2 3 1 ...

Page 17: ...operly grounded AC power outlet There is no power switch on the fax The power is on as long as the fax is plugged in You cannot use the extension phone while the fax is using the phone line If you have connected an external device to your fax be sure to select the correct receive mode see Chapter 6 If the extension phone does not have its own power supply any redial data in the extension phone mem...

Page 18: ...refilling the multi purpose tray Avoid mixing new stock with paper already loaded Do not leave paper stacked in the multi purpose tray for long periods of time since it may bend or curl and cause problems Certain environmental conditions such as extreme temperatures or humidity can cause some paper to misfeed in the multi purpose tray If you have trouble feed one sheet at a time Depending on the d...

Page 19: ...stack on a flat surface to even the stack 3 Insert the stack face up into the multi purpose tray a and align the right edge of the stack with the right side of the multi purpose tray Then slide the paper guide b snugly against the left edge of the stack Be careful not to press the paper guide strongly against the stack or the paper will not be fed properly 1 2 ...

Page 20: ...home position on the right side of the fax when you are not using the fax The ink in the BJ Cartridge is difficult to clean up if spilled Follow the precautions below when handling the BJ Cartridge Carefully remove packaging from BJ cartridges Do not attempt to disassemble or refill BJ cartridges Do not shake or drop BJ cartridges Replace BJ cartridges after one year of use even if you have not be...

Page 21: ... fax is plugged in 2 Load the paper in the multi purpose tray 3 Open the printer cover by gently pulling it towards you see p 1 2 4 Raise the cartridge lock lever on the cartridge holder 5 Remove the BJ Cartridge from its package then remove the orange protective cap a and tape b Discard the cap and tape Never attempt to reattach them to the BJ Cartridge print head 1 2 ...

Page 22: ...dge lock lever until you hear a click to lock the cartridge in place The yellow post BJ Cartridge guide should be visible through the slot The BJ Cartridge tilts slightly to the left before lowering the cartridge lock lever 7 Close the printer cover If the AUTO TEST PRINT setting is set to ON The fax automatically prints a test page every time you insert a BJ Cartridge You can turn off automatic t...

Page 23: ...2 PREPARING TO USE YOUR FAX 2 1 2 PREPARING TO USE YOUR FAX Main components of your fax Handset Document tray Operation panel Printer cover Cartridge holder Multi purpose tray Document guide ...

Page 24: ...F GHI JKL MNO TONE SYMB PRS OPER TUV WXY 0 TAM Mode Delete Record Play Coded Dial Directory Voice Dial Redial Pause Hook Start Copy Stop Microphone see pp 2 12 7 1 Numeric buttons LCD TAM LED see p 7 2 See next page for buttons on the operation panel Rewind Forward buttons see p 7 9 One touch speed dialing Special function buttons see below Polling Ink Saver Caller History Receive Mode Resolution ...

Page 25: ...ord Play Coded Dial Directory Redial Pause Hook Scroll Cursor buttons see pp 2 5 6 6 7 9 8 1 TAM Mode button see p 7 2 Delete button see p 7 7 Record button see p 7 1 Voice Dial button see p 5 7 Play button see p 7 9 Coded Dial Directory button see pp 5 5 5 6 Stop button Start Copy button Hook button see p 5 4 Redial Pause button see pp 5 8 5 9 ...

Page 26: ...operation panel input the fax returns to standby mode and any unregistered changes are lost 1 Press to switch between the letter and number mode 2 Press the numeric button that contains the letter or number you want Press repeatedly until the letter you want appears If you are unsure which button to press see the table above Button Letter Mode A Number Mode 1 Letter mode A Number mode 1 7 8 PRS TU...

Page 27: ...u want to enter is under the same numeric button you pressed in step 2 press to move the cursor to the right Then press that same numeric button repeatedly until the letter you want appears To enter a space press Space 1 Press repeatedly until the symbol you want appears 2 If you want to enter another symbol press to move the cursor to the right then press repeatedly until the symbol you want appe...

Page 28: ... telephone line type check with your local telephone company See pp 2 2 2 3 for the buttons on the operation panel 1 Press Function Press Start Copy twice 2 Use or to select TEL LINE TYPE Press Start Copy 3 Use or to select the appropriate line type Press Start Copy 4 Press Stop Setting ends and the fax returns to standby mode DATE TIME ROTARY PULSE ...

Page 29: ...ocument with the identifying information The top line includes the name of the receiving party if you send the document using one touch speed dialing or coded speed dialing and you registered the party s name Setting the date and time______________________ The date and time appear on the LCD as well as on the documents you send 1 Press Function Press Start Copy three times The page number Your nam...

Page 30: ... see SYSTEM SETTINGS p 8 5 Press Start Copy 3 Press Stop Registration ends and the fax returns to standby mode 1 Press Function Press Start Copy twice 2 Use or to select UNIT TELEPHONE Press Start Copy 3 Enter your fax number up to 20 digits using the numeric buttons You can enter a plus sign or space to make your number easier to read To enter a plus sign press Press Start Copy twice 4 Enter your...

Page 31: ...hen the daylight saving time begins and ends 1 Press Function Press Start Copy 2 Use or to select SYSTEM SETTINGS Press Start Copy 3 Use or to select DAYLGHT SAV TIME Press Start Copy 4 Use or to select ON or OFF Press Start Copy 5 If you selected OFF in step 4 press Stop to return to standby mode If you selected ON in step 4 use or to select BEGIN DATE TIME Press Start Copy twice 6 Use or to sele...

Page 32: ...se or to select TIME Press Start Copy 12 Use the numeric buttons to enter the time at which the daylight saving time will take effect Press Start Copy 13 Press Function 14 Use or to select END DATE TIME Press Start Copy twice 15 Set the month week the day of the week and time when the daylight saving time ends as in steps 6 to 12 16 Press Stop Setting ends and the fax returns to standby mode WEEK ...

Page 33: ...ISTRATION Press Start Copy 3 Press Start Copy 4 Use or to select the number of the one touch speed dialing button 01 09 under which you want to register the number If a number is already registered under this one touch speed dialing button the number is displayed on the LCD 5 Enter the party s number up to 50 digits using the numeric buttons Press Start Copy to register the number 6 Enter the part...

Page 34: ...7 proceed to step 9 If you selected YES in step 7 After a tone speak the party s name into the microphone The fax asks you to speak the party s name again After a tone speak into the microphone again 9 To assign additional one touch speed dialing numbers start from step 4 To finish press Stop YES NO If voice tag registration fails three consecutive times registration will end If this happens start...

Page 35: ...e or to select the two digit code 01 70 under which you want to register the number If a number is already registered under this coded speed dialing code the number is displayed on the LCD 5 Enter the party s number and name the same way you registered them for one touch speed dialing See steps 5 to 6 Registering one touch speed dialing numbers and names p 2 11 6 Register the party s voice tag the...

Page 36: ...inting the speed dialing lists Entries with a voice tag are preceded by an icon You cannot receive documents while you are recording a voice tag Also the Caller ID function see p 6 7 may not work properly 1 Press Function 2 Use or to select TEL REGISTRATION Press Start Copy 3 Use or to select 1 TOUCH SPD DIAL or CODED SPEED DIAL Press Start Copy 4 Use or to select the receiving party you want to a...

Page 37: ... tag Press to select YES 3 Use or to select REDO VOICE TAG Press Start Copy The fax asks you to confirm that you want to redo the voice tag registration 4 Press to select YES and proceed to step 6 on p 2 14 Press to cancel the procedure 1 Perform steps 1 and 2 on Modifying voice tags above 2 Use or to select DELETE VOICE TAG Press Start Copy The fax asks you to confirm that you want to delete the ...

Page 38: ...ttempt to load the following types of documents into the fax Wrinkled or creased paper Torn paper Coated paper or glossy paper Thick paper Curled or rolled paper Carbon paper or carbon backed paper Onion skin or thin paper Envelopes Remove all staples paper clips etc before loading the document into the document tray Make sure any glue ink or correction fluid on the paper is completely dry before ...

Page 39: ...ure the document meets the document requirements see p 3 1 A B C For a multipage document the pages are fed one by one from the top of the stack Wait until all pages of your document have been scanned before starting a new job Make sure you follow the procedure above to load documents into the document tray If the document is not loaded into the document tray correctly it may not be fed into the f...

Page 40: ...t the label on the package to see if the paper has a preferred side for printing Printable area __________________________________ The shaded area below shows the printable area of letter legal size paper Be sure to print within this area Loading paper __________________________________ For details on loading paper in the multi purpose tray see p 1 7 Be sure to test paper before purchasing large q...

Page 41: ... same resolution when making copies If MEMORY FULL appears on the LCD when making multiple copies see Copying problems p 9 16 1 Load the document face up into the document tray See Loading documents p 3 2 2 Press Resolution You can select STANDARD FINE or PHOTO Press Start Copy 3 Enter the number of copies up to 99 using the numeric buttons To make a correction to the number of copies press Clear ...

Page 42: ...ast your fax uses to send or copy documents according to how light or dark your document is Using a higher resolution will increase the output quality but will slow down the scanning speed 1 Load the document face up into the document tray See Loading documents p 3 2 2 Press Resolution to select the resolution You can select STANDARD FINE or PHOTO After about 5 seconds the fax returns to standby m...

Page 43: ...ad the document face up into the document tray See Loading documents p 3 2 You can set the scanning resolution and contrast see p 5 1 2 Dial the receiving party s fax number Use one of the dialing methods described in this chapter 3 Press Start Copy The fax begins sending TEL 3456xxxx If an error occurs during sending the fax beeps intermittently for a few seconds and an error message appears on t...

Page 44: ...nding based on the Canon FAX Standard Chart No 1 standard resolution Exclude voice dialing If MEMORY FULL appears on the LCD during the scanning process re start sending the document using direct sending see p 5 2 or divide the document into sections 1 Load the document face up into the document tray See Loading documents p 3 2 You can set the scanning resolution and contrast see p 5 1 2 Press Fun...

Page 45: ...wers converse normally then ask them to press the start button on their fax Press Start Copy and hang up If you hear a high pitch tone press Start Copy and hang up TEL 3456xxxx If you pressed Hook in step 2 you need to pick up the handset when a person answers the phone The fax will beep if the handset is not hung up properly Make sure the handset is seated properly in its cradle If you do not wan...

Page 46: ...5 1 2 Press the one touch speed dialing button under which the number you wish to fax is registered or Press Coded Dial Directory and enter the appropriate two digit coded speed dialing code The registered name and number appear If you make a mistake press Stop Then press the correct one touch speed dialing button or press Coded Dial Directory and re enter the code 3 Press Start Copy The fax begin...

Page 47: ...of the name of the party you are searching for 4 Press or to display the other names and numbers registered for the button letter group The names for one touch speed dialing numbers are prefixed with two digits and the names for coded speed dialing numbers are prefixed with an asterisk and two digits When you reach the last name and number registered for the letter group you will return to the fir...

Page 48: ...microphone The registered name will be displayed on the LCD 3 With the party s name you wish to dial displayed press Start Copy to start the document transmission If the AUTO VOICE DIAL setting is set to ON the fax automatically starts dialing see p 8 2 Once connected press Start Copy to start the document transmission If the displayed party s name is not what you are searching for press Stop to c...

Page 49: ...ly available in some countries The feature uses the ETSI EN 300 778 1 protocol Contact your local telephone company for detailed information 1 Press Function 2 Press Caller History Press Start Copy The date and time names and numbers from which you have received calls recently will be displayed on the LCD Press Redial Pause or Coded Dial Directory to switch between the date and time name and phone...

Page 50: ...re sending a document and the receiving party s line is busy the fax waits the specified time and then dials the same number again You can set the fax to redial several times if previous attempts fail because of a busy signal Automatic redialing can be turned off and on The number of redialing attempts and the time interval between attempts can also be adjusted see AUTO REDIAL p 8 3 If all rediali...

Page 51: ... select AUTO REDIAL Press Start Copy To disable automatic redialing use or to select OFF then press Start Copy Press Stop to return to standby mode To enable automatic redialing use or to select ON and continue with the steps below 4 Press Start Copy twice 5 Use the numeric buttons to enter the number of times you want the fax to redial Press Start Copy twice 6 Use the numeric buttons to enter the...

Page 52: ...ending time 24 hour clock using the numeric buttons Set the time using the 24 hour clock system Precede single digits with a zero Example 3 00 p m 15 00 Press Clear if you need to re enter the time You can also use or to move the cursor 5 Press Start Copy 6 Enter the receiving party s fax number You can enter the receiving party s fax number using the numeric buttons one touch speed dialing coded ...

Page 53: ... to more than one location at a later time when multiple fax numbers are dialed see p 5 13 1 Press Function 2 Use or to select MEMORY REFERENCE Press Start Copy 3 Use or to select DELETE DOCUMENT Press Start Copy 4 Use or to select the transaction number TX RX NO of the document you want to delete If the LCD does not change after you press or this means only one transaction is stored in memory If ...

Page 54: ...an also include one location using regular dialing Remember that when using regular dialing you must press Start Copy after entering the number You must press each button within 10 seconds of the preceding one The fax begins the operation approximately 10 seconds after you press the last button 1 Load the document face up into the document tray See Loading documents p 3 2 You can set the scanning ...

Page 55: ... Printing a document in memory _______________ 1 Press Function 2 Use or to select MEMORY REFERENCE Press Start Copy 3 Press Start Copy 1 Press Function 2 Use or to select MEMORY REFERENCE Press Start Copy 3 Use or to select PRINT DOCUMENT Press Start Copy 4 Use or to select the transaction number TX RX NO of the document you want to print If you are unsure of the transaction number TX RX NO print...

Page 56: ...the document you want to delete If the LCD does not change after you press or this means only one transaction is stored in memory If you are unsure of the transaction number TX RX NO print a list of documents in memory see p 5 14 5 Press Start Copy The fax asks you to confirm that you want to delete the document 6 Press to delete the document If you change your mind and want to keep the document i...

Page 57: ... voice calls pp 6 2 6 3 MANUAL MODE Tel Rings for every call regardless of whether the call is a fax call or a voice call For a fax call you have to manually activate reception of the fax p 6 4 DRPD Fax Tel The fax rings differently depending on whether a call is a fax or voice call Subscription to a DRPD service Handset or extension phone connected to the fax p 6 5 FAX ONLY MODE Fax Answers all c...

Page 58: ...a call is from a fax machine or a telephone RING START TIME setting Adjust the length of time the fax rings when the call is a voice call F T RING TIME setting Set whether the fax switches to receive mode after the ring time set in F T RING TIME has elapsed DEFAULT ACTION setting 1 Press Receive Mode Every time you press Receive Mode the mode changes cyclically Press Start Copy The fax returns to ...

Page 59: ... numeric buttons to enter the time the fax rings while waiting for someone to pick up the handset Press Start Copy twice 7 Use or to select RECEIVE or DISCONNECT This setting tells the fax what to do if the handset is not picked up within the specified ring time set in step 6 8 Press Start Copy 9 Press Stop Setting ends and the fax returns to standby mode 8SEC 15SEC RECEIVE ...

Page 60: ...s Start Copy on the fax to begin receiving the document Hang up the handset If the extension phone is located away from your fax dial 25 the remote receiving ID on the extension phone and hang up The fax begins receiving the document If you hear a slow beep tone Someone is trying to send you a document Press Start Copy and hang up the handset If the extension phone is located away from your fax di...

Page 61: ...or voice call Follow the procedure below to set the fax ring pattern that matches the pattern assigned by your telephone company Contact your local telephone company for detailed information on this service 1 Press Function Press Start Copy 2 Use or to select RX SETTINGS Press Start Copy 3 Use or to select DRPD SELECT FAX Press Start Copy 4 Use or to select the ring pattern that your telephone com...

Page 62: ... automatically stores the unprinted pages in memory and the LCD displays REC D IN MEMORY as well as one or more messages For an explanation of the message s and details on the action to take see p 9 17 By enabling this feature print quality will be reduced For highest print quality disable this feature 1 Press Function Press Ink Saver 2 Use or to select ON or OFF Press Start Copy The fax returns t...

Page 63: ...upports polling If the other party is using a Canon fax machine which has the Polling ID function ask them to set the Polling ID of their fax machine to 255 11111111 binary number For details on the Polling ID see the other party s fax machine manual In all other cases the Polling ID is not a concern Your fax cannot do polling transmissions 1 Press Function Press Polling Press Start Copy 2 Dial th...

Page 64: ...n area that does not have the Caller ID service SHOW IN HISTORY Determine if the fax stores phone fax number for rejected calls in memory 5 Use or to select ON YES Press Start Copy If you set to OFF the setting goes on to the next CALL REJECTION setting If you set SHOW IN HISTORY to YES or NO the setting returns to ANONYMOUS 6 If you set ANONYMOUS or OUT OF AREA to ON proceed to step 11 If you set...

Page 65: ...y PLAY MESSAGE The call will be disconnected after the ALT OUTGOING MSG see p 7 1 is played If you set SELECTIVE to ON in step 5 and want to select this setting OUTGOING MESSAGE must have been recorded DISCONNECT The call will be disconnected without notice 12 Press Stop to return to standby mode 1 Press Stop ...

Page 66: ...9 Caller cannot leave a message VOICE MEMO See p 7 6 FAXTEL MESSAGE Message played when the Fax Tel mode is set The fax receives documents automatically and only rings for voice calls FORWARDING MSG Message played when any new telephone messages are forwarded to a forwarding number 1 Press Function 2 Use or to select MSG REGISTRATION Press Start Copy 3 Use or to select OUTGOING MESSAGE You can rec...

Page 67: ...y leave a message or if the call is a fax call the fax is received automatically 12 20 00 NO OGM is displayed on the LCD when no outgoing message has been recorded You must record an outgoing message before you can set TAM MODE see p 7 1 A maximum of 55 messages including an outgoing message alternative message voice memos Fax Tel message and forwarding message with a total maximum recording time ...

Page 68: ...The recording time can be set to 0 30 60 or 120 seconds Press Start Copy 4 Press Stop Setting ends and the fax returns to standby mode USER SETTINGS 30 SECONDS When the recording time is set to 0 the alternative outgoing message is played If an alternative outgoing message has not been recorded the outgoing message is played In this case there will be no beep after the message is played and the ca...

Page 69: ... than 0 If LINE MONITOR VOL is set to 0 you will not be able to hear any incoming messages as they are being recorded 1 Press Function Press Start Copy 2 Use or to select TAM SETTINGS Press Start Copy 3 Use or to select TAM MONITOR Press Start Copy 4 Use or to select ON Press Start Copy 5 Press Stop Setting ends and the fax returns to standby mode USER SETTINGS MESSAGE LENGTH ON ...

Page 70: ...SETTINGS Press Start Copy 3 Use or to select TOLL SAVER Press Start Copy 4 Use or to select ON When TOLL SAVER is set to ON and there are telephone messages the fax will ring twice before answering the call When TOLL SAVER is set to ON and there are no telephone messages the fax will ring five times before answering the call Press Start Copy 5 Press Stop Setting ends and the fax returns to standby...

Page 71: ...nd speak into the microphone to record your voice memo The remaining recording time is displayed on the LCD or Press Start Copy use or to select RECORD and press Start Copy again Then speak into the microphone to record your voice memo 5 Press Stop twice when recording is finished The fax returns to standby mode 1 Press Record 2 Press Record or Start Copy Then speak into the microphone to record y...

Page 72: ...when recording is finished The fax returns to standby mode 1 Press Function 2 Use or to select MSG REGISTRATION Press Start Copy 3 Use or to select the type of message you want to delete 4 Press Delete The fax asks you to confirm that you want to delete the message 5 Press to delete the message If you do not want to delete the message press 3 Use or to select the type of message you want to delete...

Page 73: ...rm that you want to delete the message 6 Press to delete the message If you do not want to delete the message press YES NO You cannot delete the OUTGOING MESSAGE The old outgoing message will be automatically deleted when you record your new message ...

Page 74: ...umber of telephone messages and the number of the message being played ICM No are displayed whenever a message is played 1 Press Delete 2 Press to delete all messages A voice memo is not deleted see p 7 6 If you change your mind and decide not to delete all messages press SUN 17 15 02 05 Press to listen to the message again Repeat Press to play the next message Skip Press twice to play the previou...

Page 75: ...assword before you can use these features see below Registering the password for remote control _ 1 Press Function Press Start Copy 2 Use or to select TAM SETTINGS Press Start Copy 3 Use or to select PASSWORD Press Start Copy 4 Use the numeric buttons to enter a four digit PIN as your password Press Start Copy 5 Press Stop Registration ends and the fax returns to standby mode USER SETTINGS MESSAGE...

Page 76: ...ee p 8 6 it is not necessary to enter your password when you use the FORWARDING MSG feature see p 7 13 If you enter an invalid password you will hear an error tone If you enter two invalid passwords consecutively the call will be disconnected You should enter a remote command within 20 seconds of entering your password If more than 20 seconds elapse after you enter your password and you do not ent...

Page 77: ...Skip Stop playback Delete Delete all ICM Record voice memo End recording Play voice memo Repeat Stop playback Delete voice memo Record outgoing message End recording Record alternative outgoing message End recording Record forwarding message End recording Record FAX TEL switching message End recording Play outgoing message Repeat Stop playback Play alternative outgoing message Repeat Stop playback...

Page 78: ...l cannot be used to set this feature unless a forwarding number has been registered If you set FWD SETTINGS to ON when a forwarding message has not been recorded you will hear a tone instead of a forwarding message when telephone messages are forwarded 1 Press Function Press Start Copy 2 Use or to select TAM SETTINGS Press Start Copy 3 Use or to select FWD SETTINGS Press Start Copy 4 Use or to sel...

Page 79: ... to select AUTO REDIAL Press Start Copy 4 Use or to select ON Press Start Copy twice 5 Use the numeric buttons to enter the number of redial times Press Start Copy twice 6 Use the numeric buttons to enter the redial interval Press Start Copy 7 Press Stop Setting ends and the fax returns to standby mode FWD TEL NUMBER ON 2TIMES 2MIN ...

Page 80: ...essary to enter a password when you use forwarding feature see p 7 16 1 Follow steps 1 to 3 on p 7 13 2 Use or to select ON Press Start Copy 3 Use or to select PIN ENTRY Press Start Copy 4 Use or to select ON Press Start Copy 5 Press Stop Setting ends and the fax returns to standby mode FWD TEL NUMBER OFF FWD TEL NUMBER ...

Page 81: ...ll be disconnected 5 Any new telephone messages will be played 6 When playback ends it will be possible to use the remote control features For the remote control features see pp 7 10 to 7 12 7 Hang up the handset when you have finished When forwarding is not possible You can set the fax to redial the forwarding number a certain number of times at specified intervals when forwarding is not possible...

Page 82: ...TINGS RX SETTINGS PRINTER SETTINGS SYSTEM SETTINGS TAM SETTINGS or CALLER ID menu see pp 8 2 to 8 6 3 Press Start Copy to access the settings under the menu you selected 4 See the tables on the following pages see pp 8 2 to 8 6 for guidelines on selecting and registering settings Use and to scroll through the settings To register a setting or access a sub setting press Start Copy To return to a pr...

Page 83: ...x number SCAN CONTRAST Set the density of the reproduction STANDARD DARKER LIGHTER OFFHOOK ALARM Enable disable the off hook alarm The alarm alerts you that the handset is not seated properly in its cradle ON OFF VOLUME CONTROL Set the volume of the fax sounds LINE MONITOR VOL Set the volume of the line monitor sound during dialing 0 off 1 2 3 ALARM VOLUME Set the volume of the error alarm sound 0...

Page 84: ...y when an error occurs during receiving OUTPUT NO OUTPUT YES PRINT ERROR ONLY ACTIVITY REPORT Enable disable automatic printing of the activity report AUTO PRINT When you set ON your fax is set to print an activity report for every 20 transactions sending and receiving OUTPUT NO OUTPUT YES TX RX SEPARATE Divide the activity management report into sending and receiving transactions ON OFF Name Desc...

Page 85: ...f the fax switches to document receive mode after the fax rings for a specified time when the fax is in the manual receive mode ON OFF RING TIME Set the amount of time the fax will ring before switching to document receive mode 1 to 99 seconds REMOTE RX Enables disables remote receiving ON OFF REMOTE RX ID If you set REMOTE RX to ON you can select the remote receiving ID 00 to 99 MEMORY RX Turn on...

Page 86: ...e speed at which the fax starts transmitting Set this to a lower speed if you have difficulties connecting over long distance or noisy lines 14400bps 9600bps 7200bps 4800bps RX START SPEED Set the speed at which the fax starts receiving Set this to a lower speed if you have difficulties connecting over long distance or noisy lines 9600bps 7200bps 4800bps DAYLGHT SAV TIME Enable disable the dayligh...

Page 87: ...AL INTERVAL Set the period of time between redialing attempts ON OFF 1 to 10 times 2 to 99 minutes PIN ENTRY PIN confirmation ON OFF TAM MONITOR Allows you to screen all incoming calls ON OFF Name Description Settings CALLER ID Determine if the fax displays the caller s name and phone fax number when receiving a call ON OFF ANONYMOUS Allows you to reject anonymous calls REJECTION METHOD Set the wa...

Page 88: ... a report___________________________ Depending on the type of report you can have the fax print the report automatically or you can print it directly The TX report RX report MULTI TX RX report and Memory clear report see p 9 18 can only be printed automatically See REPORT SETTINGS p 8 3 on how and when reports are printed automatically 1 Press Function Press Report 2 Use or to display the type of ...

Page 89: ..._ Normally the fax does not print an activity report for transmitting but you can set the fax to print an activity report every time you send a document See TX REPORT p 8 3 You can set the fax to print an activity report only when an error occurs during transmitting See TX REPORT p 8 3 RX Reception report__________________________ Normally the fax does not print an activity report for receiving bu...

Page 90: ...t Copy for a few seconds The document will be fed out automatically If the document is not fed out gently pull the document out of the fax see below 1 Gently pull any jammed paper out of the fax as shown then press Stop Pull it gently in either direction If you cannot pull the paper out continue with the steps below 2 Open the document tray 3 Gently pull the document guides to remove the gray cove...

Page 91: ...mulating inside the fax and affecting print quality clean the print area of the fax periodically Never use volatile liquids such as thinners benzene acetone or any other chemical cleaner to clean the interior of the fax 1 Disconnect the power cord from the fax 2 Wipe the exterior of the fax with a clean soft lint free cloth moistened with water or diluted dishwashing detergent solution 3 When you ...

Page 92: ...e tissue paper paper towels or similar materials for cleaning 1 Disconnect the power cord from the fax 2 Open the printer cover 3 While holding the scanning unit flip down the scanning unit cover marked with a white strip inside clean the components Wipe with a clean soft lint free cloth moistened with water then wipe with a clean soft dry lint free cloth 4 When you are finished close the printer ...

Page 93: ...he nozzle check pattern Before cleaning the print head you may want to print the nozzle check pattern to test the print head of the BJ Cartridge installed in the fax This test shows if each print head nozzle is operating properly 1 Press Function Press Cleaning 2 Use or to select NOZZLE CHECK Press Start Copy The fax prints the nozzle check pattern Print the nozzle check pattern again after cleani...

Page 94: ... Press Start Copy The fax cleans the print head Do not replace the BJ Cartridge while the fax is printing or performing another operation If you need to unplug the fax wait until it returns to standby mode time and receive mode displayed on the LCD Otherwise the cartridge holder may not be in its home position causing the BJ Cartridge to remain uncapped and dry out 1 Make sure the fax is plugged i...

Page 95: ... your work area 5 With the label facing outwards and align the slot in the cartridge with the yellow post in the fax insert the BJ Cartridge into the cartridge holder a Lower the cartridge lock lever b until you hear a click to lock the cartridge in place The yellow post BJ Cartridge guide should be visible through the slot The BJ Cartridge tilts slightly to the left before lowering the cartridge ...

Page 96: ...per stack is loaded properly in the multi purpose tray and that the paper guide is adjusted correctly see p 1 7 Sheets of paper may be sticking together Be sure to fan the paper stack before loading it in the multi purpose tray This keeps the sheets of paper from sticking together see p 1 7 The multi purpose tray may contain too many sheets Make sure the paper stack in the multi purpose tray does ...

Page 97: ... it is registered correctly see pp 2 11 to 2 13 You may have dialed or have been provided with an incorrect number Dial the number again or check that you have the correct number The receiving party s fax machine may be out of paper Call the receiving party and ask them to make sure paper is loaded in their fax machine There may be other documents being sent from memory Allow time for those docume...

Page 98: ...tion Lower the transmission speed see TX START SPEED p 8 5 Receiving problems Cannot receive a document automatically The fax may not be set to receive automatically For the fax to receive documents automatically the receive mode must be set to FAX ONLY MODE FAX TEL AUTO SW Fax Tel mode or DRPD see p 6 5 or TAM MODE must be set see Chapter 7 The fax may have a document stored in memory Print out a...

Page 99: ... incoming call is from a fax machine In such cases you will have to receive the document manually see p 6 4 Cannot receive a document manually You may have disconnected the call by pressing Start Copy or dialing the remote receiving ID after hanging up Always press Start Copy or dial the remote receiving ID before hanging up the handset otherwise you will disconnect the call see p 6 4 The remote r...

Page 100: ...such problems However if the telephone lines are in poor condition you may have to try again Lower the reception speed see RX START SPEED p 8 5 The sending fax machine may not be functioning properly The sending fax machine usually determines the quality of the document Call the sender and have them make sure their fax machine is functioning properly Cannot receive using Error Correction Mode ECM ...

Page 101: ...being copied separate the pages into smaller stacks If not make the desired number of copies one at a time as needed Telephone problems____________________________ You cannot dial The telephone line may not be connected properly Make sure all line connections are secure see pp 1 4 1 5 The power cord may not be plugged in securely Check that the power cord is plugged securely into the fax and into ...

Page 102: ...supported by the fax Make sure you are using the recommended paper see p 3 3 You may be printing on the wrong side of the paper Some papers have a right side for printing If the print quality is not as clear as you would like it to be try turning the paper over and printing on the other side General problems ______________________________ The fax has no power The power cord may not be plugged in s...

Page 103: ...other party and have them check their fax machine The other party is not using a G3 machine Contact the other party and ask them to send or receive the document using a G3 machine The touch tone rotary pulse setting on your fax is incorrect Set your fax to the setting that matches your telephone line see p 2 6 The receiving fax machine did not answer within 55 seconds after all automatic redialing...

Page 104: ... holder mechanism to move Check for any obstruction paper clip small object etc and also that the orange protective cap and tape are removed from the BJ Cartridge Check also for a paper jam and clear the jam if necessary see p 9 1 Then press Stop and start again The BJ Cartridge may be defective Press Stop Reinstall the BJ Cartridge see p 1 9 and start again In either case if the error does not cl...

Page 105: ...ake longer than normal transmissions Turn off ECM if you need to transmit quickly or if you know your local lines are in good condition see ECM TX p 8 3 MEMORY FULL The fax s memory is full because it has received too many documents or a very long or detailed document Print any documents stored in memory see p 5 14 Then start again The fax s memory is full because you either tried to send or copy ...

Page 106: ... p 9 5 or clear the paper jam see p 9 1 REMOVE DOCUMENT The document is set while printing Remove the document TAM MEMORY FULL Either 55 messages including an outgoing message alternative message voice memos Fax Tel message and forwarding message have been recorded or the total maximum recording time of 10 minutes has been reached Listen to your telephone messages and delete any unnecessary messag...

Page 107: ...ction of the fax during a power failure or while the power is turned off You cannot use the fax to make telephone calls Also if your fax is connected to a telephone you may be able to make telephone calls You cannot send receive or copy documents You can receive voice calls only if a telephone or an extension phone is connected to your fax Memory clear report ___________________________ If you exp...

Page 108: ...od Bubble Jet printing Paper tray capacity Maximum 50 sheets 20 lb 75 g m2 Paper type Plain cut sheet paper Letter A4 Legal Paper weight 17 lb to 24 lb 64 g m2 to 90 g m2 Paper thickness 0 003 in to 0 005 in 0 09 mm to 0 13 mm Image memory Up to 120 pages standard resolution Auto dial functions One touch speed dialing Registration for 9 numbers Coded speed dialing Registration for 70 numbers Ink c...

Page 109: ...14 CHANGE CARTRIDGE message 9 15 CHECK DOCUMENT message 9 15 CHECKPAPERSIZEmessage 9 15 CHECK PRINTER message 9 15 Cleaning BJ Cartridge print head 9 5 button 2 2 9 5 9 6 exterior of fax 9 2 interior of fax 9 2 9 3 periodic 9 2 print head 9 5 scanner components 9 3 Clear button 2 2 2 5 CLEAR PAPER JAM message 9 1 Coded dial Directory button 2 3 5 5 5 6 Coded speed dialing description 2 13 list See...

Page 110: ...X TEL AUTO SW Fax Tel mode description 6 1 setting 6 2 Fax Tel mode description 6 1 setting 6 2 Fax Telephone number registering 2 8 Faxing problems 9 9 FAXTEL MESSAGE deleting 7 7 description 7 1 Forwarded call when a call is received 7 16 FORWARDING MSG deleting 7 7 description 7 1 Forwarding number setting 7 13 Forwardingtelephonemessages 7 13 Function button 2 2 FWD SETTINGS 8 6 FWD TEL NUMBER...

Page 111: ...LTI TX RX Transaction REPORT 8 8 N NO DATA message 9 17 NO OGM message 9 17 Nozzle check pattern printing 9 4 Number mode 2 4 Numbers entering 2 4 NUMBER TO REJECT setting 6 8 8 6 Numeric buttons 2 2 2 4 O OFFHOOK ALARM setting 5 4 8 2 One touch speed dialing buttons 2 2 description 2 11 list See One touch speed dialing list registering numbers and names for 2 11 sending a document using 5 5 One t...

Page 112: ...ing BJ Cartridge 9 5 Report button 2 2 8 7 REPORT SETTINGS menu 8 3 Resolution button 2 2 4 1 5 1 setting scanning 5 1 Rewind Forward buttons 2 2 7 8 RING COUNT setting for INCOMING RING setting 8 4 for TOLL SAVER setting 8 6 ROTARY PULSE setting 8 2 RX CALL LEVEL setting 8 2 RX REDUCTION setting 8 4 RX Reception REPORT description 8 8 setting 8 3 RX SETTINGS menu 8 4 RX START SPEED setting 8 5 S ...

Page 113: ...ad 9 5 fax 1 10 Time setting 2 7 TOLL SAVER setting 7 5 8 6 Tray document 1 1 2 1 multi purpose 2 1 TTI Transmit Terminal Identification 2 7 TTI position setting 8 2 TX Transmission REPORT description 8 8 setting 8 3 TX SETTINGS menu list 8 3 TX START SPEED setting 8 5 TX TERMINAL ID setting 8 2 TX RXCANCELLEDmessage 9 17 TX RX NO nnnn message 9 17 U UNIT NAME setting 8 2 Uppercase letter mode 2 4...

Page 114: ...nufacturer or producer thereof This limited warranty covers all defects encountered in normal use of the Product and does not apply in the following cases a Loss of or damage to the Product due to abuse neglect mishandling improper packaging by you alteration accident electrical current fluctuations improper use failure to follow operating or maintenance instructions or environmental conditions pr...

Page 115: ...0 Repair or Exchange Service Options In the event service is required for any Canon product during the limited warranty period Canon offers two support options 1 Authorized Service Facility Carry in Mail In Service 2 InstantExchange Service Program Telephone Device for the Deaf TDD 1 866 251 3752 The Repair and Exchange Service options along with details and conditions of each are available at the...

Page 116: ... A 17 quai du President Paul Doumer 92414 Courbevoie Cedex France CANON U K LTD Woodhatch Reigate Surrey RH2 8BF United Kingdom CANON DEUTSCHLAND GmbH Europark Fichtenhain A10 47807 Krefeld Germany CANON ITALIA S p A Via Milano 8 20097 San Donato Milanese MI Italy CANON LATIN AMERICA INC 703 Waterford Way Suite 400 Miami Florida 33126 U S A CANON AUSTRALIA PTY LTD 1 Thomas Holt Drive North Ryde Sy...

Reviews: