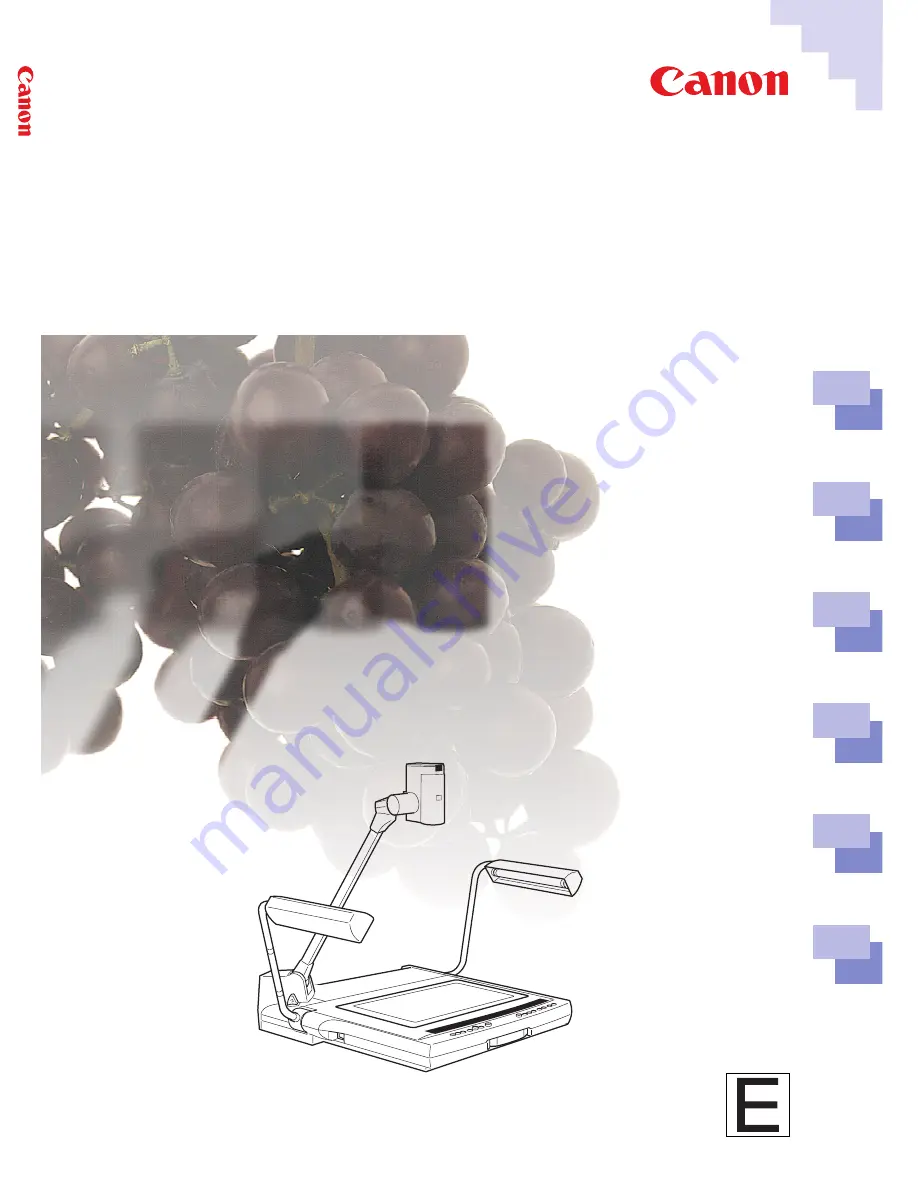
background image

DIGITAL DOCUMENT CAMERA

DZ-3600U

3

1

2

4

5

Please read this User’s Guide carefully before operation.
Be sure to read the “Safe Use of the Equipment” section before using this equipment.
Store this Guide in a readily accessible location for future reference.

S

etup for Operation

with a Computer

M

astering the

Basics

User’s Manual

An i

ntroduction

to the Features

O

perating without

a Computer

T

roubleshooting

A

ppendix

ENGLISH

CANON INC.

30-2, Shimomaruko 3-chome, Ohta-ku, Tokyo 146-8501, Japan

U.S.A. —— CANON U.S.A., INC. NEW YORK OFFICE

One Canon Plaza, Lake Success, NY 11042, U.S.A.
Phone: 516-328-5960

CANON U.S.A., INC. LOS ANGELES OFFICE
15955 Alton Parkway, Irvine, CA 92718-3616, U.S.A.
phone: 714-753-4320

JAPAN —— CANON SALES CO., INC.

7-2, Nakase 1-chome, Mihama-ku, Chiba 261-8711, Japan

IMPRIMÉ AU JAPON

PUB.Z-IE-095-VI

1198SE2

©CANON INC. 1998

PRINTED IN JAPAN

DIGIT

AL DOCUMENT CAMERA  

DZ-3600U

U

ser’

s Manual

Summary of Contents for DZ-3600U

Page 1: ... the Equipment section before using this equipment Store this Guide in a readily accessible location for future reference Setup for Operation with a Computer Mastering the Basics User s Manual An introduction to the Features Operating without a Computer Troubleshooting Appendix ENGLISH DIGITAL DOCUMENT CAMERA DZ 3600U User s Manual ...

Page 2: ...flat documents to 3 dimensional objects OHP transparencies negative films and others Just turn the camera head to capture white board images or to pan a conference room Remote Controls You can conduct a computer driven presentation without having to touch the computer if it is linked via a USB cable since you can control it from the DZ 3600U s remote control or control panel All the Advantages of ...

Page 3: ... most efficient use of them to suit your own purposes Users Guide This Guide This guide starts off with an introduction and explanation of the safe use of the equipment then the first chapter discusses procedures for connecting the power cord and other devices instructions for installing the software and preparations for using the equipment with a computer The second chapter explains the basic ope...

Page 4: ...TRIC SHOCK DO NOT REMOVE THE COVER OR BACK OF THE EQUIPMENT THERE ARE NO USER SERVICEABLE PARTS INSIDE REFER SERVICING TO QUALIFIED SERVICE PERSONNEL The serial number of this equipment may be found on the rear of the equipment No others have the same serial number as yours You should record the number and other vital information here and retain this guide as a permanent record of your purchase to...

Page 5: ...ry to correct the interference by one or more of the following measures Reorient or relocate the receiving antenna Increase the separation between the device and receiver Connect the device into an outlet on a circuit different from that to which the receiver is connected Consult the dealer or an experienced radio TV technician for help Use of shielded cable is required to comply with Class B limi...

Page 6: ... in this guide because they may be hazardous Always use the specified connection cables Ensure that devices are correctly connected 7 Water and Moisture Hazard of Electric Shock Do not use the equipment near water or in rainy moist situations Do not put a heater near this equipment 8 Placement and Transport Do not place the equipment on an unstable cart stand tripod bracket or table The equipment ...

Page 7: ...equipment from the electrical outlet and all power sources including batteries and refer servicing to qualified service personnel under the following conditions a When the power cord or plug is damaged b If any liquid has been spilled into or objects have fallen into the equipment c If the equipment has been exposed to rain or water d If the equipment does not operate normally even if you follow t...

Page 8: ...esult in fire or electric shock Do not use flammable sprays near the equipment Do not subject the equipment to strong impacts 22 Please observe the following when handling the batteries Failure to do so may result in the batteries bursting or emitting heat sparks or corrosive fluid Do not throw the batteries into a fire and do not heat short circuit or attempt to disassemble them Do not attempt to...

Page 9: ...r and projector Its single remote control places the powerful features of the DZ 3600U its software and other programs such as PowerPoint at your fingertips Presentation Examples Conference papers OHP transparencies Pictures of products and landscapes slide films negatives numerous photographs can be lined up and compared or analyzed Books opened to any page Full size products or scale models Film...

Page 10: ... dimensional objects and films As a Conventional Visualizer Of course the DZ 3600U fits the bill as a conventional visualizer video output device connected directly to a video monitor or a projector Instant 3 D scanning to capture those difficult contours Get your message across clearly with the superior reproduction of the DZ 3600U A La Carte Menu of DZ 3600U Applications ...

Page 11: ...ng Images 33 Rotating Captured Images 34 Closing Software Programs 35 Turning Off the Power 36 Knock Down 37 Transport Precaution 38 Chapter 3 An Introduction to the Features About the Bundled Software 40 The Two Programs to Install 40 DZ 3600U Presentation Software 40 DZ 3600U TWAIN Driver 41 Preview Mode and Still Mode 42 Preview Mode 42 Still Mode 43 Toolbar and Status Bar 44 Toolbar 44 Status ...

Page 12: ...e Surroundings 81 Using the Finger Pointer 82 Displaying the Finger Pointer 82 Moving the Finger Pointer 83 Interfacing with PowerPoint 84 Switching between Application Programs 84 Controlling Slides 85 Scanning Images with TWAIN Driver 86 Selecting the Input Device 86 Using TWAIN Driver 87 refers to preview mode functions refers to still mode functions Chapter 4 Operating without a Computer Conne...

Page 13: ...t from the Box 106 Packing List 108 Changing the Remote Control Batteries 109 Components Guide 110 Main Unit 110 Rear Panel of the Main Unit 111 Control Panel 112 Remote Control 113 Camera Head 114 Toolbar Preview Mode 115 Toolbar Still Mode 116 Specifications 117 Glossary 118 Index 120 Table of Contents ...

Page 14: ...1 Chapter 1 Setup for Operation with a Computer ...

Page 15: ... a power cord other than the one supplied Plug it into a 120 volt electrical outlet only Use with other voltages may result in fire electric shock or other hazards Ensure that the power switch on the main unit is set to Off before you plug in the power cord VIDEO S VIDEO VIDEO S VIDEO USB AC INLET 60 100 HandShake Reserved Service Mode RS 232C OFF ON OUTPUT EXT IN 1 EXT IN 2 1 Insert the female en...

Page 16: ...the main unit and all other devices 2 Insert one end of the USB cable into the USB port on the main unit s rear panel Rear Panel of the Main Unit Computer USB Cable 3 Insert the other end of the USB cable into the computer s USB port To Connect a Projector or Large Screen Monitor Insert one end of the VGA cable into the computer s video output port and the other end into the video input port of th...

Page 17: ...proximately 5 MB and 50 high resolution captured images require approximately 15 MB Display 800 x 600 SVGA or bigger display board or PC monitor capable of displaying any one of the 16 bit 24 bit or 32 bit modes 1024 x 768 XGA or better display is recommended Operating System Windows 95 4 00 950b OSR 2 1 with USB Supplement Windows 95 4 00 950c OSR 2 5 with USB Supplement Windows 98 Some computers...

Page 18: ...he major graphics programs on the market Important These instructions cover the basic procedures for installing the software Persons new to PCs should follow these instructions to the letter Note Experienced computer users who wish to change the target directory or folder for the installation should comply with the on screen instructions 1 Confirm that the main unit s power is off 2 Turn on the co...

Page 19: ...ility does not automatically start up after a long interval double click the My Computer icon on the Windows desktop and double click the CD ROM icon in the My Computer window Double click the SETUP icon which appears in the next window The setup utility will start 4 Click the Next button 5 Click the Next button Installing the Software ...

Page 20: ...to place a check mark in it By placing a check mark in this box you are setting it so that Presentation Software will automatically start when you turn on the computer and run Windows a shortcut will be placed in Window s Startup folder p 29 Installing the Software 6 Click the Next button 7 Click the Next button ...

Page 21: ...te This concludes the software installation process 12 Turn off the computer its monitor and any other peripherals 11 Click the Windows Start button on the taskbar select Shut Down from the menu and follow the correct procedures to shut down Windows Alternatively you may keep Windows running turn on the DZ 3600U and start up Presentation Software at this point p 29 Installing the Software ...

Page 22: ...e We will have you try various operations using this remote control in the next chapter If there are no batteries in the remote control see Changing the Remote Control Batteries P 109 for instructions Note There are some differences between the functions that can be accessed through the main unit s control panel and the remote control FOCUS BRIGHTNESS CAPTURE RESOLUTION PREVIEW W ZOOM T LIGHTS COL...

Page 23: ... clicking with all their might We highly recommend that you plan an on site rehearsal before starting a presentation Note The effective range of the remote control from the remote control sensor is approximately 16 ft 5 m at 120 degrees horizontally and 30 degrees vertically Check the Battery Charge Prior to Use The cause of a remote control not responding at all during a presentation is generally...

Page 24: ...2 Chapter 2 Mastering Basic Operations ...

Page 25: ...ter 1 Setup for Opera tion with a Computer before resuming the steps below Do not place the equipment on an unsteady table or object subject to vibration Movement of the camera head or filmed object and changes in lighting may corrupt the image capture Skip this and the following page if the three arms two front lights and one camera arm have already been erected Start from Turning On the Power P ...

Page 26: ...ly 5 Grasp the camera arm and lift it up until it locks into place with a click 6 Swivel the camera head horizontally until it clicks into place 7 Orient the camera head so that the lens points directly onto the object stage Check to make sure that the switch for the closeup lens on the right of the camera head is set to On p 97 Arm Lock Release Lever Assembly ...

Page 27: ...ht for about 20 seconds after the power is turned on while the main unit initializes itself It will indicate the ready state when only the power indicator and a few other indicators remain lit 2 Turn on the other devices that you ll be using computer monitor computer CPU projector etc Actually there is no predetermined order in which the main unit computer and projector has to be turned on POWER ...

Page 28: ...indows Start button on the taskbar and select Programs Canon DZ 3600U and Presentation Presentation Software will start and display the window above Important Do not detach the USB cable or turn off the main unit while an applica tion program is running Note If you wish to stop Presentation Software from automatically starting when you run Windows click the Windows Start button and select Settings...

Page 29: ... putting your hand on the document or object Notice how the display changes in real time The movement may appear slightly irregular on the screen This real time display is referred to as the preview mode More details about this are contained in Chapter 3 At this point it is sufficient to confirm that the real time display is working Note Please note that the minor decrease in image quality and irr...

Page 30: ...as zooming can also be controlled from the main unit s control panel or your computer This explanation in this chapter is written on the premise that you will probably use the remote control in an actual presentation For instructions for controlling the DZ 3600U from the control panel or a computer see the respective explanations in Chapter 3 In this chapter we explained how one image is captured ...

Page 31: ...ction 1 Press the T button on the remote control for two or three seconds The display will show a close up of the document or object 2 Press the W button in the same manner The display will gradually return to its former state FOCUS BRIGHTNESS CAPTURE RESOLUTION PREVIEW W ZOOM T LIGHTS COLOR AUTO NEAR FAR APP REV FWD A Few of the Basics ...

Page 32: ...rn This is discussed in Chapter 3 You will note the high resolution of this image compared to the previous real time images Now try placing you hand on the document or object in the same manner as before Note that nothing will change in the display That is because the display is not currently showing a real time image Instead it is showing an image that has been loaded into the computer The DZ 360...

Page 33: ...age will rotate 90 degrees counterclockwise each time the button is clicked Although there are still numerous other functions to demonstrate we will draw this session on the basics to a close in order to describe the shut down procedures in the following pages FOCUS BRIGHTNESS CAPTURE RESOLUTION PREVIEW W ZOOM T LIGHTS COLOR AUTO NEAR FAR APP REV FWD ROTATE A Few of the Basics ...

Page 34: ... message will appear asking if you wish to close the program without saving the captured image 3 Click the No button Since there is no need to save this image for the purposes of this demonstration the No button is selected Important If the closebox is clicked before the captured image has been saved to disk the Save confirmation window will display Click the Yes button in this message to save the...

Page 35: ...lt in a malfunction 1 Click the Windows Start button on the taskbar and select Shut Down following the correct procedures to close Windows 2 Press the power switch on the DZ 3600U main unit to set it to the position The main unit will power down 3 Turn off the other devices such as the computer and projector Actually there is no predetermined order in which the main unit computer and projector has...

Page 36: ...ointing up 2 Turn the camera head in a horizontal plane to align the grooves Arm Lock Release Lever 3 Support the arm with your right hand while you push the arm lock release lever with your left The arm will now move freely Important Always support the camera arm with one hand before you push the arm lock release lever Failure to support it may result in the camera head crashing down unexpectedly...

Page 37: ...these tubes directly with any part of your body and wait until they have cooled before placing the cover over the unit Store the equipment in a horizontal position It may fall over and cause injury or damage if stored vertically Before the equipment is picked up or moved ensure that the power is turned off all the cords and cables are unplugged and the arms are folded down Pick it up by the carryi...

Page 38: ...3 Chapter 3 An Introduction to the Features ...

Page 39: ...splay with a projector or other device Because you can capture any number of images in advance and even switch between application programs on the fly your presentations will progress smoothly and naturally Moreover most of the functions can be operated with the remote control which can be easily managed by virtually anyone Note Presentation So ftw are also w orks with Primary Pr esentation Applic...

Page 40: ...he DZ 3600U This driver allows you to use the graphics programs with which you are the most familiar to operate the DZ 3600U as a three dimensional scanner For operating instructions refer to the section entitled Capturing Images with TWAIN Driver P 86 Important Application programs must be TWAIN compliant TWAIN_32 to be used with the DZ 3600U TWAIN Driver About the Bundled Software ...

Page 41: ...ctions f or swit ching betw een the tw o modes ar e contained in the explanations f or v arious functions P 50 60 Preview Mode The preview mode is for viewing objects in real time on a computer display or other device connected to the computer such as a projector or large screen monitor Wide Frame A wide frame appears around the edges of the display when this mode is active Since the image changes...

Page 42: ...arge screen monitor that have been loaded from the DZ 3600U into the computer Off Line Display of Images Loaded onto a Computer In still mode you can switch between or change the display size of numerous previously loaded images You can tell when Presentation Software is in this mode because the wide frame is missing from the edges of the image Preview Mode and Still Mode ...

Page 43: ...me buttons such as the button are split into two sections with a left and right portion Please note that each section represents a different command Note Positioning the mouse cursor o ver a butt on will cause its name t o display after a fe w moments Status Bar The status bar is the area that appears directly under the toolbar This bar automatically displays the current mode and various other mes...

Page 44: ...ar and status bar will display Hide the Toolbar and Status Bar Method 1 Click any part of the window away from the toolbar or status bar the image display section Method 2 Position the mouse on any part of the window away from the toolbar and status bar for approximately 2 seconds The toolbar and status bar will disappear Note The examples abo ve are of the pr eview mode but the same pr ocedur es ...

Page 45: ...omatically switches to still mode to display the captured image Presentation Software remains in still mode when the capture command is executed in still mode showing the newly captured image in the display Note You can select the r esolution setting f or the image captur e For det ails see Selecting the Captur e Resolution P 48 Procedure with the Remote Control Capturing Images Press the Capture ...

Page 46: ...ITE BALANCE NEGA DETAIL Capturing Images Press the Capture button You will capture the subject appearing in the camera lens when the button is pushed Procedure with the Computer Capturing Images Click the button You will capture the subject appearing in the camera lens when the button is clicked Preview Mode Still Mode Capturing Images ...

Page 47: ... longer time r equired to captur e and display the image It pays t o set the r esolution to the optimal v alue f or the specific object type and the purpose f or which it is being captured When images are captured at the High Resolution setting the camera head will emit so ft noises as the lens shifts within it Procedure with the Remote Control Selecting the Capture Resolution Press the Resolution...

Page 48: ...tings The resolution setting will display on the Presentation Software status bar Procedure with the Computer Selecting the Capture Resolution Click the to the right of the button and select High Resolution or Low Resolution from the menu The image will be captured at the selected resolution Each click of the button will cause the image before the camera lens to be captured at the selected resolut...

Page 49: ...cedure with the Control Panel Switching to Preview Mode In still mode press the Preview button The DZ 3600U will switch from the still mode to the preview mode and begin to display images in real time Procedure with a Computer Switching to Preview Mode Click the button The DZ 3600U will switch from the still mode to the preview mode and begin to display images in real time FOCUS BRIGHTNESS CAPTURE...

Page 50: ...ay resolution setting has no effect upon the resolution at which images are captured Display rates depend upon the characteristics of the computer system It is easier to align objects on the object stage when the High Speed is selected Procedure with the Remote Control Selecting the Display Resolution In preview mode press the Preview button The selection will switch between High Clarity and High ...

Page 51: ...e button to the right of the button and select either High Clarity or High Speed from the menu The display resolution and display rate will change In still mode click this button to switch into preview mode and select a display resolution Selecting the Display Resolution ...

Page 52: ...window is the Presentation Histories folder within the My Documents folder Saving Just the Displayed Image This method allows you to save only the current image in the display to disk You can select between the JPEG JPG and bitmap BMP file formats This method can only be selected in still mode Note There are many image file formats currently in use Presentation Software can save in two of the most...

Page 53: ... menu will display 3 Specify a folder and file name then click the Save button All of the files that have been captured up to this point will saved as Presentation Software files Preview Mode Still Mode 2 Click Save History The Save As dialog will display Saving Images ...

Page 54: ...Software is in still mode and display the image you wish to save 2 Click the button A menu will display 3 Click Export Current Image The Save As dialog will display 4 Specify a folder file name and file format then click the Save button This will save the image as an image file Saving Images ...

Page 55: ... display 3 Specify the folder location and folder name then click the OK button To change the suggested folder location click the Browse button to the right A folder with the specified name will be created in the specified location and all the images files will placed in it along with an HTML index file Preview Mode Still Mode Saving Images ...

Page 56: ...he following window will display if the HTML index file created by the Saving All Images and the HTML Index method is opened with a browser program for viewing Internet web sites Click the Image1 Image2 etc icons to open and display each respective image file ...

Page 57: ... file causes the unsaved images that have been captured up to that point to be lost If there are unsaved images when you attempt to open a file a confirmation message will display Use this message to save or erase these images Preview Mode Still Mode 1 Click the button A menu will display 2 Click Open History The Open dialog will display 3 Select the file you wish to open and click the Open button...

Page 58: ... Xs represent the number of the current image and the Ys represent the total number of images captured Procedure with the Remote Control To Reverse the Display to the Previous Image Press the REV button The image immediately prior to the currently displayed image will display In preview mode Presentation Software will switch into still mode and display the last captured image To Forward the Displa...

Page 59: ...y displayed image will display In preview mode Presentation Software will switch into still mode and display the last captured image To Forward the Display to the Next Image Click the button The image immediately after the currently displayed image will display Preview Mode Still Mode Forwarding Reversing the Display to the Next Image ...

Page 60: ...select You can delete an image by selecting it from the list and clicking the Delete button All of the captured images can be deleted at once by clicking the Delete All button Procedure with the Remote Control This command cannot be executed with the remote control Procedure with the Control Panel This command cannot be executed with the control panel Procedure with a Computer To Select a Previous...

Page 61: ...in a blurred image The image may be out of focus if it is over zoomed and the switch for the closeup lens is set to Off For instructions regarding the closeup lens see Shooting the Surroundings P 81 Procedure with the Remote Control Zoom Out Press the W button Zoom In Press the T button Procedure with the Control Panel Procedure with a Computer Zoom Out Click the button Zoom In Click the button WI...

Page 62: ...ed larger than the window scroll bars appear on the right and bottom of the window It is also easy to shift the image in the display with the cursor buttons on the remote control Procedure with the Remote Control Procedure with the Control Panel This command cannot be executed from the control panel Still Mode FOCUS BRIGHTNESS CAPTURE RESOLUTION PREVIEW W ZOOM T LIGHTS COLOR AUTO NEAR FAR APP REV ...

Page 63: ... the zoom setting with the computer Method 1 This method uses the Zoom Out Zoom In buttons Method 2 This method uses the pull down menu on the status bar to select a zoom setting Select a Display Size Click the arrow here and select a size from the list Zoom Out Click the button Zoom In Click the button ...

Page 64: ...istinguish it from the white of the object stage When the document is extremely dark the image quality can be improved by placing a piece of black paper behind it The brightness can be adjusted with the control panel even in still mode However the change in brightness cannot be verified unless a video monitor is directly connected to the DZ 3600U Procedure with the Remote Control FOCUS BRIGHTNESS ...

Page 65: ...IGHTNESS FOCUS ZOOM EXT IN IN1 Green IN2 Orange LIGHTS W T Adjusting the Brightness Turn the Brightness dial Twisting the dial clockwise brightens the image Twisting it counterclockwise darkens the image Darker Click the button Adjusting the Brightness of Preview Images Brighter Press the button ...

Page 66: ... or greater with the lens zoomed in It may be difficult to focus on some objects such as glossy items translu cent items dark cloth and other items with a low reflection profile with the autofocus Use the manual focus for these objects The focus can be adjusted manually even in still mode if the control panel is used However the change in focus cannot be verified unless a video monitor is directly...

Page 67: ... a Closer Setting Press the Near button Autofocus will shut off when the button is pressed To Adjust the Focus to a More Distant Setting Press the Far button Autofocus will shut off when the button is pressed WIDE TELE NEAR FAR MANUAL AUTO BRIGHTNESS FOCUS ZOOM EXT IN IN1 Green IN2 Orange LIGHTS W T Procedure with a Computer This function cannot be controlled from a computer Adjusting the Focus of...

Page 68: ...be verified unless a video monitor is directly connected to the DZ 3600U Procedure with the Remote Control This function cannot be controlled with the remote control Procedure with the Control Panel SOFT HARD RED BLUE MANUAL AUTO WHITE BALANCE NEGA DETAIL NEAR FAR MANUAL AUTO BRIGHTNESS FOCUS Adjusting Detail Turn the Detail dial Twisting the dial clockwise increases the detail Twisting it counter...

Page 69: ...ained in the Quick Reference Guide onto the object stage as shown in the diagram 2 Zoom the chart until it completely fills the window 3 Press the Auto button in the white balance section of the control panel The auto indicator will flash until the white balance is reset then it will turn off Replace the White Balance Adjustment Chart with your presentation materials and proceed with your presenta...

Page 70: ...l reset and the indicator will go off At this point the auto white balance will be off and the manual dial to the right will be enabled If the button is pressed while the auto indicator is off auto white balance will be restored Adjusting the Color Balance Adjust the color balance by twisting the Manual dial while the auto indicator is off Twisting the dial clockwise strengthens the blue hues whil...

Page 71: ... is wide Assuming that you would normally place this page on the object stage vertically correct orientation a portion of the page will protrude beyond the camera s field on the vertical axis If instead you place it on its side horizontal or landscape orientation and use the rotate function to shift the image 90 degrees the entire page will fit into the camera s field The image is captured with th...

Page 72: ... panel Procedure with a Computer To Restore the Original Orientation Click the button To Rotate 90 Degrees Click the button The image will rotate 90 degrees counterclockwise causing a document that was placed sideways on the object state to appear vertical Adjusting the Orientation of Preview Images ...

Page 73: ...ton is pressed FOCUS AUTO NEAR FAR APP REV FWD ROTATE Procedure with the Control Panel This command cannot be executed with the control panel Procedure with a Computer There are two ways to rotate captured images with a computer Method 1 This method rotates the image 90 degrees at a time To Rotate the Image 90 Degrees at a Time Click the button The image will rotate 90 degrees counterclockwise eac...

Page 74: ...to select from the Rotate Left 90 Rotate Right 90 and Rotate 180 options To Select an Angle and Rotate the Image Click the arrow button to the right of the button and select an option from the menu The image will rotate through the specified arc Rotating Captured Images ...

Page 75: ...er with black type for example masks the blue color but greatly enhances the legibility of the black type Procedure with the Remote Control To Switch to Color Grayscale Monochrome Mode Press the Color button The mode switches to color grayscale and monochrome in sequence with each press of the button Procedure with the Control Panel This command cannot be executed with the control panel Procedure ...

Page 76: ...t their mechanisms Please do not press the button again because they have not come on right after the button was first pressed Light escaping directly from the backlight will strike the camera lens and adversely affect image quality To reduce this zoom in on the film as much as possible to exclude unwanted light Note To view negative film turn on the backlight with the procedures described here an...

Page 77: ... lights on and backlight on with each press of the button Procedure with a Computer To Turn the Front Lights and Backlight On Off Click the button and select either the Front Lights Back light or Lights Off option from the menu WIDE TELE NEAR FAR MANUAL AUTO BRIGHTNESS FOCUS ZOOM EXT IN IN1 Green IN2 Orange LIGHTS W T Using the Front Lights and Backlight ...

Page 78: ...negative mode Procedures Required for showing Negative Films 1 Press the NEGA button and then place the negative film strip in the center of the backlit object stage 2 Zoom up on the desired frame until it fills the window 3 Press the white balance Auto button on the control panel The auto indicator will shut off 4 Press the white balance Auto button again after you have finished viewing the frame...

Page 79: ...ert the image to change the perspective Right View of the Camera Head To Restore the Original Orientation Press the Reset button Pressing the button resets both the flip and mirror settings to the starting point To Flip the Image Press the Flip button The image will flip or change back with each press of the button To Reverse the Image Press the Mirror button The image will reverse or change back ...

Page 80: ...ring a presentation It is not designed to take fast close ups of individuals from the audience To shoot objects farther from the lens than the object stage switch off the closeup lens on the camera head However do not forget to turn the closeup lens back on when zooming in on objects on the object stage which might otherwise appear out of focus Note The camera head can be swiveled 90 degrees to ei...

Page 81: ...with the Remote Control To Show Hide the Finger Pointer Press the button labeled with the pointing hand The finger pointer is shown or hidden each time the button is pressed Procedure with the Control Panel This command cannot be executed with the control panel Procedure with a Computer To Show Hide the Finger Pointer Click the button The finger pointer is shown or hidden each time the button is c...

Page 82: ...by the cursor button Press continuously on any cursor button to keep moving the finger pointer in that direction Procedure with the Control Panel This command cannot be executed with the control panel Procedure with a Computer To Move the Finger Pointer Drag the finger pointer to the desired position The finger pointer can be moved freely about by clicking it with the mouse and dragging it to a ne...

Page 83: ...ote control The window of the previously active application will display Press the APP button again to return to the Presentation Software window FOCUS BRIGHTNESS COLOR AUTO NEAR FAR APP REV FWD ROTATE Still Mode Preview Mode Note The following is an example of the procedures for switching to and from a PowerPoint slide show 1 Start DZ 3600U Presentation Software 2 Minimize the Presentation Softwa...

Page 84: ...the display to the next slide The REV button will advance the display to the preceding slide Note This function can be used in situations similar to the following example The presenter presses the APP button to switch from Presentation Software to PowerPoint The presenter explains various slides moving back and forth in the PowerPoint slide show with the FWD and REV buttons The presenter then pres...

Page 85: ... guides for specific instructions Please use the control panel to manually adjust the white balance while TWAIN Driver is running P 70 Selecting the Input Device To use TWAIN Driver the DZ 3600U must first be selected as the input device in the settings of the application An item such as TWAIN_32 Device or Select Source should appear in the application s File menu or one of its submenus Click on t...

Page 86: ... used to control the TWAIN Driver To select the image orientation To adjust the brightness setting To adjust the zoom setting To select the color grayscale or monochrome data type Click the beside the Viewing Document item in the window to display the menu below This setting allows you to select from two options to match the color settings to the type of image being captured Viewing Documents Sele...

Page 87: ...ze dimensions expressed in pixels at which images are captured After you have adjusted the settings to your satisfaction click the Capture button This will cause TWAIN Driver to capture the image and display it in the application s window When you have finished the capture click the Close button Scanning Images with TWAIN Driver ...

Page 88: ...4 Chapter 4 Operating without a Computer ...

Page 89: ... a cable long enough to reach between the devices at the site in which they will be used Standard television sets may be used as video monitors if they are equipped with a video in jack S Video Cable 1 Ensure that the main unit and other devices are turned off 2 Insert the plug on one end of the S video cable into the S video output port on the main unit Rear Panel of the Main Unit 3 Insert the pl...

Page 90: ...v ailable on the market Conversely you may use a pin type video cable o f the kind commonly used on home use VCRs with a Pin to BNC adapter attached to the DZ 3600U end of the cable However this type o f cable is gener ally pr one to significant signal loss which means that the decr ease in image quality will incr ease in proportion t o the length o f the cable An external VCR may also be connecte...

Page 91: ...this case Similarly input through a BNC video cable must be output through the video output port Accordingly ensure that the cable you use between the DZ 3600U and the video monitor or projector is the same type as that used between the DZ 3600U and the external input device Note Up to tw o external input de vices may be connected at one time If both devices are connected the video feed can be fre...

Page 92: ...n unit and other devices are turned off 2 Insert the plug at one end of the S video or BNC video cable to the respective EXT In 1 or EXT In 2 port 3 Insert the plug on the other end of the S video or BNC video cable to the respective video output port on the external input device S Video Cable or BNC Video Cable External Input Device VCR Video Camera Digital Camera Communication Camera Connecting ...

Page 93: ...he power switch which is located on the left side of the main unit The power in the main unit will come on and the power indicator on the control panel the front panel on the main unit will light 2 Turn on the power of the other connected devices video monitor etc Turning Off the Power 1 Press the side of the power switch which is located on the left side of the main unit The main unit will power ...

Page 94: ...s connected Resolution Button Indicator Used only when a computer is connected Preview Button Indicator Used only when a computer is connected White Balance Button Indicator Dial Adjusts or resets the color balance p 71 NEGA Button Indicator Used to view negative films p 79 Detail Dial Emphasizes image contours p 69 Brightness Dial Adjusts the image brightness p 66 Focus Button Indicator Adjusts t...

Page 95: ...s and backlight p 77 Color Button Switches between color grayscale monochrome settings p 76 REV FWD Buttons Used only when a computer is connected Rotate Button Used only when a computer is connected Cursor Buttons Used only when a computer is connected APP Button Used only when a computer is connected Focus Button Adjusts the focus p 67 Brightness Button Adjusts the image brightness p 65 Zoom But...

Page 96: ...p and mirror settings to the starting point p 80 Mirror Button Reverses images from left to right p 80 Closeup Lens Switch Switches the closeup lens on and off to change from shooting objects on the object stage to shooting the surroundings p 81 Flip Button Inverts images from top to bottom p 80 Button Functions ...

Page 97: ... de vices may be connected t o the DZ 3600U at once For connection instructions see Connecting t o Other Image Input De vices P 92 The EXT In indicator turns green when data is input from the device con nected to the EXT In 1 port and orange when input from the device con nected to the EXT In 2 port Procedure with the Remote Control This function cannot be controlled with the remote control Proced...

Page 98: ...5 Chapter 5 Troubleshooting ...

Page 99: ...t device EXT In 1 or EXT In 2 been selected as the current image source P 98 Have the input sources for the video monitor and projector been correctly selected Images Are Not Displaying Smoothly Because of the limitations imposed by the transfer rate of the USB cable the movement of real time images will be somewhat irregular on the computer display To view real time images without the time lag co...

Page 100: ...ect too dark Turn on the front lights if necessary P 77 The autofocus may have difficulty focusing on objects that are too glossy virtually translucent or reflect very little light such as dark cloth Use the manual focus on these objects P 67 It may be difficult to adjust the focus when the lens is zoomed in on three dimensional objects or thick documents P 67 The Coloration Is Off Have the color ...

Page 101: ...ssed To protect the lights they do not illuminate until two or three seconds after the power has been applied This is not a malfunction P 77 The Lights Flicker or Are Dim The fluorescent tubes in the front lights or backlight have reached the end of their service lives Replace them if they flicker or are dim Consult the dealer for replacement tubes The Remote Control Will Not Work Is there suffici...

Page 102: ...ew folder name that will be created to hold the exported images Connection to the DZ 3600U has been lost Preview Video not available in this video resolution DZ 3600U Presentation attempted to locate a nonexistent image DZ 3600U Presentation could not allocate needed memory The disk is in use or locked by another process The directory or file cannot be created The file already exists Network acces...

Page 103: ...cations Disk full or insufficient network privileges The user does not have sufficient privileges to create delete or write to a file See your network administrator Disk is full Please archive unneeded file to make more disk space Unable to activate help The specified path is invalid The system cannot open the device or file specified The network resource type is not correct The wrong diskette is ...

Page 104: ...105 Appendix ...

Page 105: ... to transport the equipment in the future Note Although this equipment is primarily used in institutional settings and set up by service personnel or dealers these instructions are provided in case the users need to move or transport the equipment 1 Open the lid of the box 3 Lift the main unit out of the box with the packing materials still attached 2 Remove the accessories from around the main un...

Page 106: ...ght front light 7 Remove the plastic bags from around the front lights 8 Push the lever arm lock release lever at the base of the camera arm and unfold the arm 10 Remove the packing materials taped to the object stage 11 Remove all other tape strips from the equipment Removing the Equipment from the Box ...

Page 107: ...n Software DZ 3600U TWAIN Driver Other Items Main Unit Cover Users Guide this guide Quick Reference Guide Warranty Card Software License Agreement Important Please consult the dealer from which the equipment was purchased if anything is missing from the package FOCUS BRIGHTNESS CAPTURE RESOLUTION PREVIEW W ZOOM T LIGHTS COLOR AUTO NEAR FAR APP REV FWD ROTATE ...

Page 108: ...es with a click Important Do not use rechargeable batteries The shape and performance charac teristics may not operate the remote control correctly Do not mix new and spent batteries together Remove the batteries if the unit will not be used for a long period Remove any battery fluids that leak and replace the leaking cells Remote Control 3 Insert two AA batteries orienting the battery terminals a...

Page 109: ...urce for illuminating objects on the object stage p 77 Object Stage Backlight Stage for resting objects featuring an integral backlight for illuminating films and transparencies p 77 Control Panel Switches for operating the unit Carrying Handle Handle for picking up and carrying the unit Power Switch Switch for turning the unit on and off p 28 Arm Lock Release Lever Release for moving the camera a...

Page 110: ... cord p 16 DIP Switches Electronic shutter Flip this switch when the image is flickering p 101 Handshake usually set to off Reserved usually set to off Service Mode usually set to off Do not change these settings since it will lead to malfunctions 60 100 HandShake Reserved Service Mode OFF ON USB Port Port for connecting computers p 17 EXT IN 2 External Input 2 Video Port S Video Port Input ports ...

Page 111: ...n Indicator Adjusts the focus p 68 White Balance Button Indicator Dial Adjusts the color balance p 71 NEGA Button Indicator Used to view negative films p 79 Detail Dial Emphasizes image contours p 69 Zoom Button Adjusts the image display size p 62 EXT IN Button Indicator Used to throughput images from external input devices to video monitors p 98 Cannot throughput to a computer monitor SOFT HARD R...

Page 112: ...uttons Scroll between images in Presentation Software pp 59 85 Rotate Button Rotates images 90 degrees clockwise in Presentation Software pp 72 74 Cursor Buttons Move the finger pointer in Presentation Software p 83 Scroll images in still mode p 63 APP Button Switches between application programs on the computer p 84 Focus Button Adjusts the focus p 67 Brightness Button Adjusts image brightness p ...

Page 113: ...or Button Reverses images from left to right p 80 Closeup Lens Switch Switches the closeup lens on and off to change from shooting objects on the object stage to shooting the surroundings p 81 Flip Button Inverts images from top to bottom p 80 RESET FLIP ON OFF CLOSEUP LENS MIRROR Components Guide ...

Page 114: ...58 Switchs to still mode p 60 Selects images for display from the list p 61 Switches the orientation of the page p 73 Adjusts the brightness of the preview image p 66 Adjusts the size of the preview image p 62 Switches between color grayscale monochrome settings p 76 Switches front lights and the backlight on and off p 78 Displays Help topics Minimizes the window p 40 Closes Presentation Software ...

Page 115: ...90 degrees counterclockwise with each click p 74 Selects an image rotation angle from the menu p 75 Saves images to disk or opens saved images pp 54 58 Displays the previous image p 60 Displays the next image p 60 Selects images for display from the list p 61 Changes the display size of the displayed image p 64 Closes Presentation Software p 35 Selects a display size for images from the menu p 64 ...

Page 116: ... 33 5 x 25 mm Data Transfer RS 232C 9600 bps USB 12 Mbps Input Internal camera external 1 external 2 Illumination Front lights 6 W fluorescent x 2 high intensity adjustable Backlight 6 W fluorescent x 2 high intensity Other Functions Negative positive color grayscale Monochrome flip mirror Input Output Ports RS 232C serial interface connector 8 pin DIN x 1 USB USB connector Type B x1 Video Input B...

Page 117: ...ot use compression and differ in the way the dots are arranged NEGA The DZ 3600U mode that enables negative films to be scanned much like a paper document This mode produces coloration superior to the method whereby a negative film is scanned as a negative and later inverted with graphics software because it takes the color of the film base into account in calibrating colors If you look carefully ...

Page 118: ...equivalent to a 3 6 million element charge coupled device CCD White Balance The human eye is an extremely adaptable device For example if exposed to a sheet of white paper outdoors at noon it will recognize it as white paper If exposed to the same sheet indoors in a room with the lights off and little ambient light it will still recognize it as white paper Moreover it can even recognize it under t...

Page 119: ... Connecting to a Power Source 16 Control Panel 110 112 Cover 26 D Default Save Location 53 Detail Dial 69 Digital Camera 93 DIP Switch 111 Display Image 55 Displaying Documents 87 Displaying Pictures 87 Display Resolution 51 Display Size 62 63 Display Speed 51 Document Camera 93 DZ 3600U Presentation Software 40 DZ 3600U TWAIN Driver 41 E Electronic Shutter 101 111 Error Message 103 External Input...

Page 120: ...tion 48 Resolution Button 48 REV Button 59 85 Reversing Images 80 Rotate 72 74 Rotate Button 72 74 RS 232C 111 S Safety 5 Save 53 Save Display Image 55 Save History 54 Saving All Images 56 Saving Images 53 Scanner 119 Selecting Images 61 Sensor 24 Setup 20 Shooting Surroundings 81 Slide 85 Software 40 Software Installation 19 Specifications 117 Starting the Software 29 Status Bar 44 Still Mode 43 ...

Page 121: ...da Writing Yoshihito Isogawa Isogawa Studio Tokyo Japan English Writing Christian R P Cowley Concise Communications Corp Vancouver Canada Cartoons Adrian Raeside Koko Press Inc Victoria Canada Illustration Torahiko Omura Moma room Tokyo Japan Cover Photo Midori Theodorakakis J Cat Communications Vancouver Canada ...

Page 122: ...s NY 11042 U S A Phone 516 328 5960 CANON U S A INC LOS ANGELES OFFICE 15955 Alton Parkway Irvine CA 92718 3616 U S A phone 714 753 4320 JAPAN CANON SALES CO INC 7 2 Nakase 1 chome Mihama ku Chiba 261 8711 Japan IMPRIMÉ AU JAPON PUB Z IE 095 VI 1198SE2 CANON INC 1998 PRINTED IN JAPAN DIGITAL DOCUMENT CAMERA DZ 3600U User s Manual ...

Reviews: