Canon D2, Service Manual
Get your hands on the comprehensive service manual for the Canon D2 camera, providing detailed instructions and troubleshooting tips. Download the manual for free from manualshive.com and explore the endless possibilities of capturing breathtaking moments with your Canon D2.
Share
Download


Reviews:
No comments
Related manuals for D2
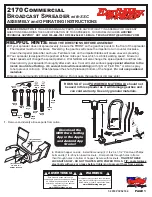
2170
Brand: EarthWay Pages: 8

TC1200
Brand: Datalogic Pages: 160

Gateway
Brand: Neo Car Audio Pages: 16

Charge Analyzer 711
Brand: 3M Pages: 26

E-iSERV CD7200 mkII
Brand: Eclipse Pages: 119

AVN726E
Brand: Eclipse Pages: 230

CD5000 - ECLIPSE - Radio
Brand: Eclipse Pages: 40

avn5435
Brand: Eclipse Pages: 20

AVN2454
Brand: Eclipse Pages: 98

PM-Pro 3
Brand: Hama Pages: 5

VX4010
Brand: Jensen Pages: 6

VM9414
Brand: Jensen Pages: 4

VM9213 - Touch Screen MultiMedia Receiver
Brand: Jensen Pages: 88

Phase Linear CD1213
Brand: Jensen Pages: 46

VX3022
Brand: Jensen Pages: 4

VX3014
Brand: Jensen Pages: 31

VX3014
Brand: Jensen Pages: 4

VX3020
Brand: Jensen Pages: 48


