background image

1

2

3

4

Introduction

Contents at 

a Glance

Downloading 

Images

Camera 

Settings

Remote 

Shooting

Reference

Preferences

Index

Communication Software for the Camera

EOS Utility

Ver. 2.4

Instruction Manual

1Ds Mk III

1D Mk III

40D

REBELXSi

450D

1000D

O

Content of this Instruction Manual

O

EU is used for EOS Utility.

O

Camera model is displayed as an icon.
Example: EOS-1D Mark III 

J


O

 displays the relevant camera model.

O

In this manual, the windows used in the examples 
are from Windows XP.

O

The selection sequence of menus is displayed in 

X


procedures.
(Example: Select the [Window] menu 

X

 [Main Window].)

O

Square brackets are used to indicate items such as 
menu names, button names and window names 
that appear on the computer screen.

O

Text inside < > indicates a camera switch name or 
icon, or a keyboard key name.

O

**

 indicates a reference page. 

Click to move to the relevant page.

O

 : Marks information that should be read before use.

O

 : Marks additional information you may find helpful.

1D Mk III

© CANON INC. 2008     CT1-7161EUaWE-000

O

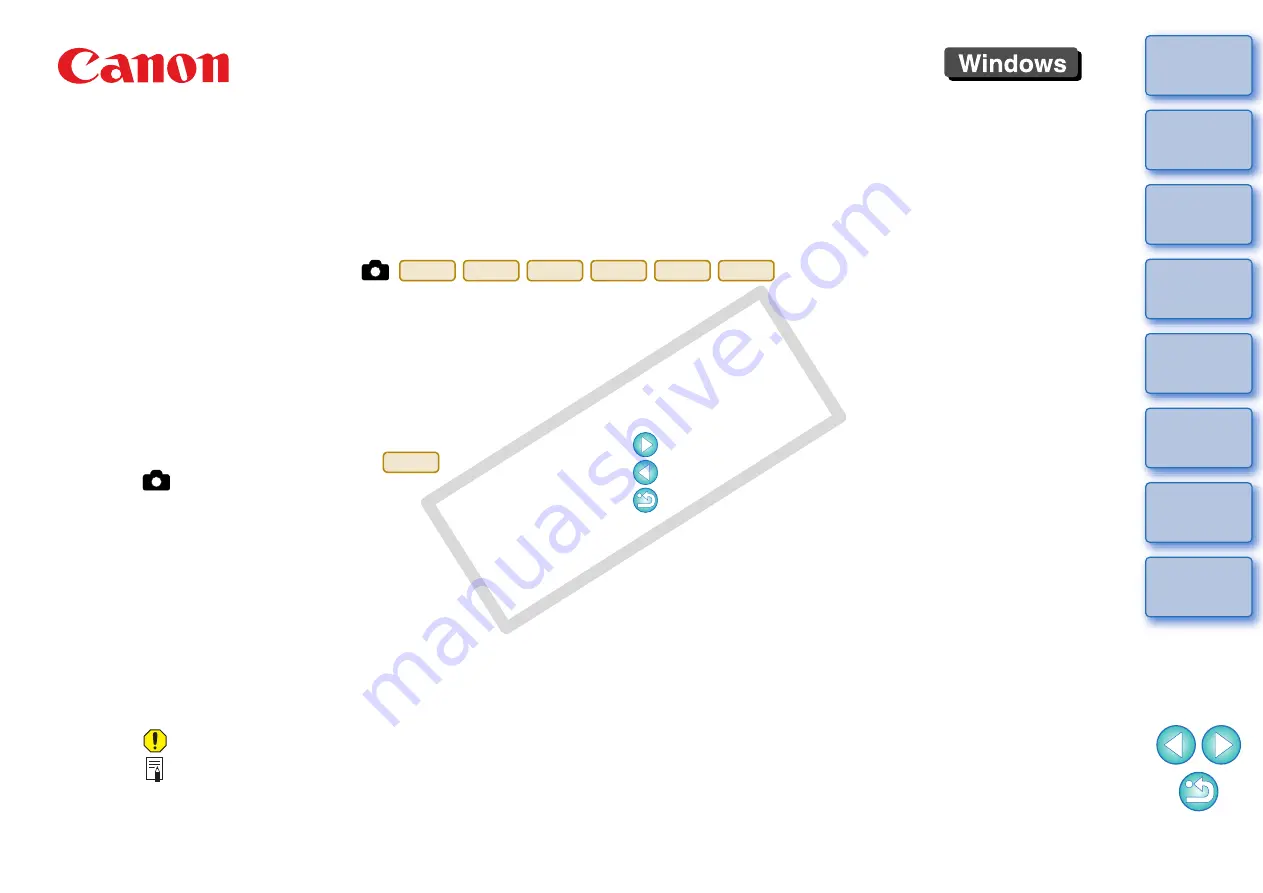
Switching Between Pages

O

Click on arrows on the bottom right of the screen.

 : next page

 : previous page

 : return to a page you had previously displayed

O

Click on the chapter headings on the right side of 
the screen to switch to the contents page of that 
chapter. Also, click the item you want to read about 
on the table of contents to move to the relevant 
page.

CO

PY

Summary of Contents for 9320A010 - EOS Rebel XSi Starter

Page 1: ... Window O Square brackets are used to indicate items such as menu names button names and window names that appear on the computer screen O Text inside indicates a camera switch name or icon or a keyboard key name O indicates a reference page Click to move to the relevant page O Marks information that should be read before use O Marks additional information you may find helpful 1D Mk III CANON INC ...

Page 2: ...INCLUDING ANY WARRANTY OF MERCHANTABILITY OR FITNESS FOR A PARTICULAR PURPOSE WITH RESPECT TO THE SOFTWARE NEITHER CANON NOR ANY OF CANON S SUBSIDIARIES DISTRIBUTORS OR DEALERS IS LIABLE FOR ANY DAMAGES HOWSOEVER CAUSED INCLUDING WITHOUT LIMITATION DIRECT CONSEQUENTIAL OR INCIDENTAL LOSS OR DAMAGE INCLUDING LOSS OF PROFITS EXPENSE OR INCONVENIENCE HOWSOEVER CAUSED OR ARISING OUT OF THE SOFTWARE OR...

Page 3: ...perating the camera s shutter button O Preset a time allowing the camera to shoot automatically with timer shooting O When downloading images or shooting remotely view check images with the linked Digital Photo Professional System Requirements 1 Compatible with 32 bit 64 bit systems for all versions except Starter Edition 2 Compatible with Service Pack 2 3 Compatible with Service Pack 4 4 NET Fram...

Page 4: ...hite balance in the camera p 19 O To set a JPEG quality and apply to the camera p 20 O To adjust a white balance setting and apply to the camera p 21 O To set My Menu and apply to the camera p 21 Remote shooting O To shoot by controlling the camera from a computer Remote Live View shooting p 25 O To shoot with accurate horizontal vertical alignment p 31 O To change the aspect ratio and shoot p 31 ...

Page 5: ...ting up EU downloading images from your camera to your computer and exiting EU are explained here Preparing to Download Images 5 Connecting the Camera and Computer 5 Starting up EU 5 Batch Downloading Images to Your Computer 6 Downloading Selected Images to Your Computer 7 Downloading Images with a Card Reader 9 Downloading Images Using Digital Photo Professional 9 Downloading Images Using ZoomBro...

Page 6: ...rk on the plug facing the front of the camera O Image downloading preparation is now complete Continue with Starting up EU O With the you can fix the plug to the camera with the cable protector to prevent the plug from disconnecting For details on using refer to p 24 Connecting the Camera and Computer 1Ds Mk III 1D Mk III Starting up EU When the camera s power switch is set to ON EU will start up ...

Page 7: ...n your desktop to start up EU EU Main window EU starts up the main window appears and your camera and computer can now communicate Continue with Batch Downloading Images to Your Computer Batch Downloading Images to Your Computer You can batch download to your computer all the images saved in your camera s memory card The downloaded images are sorted by date into folders and are then displayed in t...

Page 8: ...ith Exiting EU p 9 DPP Main window O When you download images you can change the software that starts up from DPP to ZoomBrowser EX or another software p 38 O You can change images downloaded and the save destination p 37 p 38 From the images saved in your camera s memory card you can select the ones you want and download them to your computer 1 Click Lets you select and download images A viewer w...

Page 9: ...ns O When all images have been downloaded DPP starts up automatically and the downloaded images are displayed O To switch to the main window click the Main Window button in the viewer window Download image dialog box Specify the save destination Displays the save destination on the computer O In step 2 you can batch checkmark several images in sequence After clicking the first image you want to do...

Page 10: ...sional Instruction Manual PDF electronic manual Downloading Images Using ZoomBrowser EX You can use ZoomBrowser EX to download to your computer shot images in a memory card inside a third party card reader connected to your computer For detailed instructions refer to Downloading Images Using Your Card Reader in the ZoomBrowser EX Instruction Manual PDF electronic manual Downloading Images without ...

Page 11: ...Functions 13 Available Settings by Camera Model 14 Setting Picture Styles and Applying to the Camera 15 Selecting a Picture Style and Applying to the Camera 15 Changing Picture Style Settings and Applying to the Camera 16 Customizing Picture Styles and Applying to the Camera 17 Applying Picture Style Files to the Camera 18 Registering Personal White Balance in the Camera 19 Setting JPEG Quality an...

Page 12: ...Owner s Name and Date Time You can set and apply to the camera the camera owner s name and date time and record these as shooting information of shot images 1 Connect your camera and computer and then start up EU p 5 2Click Camera settings Remote shooting The capture window appears 3 Click the button The Set up menu appears Capture window COPY ...

Page 13: ... menu For a list of the capture window functions refer to p 49 Owner s Name O You can enter up to 31 characters and register the camera owner s name Date Time O You can set the camera s date and time Live View Function Settings O You can set whether the Live View shooting function p 25 is available or not Firmware O You can display the version of the camera s firmware O You can update the firmware...

Page 14: ...ex Setting up Camera Functions You can set and apply to the camera Picture Styles personal white balance JPEG quality and white balance adjustment 1 Connect your camera and computer and then start up EU p 5 2Click Camera settings Remote shooting The capture window appears 3 Click the button The Shooting menu appears COPY ...

Page 15: ...ture window functions refer to p 49 Picture Style O You can set a Picture Style and apply it to the camera in the same way as operating from the camera p 15 Personal White Balance O You can register to the camera a personal white balance file saved in RAW Image Task p 19 JPEG Quality O You can set the JPEG image quality and apply it to the camera in the same way as operating from the camera p 20 W...

Page 16: ...ra as user defined settings You can also register Picture Style files in the camera as user defined settings you have downloaded from the Canon s website or created with Picture Style Editor Picture Style file creating software hereinafter PSE and saved to your computer Selecting a Picture Style and Applying to the Camera 1 Click Picture Style The Picture Style window appears Setting Picture Style...

Page 17: ...ow appears 2Click Detail set The Picture Style settings dialog box appears 3 Select a Picture Style from the Picture Style list box If you select Monochrome the Filter effect and Toning effect list boxes appear 4Drag the slider for each item left or right 5 Click the Apply button The settings are registered in the camera 6Click the Close button The Picture Style settings dialog box closes 7 In the...

Page 18: ...ttings in your camera in the same way as operating from the camera 1 Click Picture Style p 15 The Picture Style window appears 2Click Detail set The Picture Style settings dialog box appears 3 Select one of User Def 1 to User Def 3 from the Picture Style list box 4Select a Picture Style from the User defined Picture Style list box If you select Monochrome the Filter effect and Toning effect list b...

Page 19: ... your computer as user defined settings in your camera 1 Click Picture Style p 15 The Picture Style window appears 2Click Detail set The Picture Style settings dialog box appears 3 Select one of User Def 1 to User Def 3 from the Picture Style list box 4Click the Open button The Open window appears 5 Select a Picture Style file and then click the Open button The Picture Style file is loaded and app...

Page 20: ...processing software you can adjust the white balance of shot RAW images and you can save those results as white balance files In EU you can register the white balance files in the camera as personal white balance and use them when you shoot in specific environments For instructions on how to save white balance files using RAW Image Task refer to Adjusting RAW Images in the ZoomBrowser EX Instructi...

Page 21: ...nd the display returns to the Shooting menu 7 Select a registered personal white balance on the camera O Select a registered personal white balance or manual white balance as the white balance O For selecting personal white balance or manual white balance refer to Selecting the White Balance or Setting the White Balance in the camera s Instruction Manual provided with your camera 40D 1Ds Mk III 1D...

Page 22: ...he original values follow the procedure in step 2 Adjusting White Balance and Applying to the Camera Displays the compensation value Compensates amber Compensates magenta Compensates green Compensates blue Setting My Menu and Registering to the Camera You can register up to six frequently used menu items as My Menu and register them to the camera in the same way as operating from the camera You ca...

Page 23: ...lick the Add button The selected item is added to Items that can be configured in My Menu on the camera on the left side of the window O You can register up to six items with the above procedure O You can change the position of an item by selecting it and then clicking the or button to move it 6Click the Apply to camera button The setting is applied to the camera My Menu My Menu settings window Fo...

Page 24: ...mera even during remote shooting or preset a time allowing the camera to shoot automatically with timer shooting Preparation Before Remote Shooting 24 Remote Live View Shooting 25 Adjusting the Focus 27 Checking the Depth of Field and Exposure 28 White Balance with the Remote Live View Window 29 White Balance for Flash Photography 29 Adjusting the Horizontal Vertical Alignment of the Camera 31 Cha...

Page 25: ...e camera with the cable protector to prevent it from detaching during remote shooting 1 Remove the cap 2Attach the cap on the fixing screw 3 Connect the small plug of the cable into the terminal on your camera O Connect with the mark on the plug facing the front of the camera 1Ds Mk III 1D Mk III 4Attach the cable protector and fix it with the fixing screw Cable protector COPY ...

Page 26: ... Professional hereinafter DPP This function is effective for shooting large numbers with fixed framing such as for studio shooting 1 Connect your camera and computer and then turn the camera s power switch to ON EU starts up O Looking into the viewfinder of the camera compose your picture and adjust the focus 2Click Camera settings Remote shooting The capture window appears 3 Set the camera O You ...

Page 27: ...emote Live View window is displayed By pressing the camera s SET button Live View image will also be displayed on the camera s LCD monitor and then you can operate the camera O You can shoot by operating the capture window even if the Remote Live View window is not displayed O To perform exposure simulation p 28 with Remote Live View window or enable display of histograms p 50 set your camera s Cu...

Page 28: ...tton The section you selected in step 1 is displayed enlarged at 100 actual pixel size in the Zoom View window O To move the display position in the Zoom View window click either or O You can checkmark Maintain Zoom View to maintain display of the Zoom View window O You can also double click the section you want to enlarge in step 1 to display an enlarged view at 100 actual pixel size in the Zoom ...

Page 29: ...window changes in real time according to the focus position adjustment Closer Further away You can also focus using a key operation on the keyboard Adjustment Closer Further away Large amount I O Medium amount K L Small amount You can check the depth of field and exposure in the Remote Live View window Click the ON button The aperture value exposure simulation is set in the capture window p 25 p 4...

Page 30: ...ou set white balance here at this point this set white balance is not applied to images that will be taken in step 6 on p 26 To apply white balance to images that will be taken click the Apply to camera button to register the white balance to the camera as the personal white balance and then select the registered white balance in the camera before taking images When taking flash shots where the su...

Page 31: ...4Click the Apply to camera and execute test shooting button A shot will be taken again using the part of the image in step 3 clicked as the standard for white and the shot image is displayed in the Test Shooting window O The test image will not be saved To save the test image click the button O To close the Test Shooting window click the Close button O You can take a test shot even when flash is n...

Page 32: ...ontal Vertical Alignment of the Camera As with the camera s live view function it is possible to shoot with a feeling similar to film type medium format large format cameras such as 6 6 cm 6 4 5 cm and 4 5 inches Aspect ratio information is also attached automatically with a shot image and when viewing an image with DPP is displayed as an image trimmed based on the aspect ratio information Further...

Page 33: ...the camera Also since the shot images are saved to your computer s hard disk you can shoot large quantities without having to worry about the capacity of the memory card 1 Display the capture window p 25 2Press the camera s shutter button and take a shot The shot images are transferred to the computer DPP starts up automatically and the shot images are displayed Shooting by Operating the Camera Wh...

Page 34: ...al between shots and the number of shots to be taken 1 Display the capture window p 25 2Click the button The Timer shooting settings dialog box appears 3 Checkmark Interval timer shooting 4Enter the shooting interval and the number of shots O Enter a value between 5 seconds and 99 minutes and 59 seconds in one second increments O The minimum number of interval timed shots is two The number of shot...

Page 35: ... shooting settings dialog box appears 5 Enter the exposure time and click the Start button O Enter a value between 5 seconds and 99 minutes and 59 seconds in one second increments O You can start end bulb exposure without setting an exposure time by clicking the button O With the set the camera s Mode dial to M Manual exposure Next by setting the shutter speed in the capture window or camera to BU...

Page 36: ...gs Remote Shooting Reference Preferences Index Preferences You can change each of the EU functions in the preferences window to make them easier to use Preferences 36 Basic Settings 36 Destination Folder 37 File Name 37 Download Images 38 Remote Shooting 38 Linked Software 38 COPY ...

Page 37: ...era settings Remote shooting screen is set for Startup Action the capture window p 11 appears O When Execute Starts to download images is set for Startup Action the Save File dialog box p 6 appears and downloading to your computer begins When all images have been downloaded DPP starts up automatically and the downloaded images are displayed in DPP s main window O If you checkmark Auto power off th...

Page 38: ...older a subfolder is generated when the checkmarked function is used O You can select the naming rule for a generated subfolder from the list box O You can customize the naming rule for subfolders by clicking the Customize button You can specify the file name of images downloaded from your camera or of images shot remotely File Name O When specifying an image s file name select a naming rule for t...

Page 39: ...on that rotates the shot image Set the rotation angle in the capture window p 49 Download Images Remote Shooting You can select the linked software that starts up when images are downloaded from the camera or when images are shot remotely Also you can register third party software as linked software by clicking the Settings button Linked Software O When you have selected ZoomBrowser EX you can spe...

Page 40: ...re looking for Troubleshooting 40 Monitor Folder Function Function for Use with the WFT E2 E2A or E3 E3A 42 Function for Use with the Accessories 43 Folder Structure and File Names in the Memory Card 44 Uninstalling the Software 44 Deleting the Driver Windows 2000 only 45 List of Main Window Functions 46 List of Viewer Window Functions 47 List of My Menu Settings Window Functions 48 List of Captur...

Page 41: ... the software on your computer 5 Connect the camera and your computer Installation could not be completed correctly I connected the camera to the computer before installing the software O If EU does not start up even when you have set the camera s power switch to ON either double click the EOS Utility icon on the desktop or click the Start button select All Programs Programs in Windows 2000 X Cano...

Page 42: ...camera and computer are connected depending on the computer system a confirmation message may appear on the screen asking whether you wish to continue communicating with the camera If you do not perform an operation while this message appears communication with your camera is discontinued and EU shuts down In this case turn the camera s power switch to OFF then again to ON and start up EU O Do not...

Page 43: ...nitor Folder dialog box appears 2Click the Browse button and specify the save destination folder for shot images O The save destination folder for the shot images set in the WFT E2 E2A or E3 E3A is specified 3 Click the Change button and specify the transfer destination folder 4Click the button Image transfer preparation is complete 5 Take a shot If images are saved in the folder specified in step...

Page 44: ...y you can start up the previously mentioned accessory software from EU And you can also start up the Picture Style Editor Picture Style file creating software For details on using the software for each accessory refer to the instruction manual for the software For Picture Style files refer to p 18 1 Connect your camera and computer and then start up EU p 5 2Click the Accessories tab The Accessorie...

Page 45: ...he file names represents a number between 0001 and 9999 File name Image type YYYY JPG JPEG image YYYY CR2 RAW image YYYY WAV Audio file Contains a file allowing the camera to manage the images in the DCIM folder xxxEOS1D or xxxCANON DCIM CANONMSC When Adobe RGB is specified the file names of images shot with your camera have an underscore _ as the first character Uninstalling the Software O Before...

Page 46: ...he driver deletion exit all programs you are using and disconnect the dedicated cable from your computer 1 Delete EOS XXX PTP Driver O Your camera model is displayed in EOS XXX O Click the Start button X select Programs X Canon Utilities X EOS XXX PTP Driver X PTP Driver Uninstall 2Proceed with the deletion as directed by the on screen messages The driver is deleted 3 Restart the computer O When t...

Page 47: ...tents at a Glance Downloading Images Camera Settings Remote Shooting Reference Preferences Index List of Main Window Functions p 6 p 7 p 47 p 25 p 49 p 42 Exits EU p 9 p 36 Control camera tab sheet p 43 Accessories tab sheet COPY ...

Page 48: ...nloads the images to the computer Selects the condition of the image Deletes the image RAW JPEG image icon RAW image icon Images already transferred to computer icon Protect icon Image display size Audio recording icon Bracketing icon Checkmark p 8 Exits EU Displays the main window Displays the preferences window Displays the capture window Recording media folder hierarchy sRAW JPEG image icon COP...

Page 49: ...te Shooting Reference Preferences Index List of My Menu Settings Window Functions p 21 to p 22 My Menu up to 6 items Deletes from My Menu Applies My Menu to the camera Switches My Menu position Adds to My Menu All items that can be applied to My Menu Closes My Menu settings window COPY ...

Page 50: ...12 Displays the preferences window p 36 Rotates shot image 1 Save destination for shot images Displays the timer shooting window p 33 p 34 Displays the My Menu p 22 Displays the Test Shooting window p 29 p 52 Displays the main window p 46 1 Each time you click the button the shot image rotates 90 degrees To make this function available checkmark Rotate image in the Remote Shooting tab sheet p 38 i...

Page 51: ...arts ends Remote Live View functions Selects the white balance p 29 Sets the color temperature Click white balance p 29 Lens drive p 28 Checks the depth of field p 28 Shows hides the histogram p 26 Shows hides the gridlines p 31 Sets the aspect ratio p 31 Focus frame Displays the Zoom View Window p 27 p 51 Rotates the image Displays the capture window p 49 Shows hides the controllers 1 Controllers...

Page 52: ...ited to focusing while viewing on your computer Selects the white balance p 29 Sets the color temperature Lens drive p 28 Checks the depth of field p 28 Display mode 1 Closes the window Controllers 2 Displays the capture window p 49 Returns to the Remote Live View window Shows hides the controllers 1 Moves the display position Moves the display position Moves the display position Moves the display...

Page 53: ...ndex List of Test Shooting Window Functions p 29 Test Shooting button Displays the Click white balance window p 30 Saves the test shot image Enlargement ratio of the image Closes the window Enlargement reduction of the image Fit to window view 100 actual pixel size view Rotates the image Displays the capture window COPY ...

Page 54: ...in a Single Operation 6 Downloading Images with a Card Reader 9 Downloading Selected Images 7 E Exiting the EOS Utility 9 F File Name Settings Preferences 37 Folder Structure and File Names 44 Folder Structure and File Names in the Memory Card 44 Function for Use with Original Data Security Kit OSK E3 43 Function for Use with OSK E3 43 Function for Use with WFT E2 E2A or E3 E3A 42 Function for use...

Page 55: ...7 51 About This Instruction Manual O It is prohibited to reproduce in whole or part the contents of this Instruction Manual without permission O Canon may change without notice the software specifications and contents of this Instruction Manual O The software screens and displays printed in this Instruction Manual may differ slightly from the actual software O The content of this Instruction Manua...

Reviews: