background image

PUB. DIE-272

English

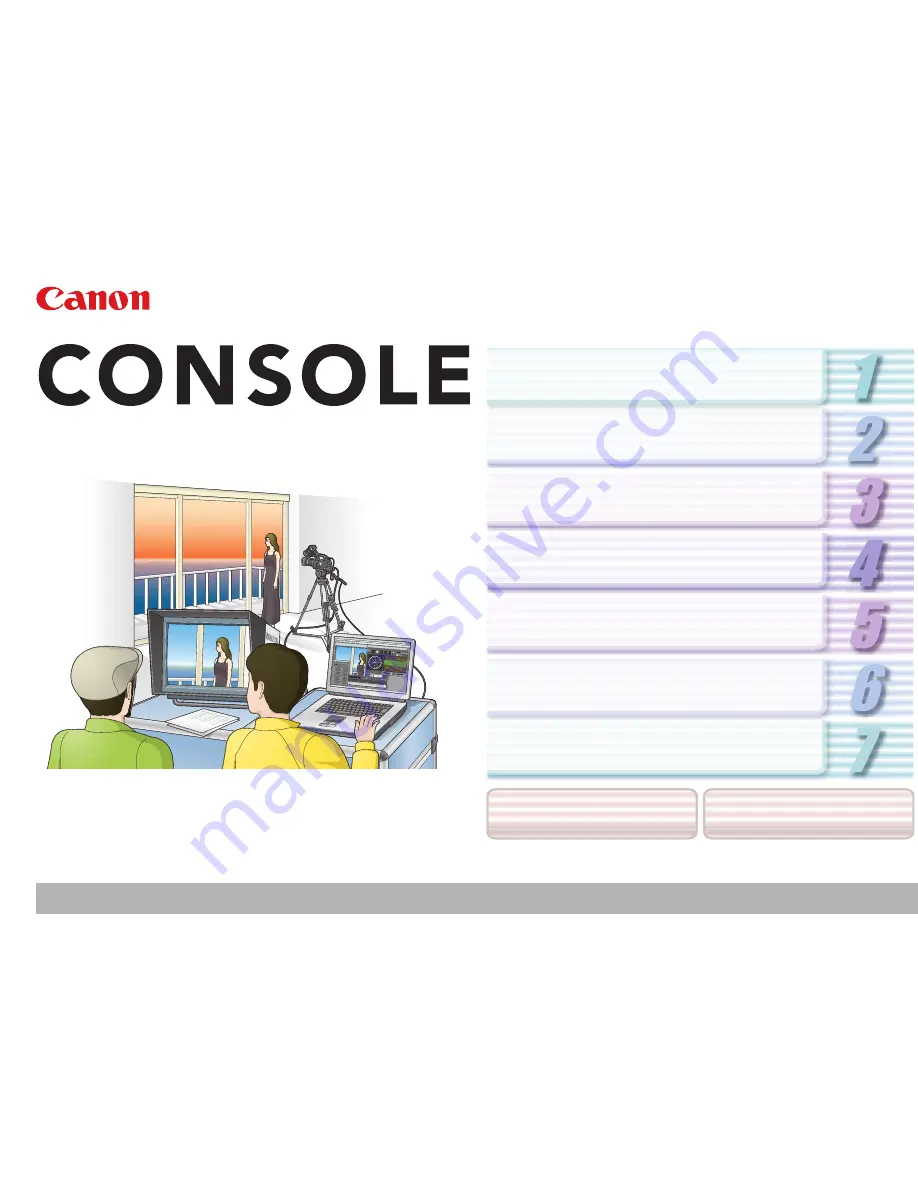
CONSOLE is a software that enables you to adjust the settings of a camcorder from 
a computer and to record on the tape in the camcorder and onto the computer’s 
hard disk by connecting the camcorder using an IEEE1394 (DV) cable. You can 
adjust and save the Custom Preset settings of the camcorder and analyze a 
shooting image using a waveform monitor and a vector scope to compose the 
image you want.

Image Control & Storage Software

Version 1.1

This software is for use with Windows

®


XP (Service Pack 2) only.

CONSOLE Windows

Various Settings and [Performance Check]

Camera and Picture Control

Recording onto the Hard Disk

Playback the Recorded Files

Troubleshooting

Shortcut Keys

Installing the Software

Uninstalling the Software

Summary of Contents for 1629B001 - XH G1 Camcorder

Page 1: ... the Custom Preset settings of the camcorder and analyze a shooting image using a waveform monitor and a vector scope to compose the image you want Image Control Storage Software Version 1 1 This software is for use with Windows XP Service Pack 2 only CONSOLE Windows Various Settings and Performance Check Camera and Picture Control Recording onto the Hard Disk Playback the Recorded Files Troublesh...

Page 2: ... 28 Camera Control 4 28 Control Tab 4 29 Information Tab 4 31 Waveform Vector Monitor 4 32 Color Control 4 34 Color Correction 4 34 Detail 4 35 Custom Preset 4 37 Adjusting the Custom Preset Settings 4 37 Importing the Custom Preset 4 38 Exporting the Custom Preset 4 39 Practical Usages of the Custom Preset Files 4 40 Use of the Disconnected Camcorder After Adjusting the Custom Preset Files 4 40 P...

Page 3: ... saved on a hard disk recognized as Removable Disk If you connect 4 or more devices including the connected computer and the XL H1 itself by IEEE1394 CONSOLE will not run properly Proper operation cannot be guaranteed if you are using a repeater If your computer has an IEEE1394 DV board card in addition to the standard IEEE1394 DV board card or if you have several IEEE1394 DV boards cards added to...

Page 4: ...t keys Changing the shortcut keys for displaying hiding the Rec Viewer window and the Camera Control window Limitations During the Trial Period During the trial period you can start CONSOLE 50 times limited to within 14 days During the trial period the following limitations apply to CONSOLE You can operate CONSOLE for 120 minutes only You can record for 5 minutes only You cannot export or load Cus...

Page 5: ...Canon Virtual VCR Driver 1 6 Installing the AV C Camera Storage Subunit WIA Driver 1 7 Connecting the Camcorder 1 8 Connecting the Camcorder to the Computer 1 8 Launching CONSOLE 1 9 Changing the Software Event Setting 1 9 Starting the Application 1 9 Activation 1 10 Purchasing the License Key 1 10 Registering the License Key 1 10 ...

Page 6: ... before installing the software 1 Start the CONSOLE installer and click Next 2 Read the license agreement and click Yes to accept the terms and to start installation 3 Confirm the target folder and click Next If a dialog appears asking you whether you wish to create a shortcut for CONSOLE click Yes If a warning window concerning the installation is displayed click Continue Anyway The dedicated dri...

Page 7: ...the driver 7 Click Finish 1 Turn the camcorder s power on and activate the DV CONTROL function 2 Set the camcorder s recording program to EXT CONT 3 Connect the camcorder to the computer using the IEEE1394 DV cable 1 8 For details about connecting the camcorder to the computer refer to Connecting the Camcorder to the Computer 1 8 When the Found New Hardware Wizard window appears select No not this...

Page 8: ...CONTROL function while the camcorder is connected to the computer Refer to the computer manual for the location of the computer s IEEE1394 DV port HDV DV terminal on the camcorder DV cable IEEE1394 port on the computer Follow the procedure below to confirm if the camcorder is properly connected Your camcorder is correctly connected if you see items described in step 4 in the Device Manager window ...

Page 9: ...ow while launching CONSOLE 1 Double click the CONSOLE 1 1 icon on the desktop When you have not registered the license yet the remaining trial period and number of times you can start CONSOLE are displayed Click on Register when you proceed to register the license 1 10 When the trial period is expired or the number of times you can start the CONSOLE is exceeded its limit a warning window appears C...

Page 10: ...mputer in which CONSOLE 1 0 had already been run The license key information will be carried on automatically 1 Set the camcorder s recording program to EXT CONT or Camera mode and connect the camcorder to the computer 1 8 2 Start CONSOLE 3 Click Register in the trial confirmation window If you are already running the software select Version About CONSOLE and click the Register button Registering ...

Page 11: ...ready running the software select Version About CONSOLE and click the Register button 4 Check the product ID If the product ID is not the same as the one for receiving the license key you cannot register the license Product ID 5 Click Register after entering the license key and a user name 6 Click OK License Key User Name ...

Page 12: ...Chapter 2 CONSOLE Windows Main Panel 2 13 Menu Bar 2 13 Camcorder Status 2 14 Toolbar 2 14 Work Space 2 15 Camcorder Screen 2 15 ...

Page 13: ...the tape in the camcorder For details refer to Camcorder Status 2 14 4 Software Status Displays the status of the software 5 Rec Panel Displays Rec Viewer 4 23 Focus Assist 4 28 Camera Control 4 28 a Waveform Vector Monitor 4 32 and Custom Preset 4 37 6 Toolbar For details refer to Toolbar 2 14 2 4 6 5 3 1 Menu Bar File Menu View Menu 1 Displays the Option Settings window 3 17 2 Changes the defaul...

Page 14: ...ording Tape reached the end Tape is write protected Tape error Docking Floating 1 Main Toolbar Recording Toolbar Playback Toolbar To redisplay the toolbar select View Toolbars and the name of the toolbar you want to redisplay 1 Displays Hides Rec Panel 2 Displays Hides Play Panel 3 Displays the Option Settings window 3 17 4 Displays the version information 1 Displays Hides the Rec Viewer window 2 ...

Page 15: ... Work Space Add Work Space 2 Input the name of the work space and click OK The positions of the windows are registered and the name of the work space will be displayed in the menu Camcorder Screen The CONSOLE status and the remaining recording time on the hard disk are displayed on the camcorder screen If is not displayed activate the DV CONTROL function of the camcorder When XL2 is connected to t...

Page 16: ...ter 3 Various Settings and Performance Check Video Folder and Recording Settings 3 17 General Tab 3 17 DV Rec Tab 3 18 HDV Rec Tab 3 18 Performance Check 3 19 Changing the Default Shortcut Key Settings 3 21 ...

Page 17: ...ding A sequence number up to 9999999 will be allocated after the specified prefix e g CNSL0001 avi 3 Place a check mark to record the Custom Preset settings of the camcorder onto the hard disk CONSOLE only saves the settings of the camcorder when the recoding is started The name of the Custom Preset file will be the recording file name and the extension is cpf When Sequence or Frame mode is select...

Page 18: ...frame is recorded and added to the same file each time you press the recording button 5 47 Placing a check mark at Interval recording makes CONSOLE to repeatedly record the frame image at the specified interval time 2 1 HDV Rec Tab This tab is for the HDV standard recording settings when you record in HDV When recording an MPEG2ES picture WAV sound files with the same file name as the recording fi...

Page 19: ...s before you start recording on the hard disk 1 Set the recording settings and click Performance Check When the Performance Check button is not being activated click the Apply button 2 Click Start on the left side The performance check of the hard disk starts CONSOLE writes the data to the selected folder to evaluate the performance of the hard disk and graphs out the results every second The perf...

Page 20: ...eceiving the DV standard data from the camcorder while Frame is selected in the DV Rec tab the writing test of the performance check will not be executed The performance check cannot be executed when CONSOLE cannot access to the hard disk 4 Review the result and click Close Even if all bars are above the red line after executing the hard disk performance check or no data dropping has occurred duri...

Page 21: ...Shortcut Settings from the File menu 2 Click of Category and select the category to which the shortcut key that you wish to change belongs You cannot change the default settings of the Work Space shortcut keys 3 Select the target shortcut key from the Command list 4 Enter the new key you wish to change to in the New Key box and click Apply The new key setting will not be applied unless you click A...

Page 22: ... Color Correction 4 34 Detail 4 35 Custom Preset 4 37 Adjusting the Custom Preset Settings 4 37 Importing the Custom Preset 4 38 Exporting the Custom Preset 4 39 Practical Usages of the Custom Preset Files 4 40 Use of the Disconnected Camcorder After Adjusting the Custom Preset Files 4 40 Passing Down the Custom Preset Setting to the Other Camcorders 4 41 Creating a New Custom Preset File Using an...

Page 23: ...tern Displays the zebra pattern 4 27 in the preview 6 Split Splits the preview 4 27 7 Color Monochrome Switches the preview between color and monochrome display 8 Interval Counter When Interval recording 3 18 is selected the remaining interval time is displayed 9 Time Code Shows the time code of the file 10 Recording Indicator The indicator will turn while recording on the hard disk 11 File Name D...

Page 24: ... that the marker is a group marker which contains several markers in it Select one of the markers in the group Clicking opens the group marker set and clicking closes the displayed marker set displaying only the group name You can change the name and group that the marker belongs 2 Aspect ratio Selects the aspect ratio of the marker preview 3 Marker preview Displays the marker and allows you to ed...

Page 25: ...NSOLE Windows 4 25 Adding a New Marker 1 Click Add 2 Select the marker group If the new marker does not belong to any group select None If you want to create a new group enter the new group name 3 Enter the marker name 4 Select the Aspect ratio and click Add The new marker will be added it appears as selected and will be displayed in the marker preview ...

Page 26: ...rker at the specified coordinates The safety zone center level and aspect markers cannot be edited 1 Select a marker you wish to save and click Export When a window asking the destination folder and the file name is displayed specify the destination folder and the file name Importing the Marker Deleting the Marker 1 Click Import When a window asking which marker to be imported specify a marker tha...

Page 27: ...he splitting settings by clicking while splitting the preview Zebra Pattern You can display a zebra pattern on the preview 1 Selects the position of the camcorder picture to be displayed Selecting Upper or Lower splits the picture horizontally and Right or Left splits the picture vertically 2 Selects the reference picture to be displayed Capture camera view Displays a still image captured from the...

Page 28: ...he mouse you can reposition the displayed image 2 Aspect Ratio Changes the aspect ratio correction mode When the correction is ON the aspect ratio of the image is adjusted by CONSOLE to fit the aspect ratio of the monitor The status of the mode will be displayed on the title bar 3 Color Monochrome Switches over the preview to color and monochrome 1 2 3 Camera Control This window enables you to con...

Page 29: ...nce to the preset setting 3 Custom White Balance While one of the presets is being selected clicking on this button registers the white balance setting For details about saving the white balance settings refer to the camcorder instruction manual 4 Color Temperature Specifies the color temperature Clicking or in the Kelvin text box increases and decreases the value by 100K You can enter a new value...

Page 30: ... Selects a frame rate 2 Selects a test tone when displaying the color bars 3 Selects a focus speed when operating by keyboard 4 Selects a zoom speed when operating by keyboard 5 Displays Hides the color bars 6 Selects the aspect ratio when recording in DV 7 Selects AE mode 3 4 5 6 2 1 7 6 EXP LOCK Click this button to lock the exposure 7 GAIN You can adjust the gain level by clicking the scale Pla...

Page 31: ...1 Information Tab This tab shows information of the hard disk recording 1 3 4 2 1 Displays the recording file name a recording mode a file type and the video folder specified in the Option Settings window 3 17 2 Displays Recording history 5 48 3 Displays the number of data droppings occurred during recording 5 48 4 Plays back the file selected in Recording history 5 48 ...

Page 32: ...ation of the picture displayed in the Rec Viewer 3 1 2 4 5 6 7 1 Color Picker The values of selected pixel in Rec Viewer are displayed When the color picker is activated a marker will be displayed on the preview You can drag the marker to select a pixel 1 Displays Hides the color picker 2 Displays the coordinate of the selected pixel 3 Displays the color of the selected pixel 4 Displays the numeri...

Page 33: ... of the waveform monitor 1 Switches over between the line and full scan mode 2 Displays the selected line number 3 Selects a number of lines used in the line mode IRE 40 IRE 140 IRE Voltage 1 0 3V 1 0V Voltage 2 0V 1 3V 1 2 3 A line for scanning 6 Wave Mode You can select the display mode of the waveform monitor In the PARADE mode the waveform monitor will be tri partitioned 7 Vector scope Display...

Page 34: ...rrower color range Y Level Adjust the brightness for the color to be detected Adjusting to detects brighter colors and to detects darker colors 1 Click the Color Correction tab and of A Area Select The Color Phase Chroma Area and Y Level sliders will be activated To set the B area click of B Area Select Adjusting the Color Correction R Gain Adjust the red gain of the detected area Adjusting to res...

Page 35: ...ends the setting process leaving the settings as they are The Custom Preset settings cannot be adjusted while configuring the settings 1 Click of CORRECT and select an area in which the color will be corrected The color will not be corrected if OFF is selected Detail Skin and sky details settings are managed on the Detail window Setting the Skin Detail Area 1 Click the Detail tab and of Area Selec...

Page 36: ...r Low The skin detail settings will not be effective if OFF is selected Clicking the Color Correction tab while configuring the settings ends the setting process leaving the settings as they are The Custom Preset settings cannot be adjusted while configuring the settings Setting the Sky Detail 1 Click of Effect and select Soft CONSOLE automatically detects the sky area blue area and reduces noises...

Page 37: ...g the camcorder mode from EXT CONT to other modes or from Camera mode to other modes Disconnecting the IEEE1394 DV cable Changing the position of the TAPE CARD switch You can change the setting using the keyboard You can select the next item with the or Tab key and go back to the previous item with the or Shift Tab keys You can also select items by pressing 2 down 4 left 6 right and 8 up keys The ...

Page 38: ...d before clicking a window asking you whether or not you wish to save the new settings will be displayed Clicking No discards the new settings and displays the new selected memory number settings 5 Click Yes to overwrite the new settings Importing the Custom Preset CONSOLE imports the Custom Preset file in the camcorder or the hard disk and applies to the camcorder When importing the custom preset...

Page 39: ...f the recently imported and saved files You can select a file from the list Click to select a file that is not in the list The information of the selected Custom Preset setting is displayed and the settings are applied to the camcorder only to preview the picture The camcorder settings have not been set yet 3 Check the camcorder picture and the settings and click OK Clicking Cancel stops importing...

Page 40: ...e saved and the camcorder settings will be returned to the previously selected Custom Preset file setting Practical Usages of the Custom Preset Files Use of the Disconnected Camcorder After Adjusting the Custom Preset Files This is how to apply the new Custom Preset settings to the camcorder that is disconnected from the computer after adjusting the Custom Preset files by the computer After discon...

Page 41: ...sted to the previous settings When you cannot save on the card export the Custom Preset file to the hard disk change the connected camcorder to the next one import the exported file to the second camcorder and save the file on the camcorder Installation of the AV C Camera Storage Subunit WIA driver may be needed for the second camcorder 3 Insert the card with the exported file to the second camcor...

Page 42: ... adjusting its size To specify which part in the image to be displayed click and specify an area to be displayed in the Position Select window 2 Level Specifies the variation level Clicking redisplays the images in the specified level 3 Reference setting Specifies the reference image to be displayed Original Applies the same settings as the current image Image File Displays a selected still image ...

Page 43: ...e File 5 45 By Operating the Camcorder 5 45 By Operating CONSOLE 5 45 Cache Recording 5 46 Setting the Cache Time 5 46 Cache Recording 5 46 Frame Recording 5 47 Setting the Frame Recording 5 47 Frame Recording 5 47 Data Dropping 5 48 Recording History 5 48 ...

Page 44: ...the following cases recordings cannot be saved on a hard disk During option settings or performance check When the sequence number of the file exceeds the maximum value e g CNSL9999999 avi When CONSOLE is started while using the camcorder with another software Observe the followings during recording Do not activate any other software When another software is running data droppings may occur Also w...

Page 45: ... was changed during recording recording stops and a new file will be created when recording is resumed When using a laptop computer the recording will not stop even if the display is closed Recording starts on both the tape in the camcorder and the hard disk When Save custom preset file when recording start is selected in the General tab setting the Custom Preset file will be saved in the same fol...

Page 46: ...ec disables the cache recording function When recording in DV and Recording mode is set to Frame the cache recording function is disabled When recording in HDV the cache recording time is actually longer than the time set The cache recording data is cleared in the following cases When the frame rate is changed When the sound recording mode is changed When the recording mode is switched from to one...

Page 47: ... menu or click 2 Select DV Rec tab and select Frame as the recording mode When Interval recording is checked CONSOLE repeatedly records the frame image at the specified interval time 3 Click OK Frame Recording 1 Specify the frame recording settings 5 47 2 Click in the Camera Control window CONSOLE records onto the hard disk only You cannot record on the tape when you are recording frame by frame W...

Page 48: ...V standard select File Option and click on the HDV Rec tab Select a smaller size in Preview resolution and or select I picture and P picture or I picture only in Preview picture Hide or reduce the window size of the Rec Viewer window Hide or reduce the window size of the Vector and Wave Monitor window Recording History When you stop recording the picture in Standard mode or when a file is created ...

Page 49: ...Chapter 6 Playback the Recorded Files Play Viewer 6 50 Output to the Camcorder 6 51 Time Slider 6 51 Waveform Vector Monitor 6 52 File Browser 6 52 Copying from the Memory Card 6 52 ...

Page 50: ...ows you to select the size of the preview panel 4 23 and to display the overlay markers 4 24 2 Audio Monitor Settings Selects which audio channel to be displayed on the audio level indicator and adjusts the monitor volume 3 Audio Monitor Turns ON OFF the computer s audio monitor output 4 Audio Level Indicator Displays the audio level of the playback file The sound can be monitored with the compute...

Page 51: ...the special playback modes The sound cannot be monitored with the computer s sound system When pausing the playback no image is displayed on the monitor Unable to playback MPEG2ES picture Unable to record pictures 1 Click in the Play Viewer window CONSOLE changes its mode to the output mode and the camcorder will be set to the receiving mode While the camcorder is set to the receiving mode recordi...

Page 52: ... a file the selected file will be played back in Play Viewer 6 Displays the explorer view 1 3 4 2 5 6 Copying from the Memory Card You can copy the still image and the Custom Preset files from the memory card to the hard disk If the total number of files recorded on the memory card is more than 1500 XL H1 or 2000 XH G1 XH A1 the file browser cannot display the files correctly In this case please c...

Page 53: ...Chapter 7 Uninstall Uninstalling the Software 7 54 Uninstalling the AV C Camera Storage Subunit WIA Driver 7 54 Uninstalling of the Drivers 7 55 ...

Page 54: ...installing the AV C Camera Storage Subunit WIA Driver Uninstall the AV C Camera Storage Subunit WIA driver if it has not been installed correctly or if it is not required anymore Close all programs that are running before uninstalling the driver You need to log in as an administrator before uninstalling the driver 1 Turn the camcorder power on and set the camcorder s recording program to EXT CONT ...

Page 55: ...nstall process is complete Uninstalling of the Drivers If you had problems uninstalling the driver use the following procedures to remove it Use the procedures below for the following circumstances too If you do not find the Scanners and Cameras icon in the Printers and Other Hardware If the Camera icon does not appear in the Scanners and Cameras folder 1 From the start menu select Control Panel 2...

Page 56: ...e icon that appear in the Other devices or Imaging devices categories or that appear more than once in one category 7 From the start menu select My Computer and double click the C local disk WINDOWS and INF folders in succession If the INF folder is not visible in the WINDOWS folder use the following procedures to show all files and folders 1 Click the Tools menu and select Folder Options 2 Click ...

Page 57: ...s When uninstalling the AV C Camera Storage Subunit WIA Driver click each oem file until you find the one that contains AV C Camera Storage WIA driver in its first line When you have found the correct file delete the file set 1 Close the Notepad window 2 Right click the mouse button and select Delete 9 Close all windows and restart the computer The INF folder contains numerous files that are criti...

Page 58: ...Appendix Troubleshooting Appx 59 Shortcut Keys Default Settings Appx 61 ...

Page 59: ... is installed already the Found New Hardware Wizard window appears when starting CONSOLE ÎWhen you change the computer s IEEE1394 DV card and start CONSOLE Canon Virtual VCR or AV C Tape Recorder Player will be detected as new hardware Select Install the software automatically Recommended and click Next to install the driver Cannot select a video folder ÎOnly folders on a NTFS formatted hard disks...

Page 60: ...and perform Performance Check 3 19 to confirm the rate 90 or less is recommended When recording in HDV standard select File Option and click on the HDV Rec tab Select a smaller size in Preview resolution and or select I picture and P picture or I picture only in Preview picture Hide or reduce the window size of the Rec Viewer window Hide or reduce the window size of the Vector and Wave Monitor win...

Page 61: ...ying Hiding in Play Panel Ctrl W Switching the setting item Next Tab Previous Shift Tab To switch a button in Display These keys can be used only when the buttons are selected To execute Space Enter To select a value in a list One value up One value down To change a numeric value One value up One value down Custom Preset Displaying Hiding Ctrl I Switching the setting item Next Tab Previous Shift T...

Page 62: ...PUB DIE 272 CANON INC 2006 The information on this manual is verified as of July 1st 2006 ...

Reviews: