background image


C A L I F O R N I A     S E N S O R     C O R P O R A T I O N  


2075 Corte del Nogal, Suite P, Carlsbad, CA  92011  ph (760)  438-0525  fax (760) 438-2619  www.calsense.com


CS3000 Quick Start Guide 
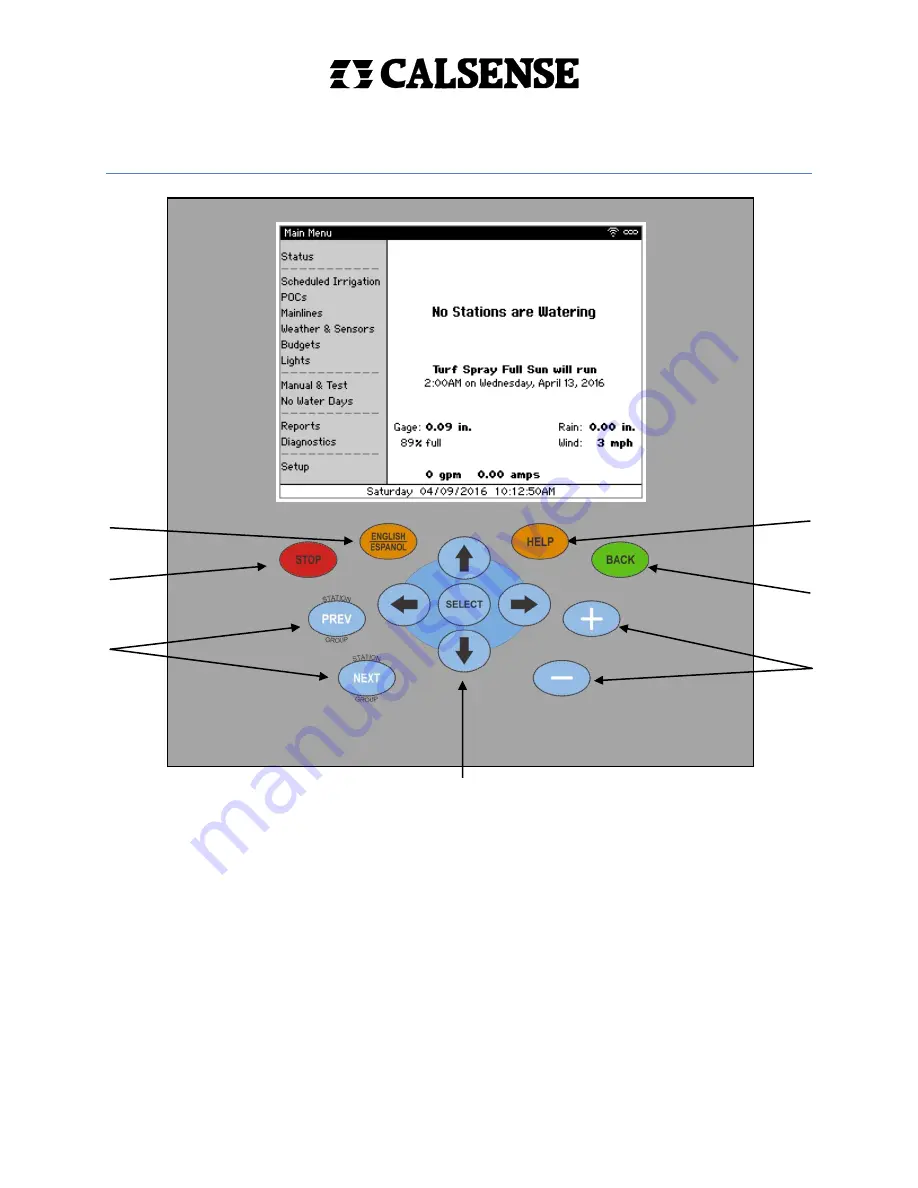


Key Map 

1.


ENGLISH/ESPANOL

 – Change screen text from English to Spanish and vice versa 

2.


STOP

 – Stop any currently running irrigation 

3.


PREV/NEXT

 –  Selects the Previous or Next menu item  

4.


←↑→↓

/SELECT 

– Move the cursor position around in the different programming and reports 

screens and selects a main menu field or a particular programming field. 

SELECT

 also provides 

dropdown menus for certain fields or numeric keypad for others. 

5.


+/–

  – Increase or decrease values on programming screens 

6.


BACK

 – Returns to the previous screen 

7.


HELP

 – Display different help based upon the status or menu screens and highlighted cursor 

position on programming screens 


Summary of Contents for CS3000

Page 1: ...V NEXT Selects the Previous or Next menu item 4 SELECT Move the cursor position around in the different programming and reports screens and selects a main menu field or a particular programming field...

Page 2: ...and time and use to change values to set the current date and time 5 Once the time is correct navigate to and select Set Date Time to save the change 6 Once done press BACK to return to the Main Menu...

Page 3: ...cally appear The Station Assignment screen displays Figure 3 The pane on the left displays the 2 Station and Moisture Sensor decoders discovered while the right shows each s station assignments Figure...

Page 4: ...ht a decoder to edit and press SELECT The cursor moves to the Is this POC Decoder In Use field on the right 3 Use to navigate through the screen and the to select whether the decoder is in use and whe...

Page 5: ...assigned to that group By default the name will automatically take on the plant type head type and exposure Mainline The mainline the stations in this group are physically connected to Plant type The...

Page 6: ...required press BACK and navigate to and select Add New Group to create additional groups and repeat steps 3 7 to define the characteristics and add stations 9 When done press BACK to return to the Ma...

Page 7: ...Main Menu navigate to Scheduled Irrigation and press SELECT The Scheduled Irrigation menu displays 2 Navigate to and select Stations The Stations screen displays Figure 8 The pane on the left display...

Page 8: ...he screen and to change values setting the following values POC used for Either Irrigation Non Irrigation or Not Used If there is no flow meter or master valve connected to this POC select Not Used Fl...

Page 9: ...Station to activate the selected station The valve turns on and the Irrigation Details screen displays to show the progress Sharing Real Time Weather If the controller does not have an ET Gage and Ra...

Page 10: ...n the CS3000 Sites heading tap or click Add CS3000 7 Type the Site ID and Serial Number noted in Step 3 and tap or click Add Site The controller is added 8 Tap or click Settings Weather Sharing The We...

Reviews: