

U7 USB Tabletop Recording
Microphone
Before using the U7 in your favorite audio or communications application
you must confi rm that the computer’s operating system recognizes the U7
microphone.
Windows XP recognition instructions
1. Plug the U7 into the USB port on the computer.
(When using a USB hub, check with the hub manufacturer to be sure
the hub supports a device such as a microphone. Plug the microphone
directly into the computer’s powered USB port for optimal performance.)
2. Allow 30 to 60 seconds for the system software to recognize the U7.
(A series of bubbles will appear by the Windows toolbar to notify you
of a new device.)
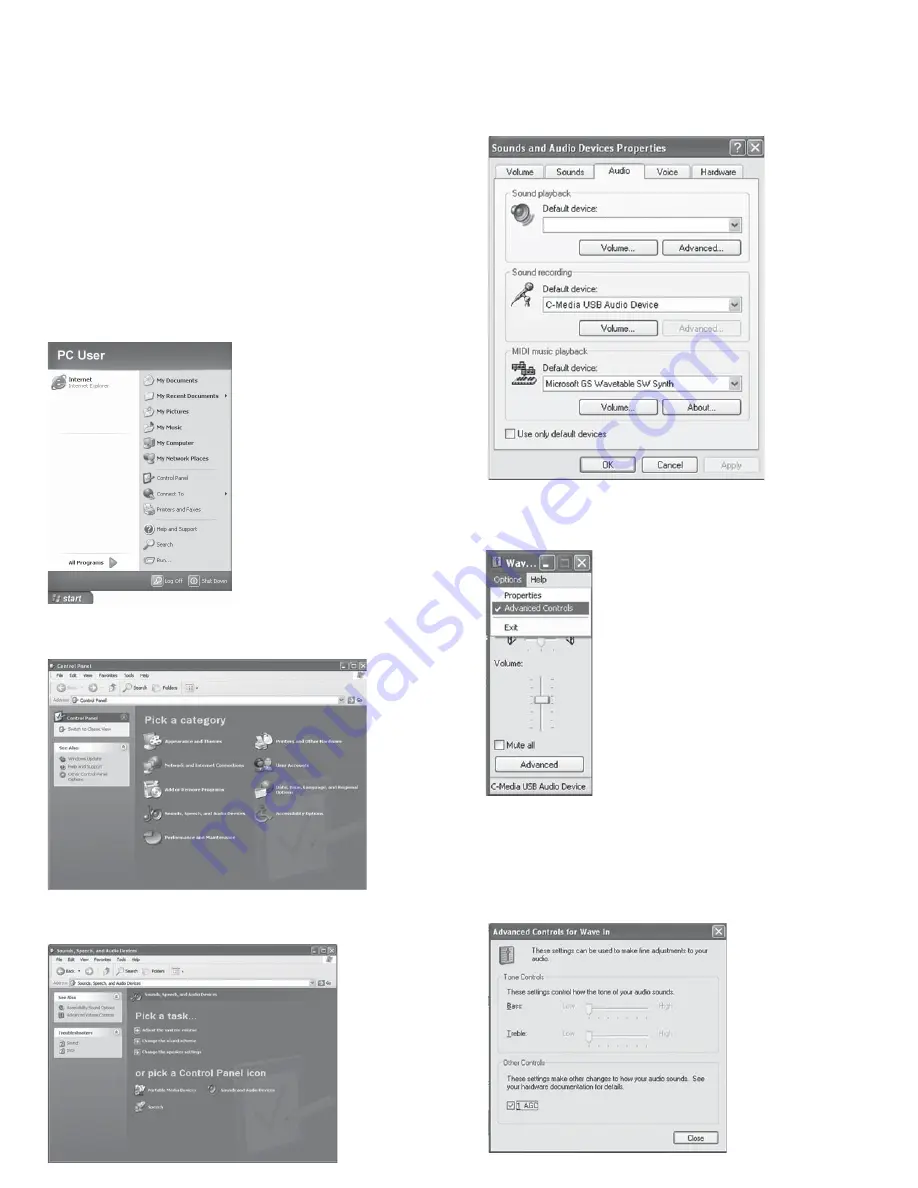
3. In the Start Menu, select Control Panel.
4. Select “Sounds, Speech, and Audio Devices”.
5. Select “Sounds and Audio Devices”.
6. Select the “Audio” tab. Confi rm that under the “Sound recording”
section the “C-Media USB Audio Device” is selected. (The “Sound
playback” should remain your usual sound output device).
7. Select the “Volume” tab under the Sound recording heading and
select “Advanced Controls” in the Options menu of this window.
8. Click the “Advanced” button to open the “Advanced Controls for
Wave In” window. Depending upon your system, you might have the
option of selecting “1 AGC” or “Mic boost”. Checking this option will
signifi cantly increase the sensitivity of the microphone. Use this for
recording softer sounds. If you experience distortion when recording
louder sounds, try unchecking this option.
(Default playback device)


