


Reviews:
No comments
Related manuals for HERMES Q2L

CM300
Brand: Barista Mate Pages: 12

1200 series
Brand: U-Line Pages: 21

MG-962
Brand: Magio Pages: 44
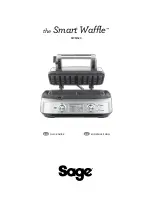
Smart Waffle BWM620
Brand: Sage Pages: 16

NIZZA 1604A Business
Brand: Kaffit Pages: 40

31876500
Brand: GGMgastro Pages: 257

F073-C201
Brand: Hoshizaki Pages: 43

ICE3
Brand: Proline Pages: 40

GOURMET 1000 TM/MD 8792
Brand: Bloomfield Pages: 24

CA569
Brand: Jata calor Pages: 20

Lavazza A MODO MIO
Brand: Saeco Pages: 2

Espresso Si'
Brand: La Pavoni Pages: 8

BOTTLEMATE-910P
Brand: Labelmate Pages: 2

WM1075
Brand: Salton Pages: 10

439 001
Brand: Lagrange Pages: 32

CM430Y10
Brand: TEFAL Pages: 56

Cafina CT8
Brand: Melitta Pages: 2

iD4P
Brand: iDPRT Pages: 2


