C.T.M. HS-850, Instruction Booklet
Discover the essential guide for maintaining your C.T.M. HS-850 with our Service Manual. Available for free download, this comprehensive manual provides detailed instructions and support. Optimize your device's performance today by downloading directly from manualshive.com. Don't miss out on mastering your product with our expertly crafted manual.
Share
Download


Reviews:
No comments
Related manuals for HS-850

Bure Standard
Brand: Gate Pages: 6

P429BKE
Brand: Invacare Pages: 6
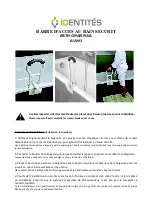
812093
Brand: identités Pages: 2

ZT-TRI-WLK-RED
Brand: Z-Tec Pages: 4

OptiFlex T
Brand: Chattanooga Pages: 6

10495-10
Brand: Drive DeVilbiss Healthcare Pages: 20

201 Delta
Brand: Vermeiren Pages: 68

Serenys
Brand: Vermeiren Pages: 24

SuperPole F.R.S. Series
Brand: Health Craft Pages: 12

COSY 2
Brand: VELTOP Pages: 2

PR30266-BK
Brand: Able 2 Pages: 11

Mopedia RS990
Brand: Moretti Pages: 4

940P
Brand: Ossenberg Pages: 2

Pavlik 23 400 011
Brand: Teufel Pages: 24

YOLA TGR-R RA 883
Brand: Timago Pages: 5

TGR-R KP-O 5021
Brand: Timago Pages: 4

TGR-R KP 350L
Brand: Timago Pages: 4

TGR-R KP 340L
Brand: Timago Pages: 4


