background image

HS-539

Instruction Booklet

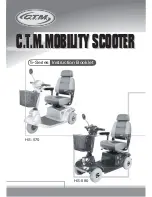
C.T.M. MOBILITY SCOOTER

C.T.M. MOBILITY SCOOTER

C.T.M. MOBILITY SCOOTER

Summary of Contents for HS-539

Page 1: ...HS 539 Instruction Booklet C T M MOBILITY SCOOTER C T M MOBILITY SCOOTER C T M MOBILITY SCOOTER...

Page 2: ...Precautions Electromagnetic Interference and Warnings Identification of Parts Operating Your Scooter Disassembling Your Scooter Re assembling Your Scooter Charging the Batteries Care and Maintenance T...

Page 3: ...the manufacturer for the C T M mobility scooter We pride ourselves on providing safe and comfortable products Our goal is to ensure your complete satisfaction with our product We are certain that you...

Page 4: ...r uneven terrain If speed is too fast leave your hand off the handle bar let the scooter stop Make sure safety and start again A slow speed must always be used when ascending descending or traversing...

Page 5: ...motorized scooter model is 10 v m There are a number of sources of relatively intense electromagnetic fields in the everyday environment Some of these sources are obvious and easy to avoid Others are...

Page 6: ...ios TV sets CD players and cassette players and small appliances such as electric shavers and hair dryers so far as we know are not likely to cause EMI problems to your motorized scooter Motorized Sco...

Page 7: ...tributor listed on the inside front cover of this manual Note whether there is a source of EMI nearby 1 20 volts per meter V m is a generally achievable and useful immunity level against EMI as of May...

Page 8: ...d how they operate Anti Tip Wheels Storage Cover Rear Turn Signal and Tail Lights Free wheeling Lever Armrest Width Adjustment Thumbscrews Optical Headlights Front Basket Tiller Angle Adjustment Throt...

Page 9: ...the button again to switch off the Hazard Light 3 Horn Button Press Horn Button 4 will buzz warning sound stop horning by release it 4 Power Reserve Indicator 5 Displays batteries electricity carryin...

Page 10: ...See Fig 10 1 Pull the seat rotation lever G up to adjust seat s turning angle also can lift up the seat 2 Pull the seat sliding lever H up to adjust the seat to either go forward or backward to an ap...

Page 11: ...ver loaded the circuit breaker K will automatically switch off the power to ensure safety 2 After automatically power switch off by press the circuit breaker can be reset TILLER ANGLE ADJUSTMENT See F...

Page 12: ...nostic Warning Light should not be blinking 3 When your hands rest comfortably on the handle bar the thumb control levers should be within reach The right lever moves the scooter forward the left one...

Page 13: ...peed set the speed control knob in the proximity of the rabbit Down Slopes To proceed down steep slopes slowly set the speed control in the proximity of the turtle This enables driver control as the c...

Page 14: ...long in your vehicle when going away from home Having the scooter disassembled is easier than ever since no tools are required Please follow these steps Remove the seat by pull the Seat Rotation Lever...

Page 15: ...post to separate the Front Frame Assembly W from the rear frame assembly See Fig 25 Disassemble Front Basket X See Fig 26 Figure 25 Figure 26 Figure 23 Figure 24 U T V W X Figure 21 Figure 22 S R Unp...

Page 16: ...n the Tiller Angle Adjustment Y to fold the tiller in a lower position See Fig 27 Once all the parts have been disassembled you are now able to put the pieces in storage or in a vehicle for transporta...

Page 17: ...e seat post and align the Curved Locking Brackets Z on the front frame assembly with the bar on the rear frame assembly 3 While holding the seat post slowly pivot the rear frame assemby forward until...

Page 18: ...If ORANGE light can turn to GREEN The battery can not be charged Please check and recover it D If ORANGE light turns to GREEN immediately Check to see the battery is fully charged if not The battery...

Page 19: ...rmance after the scooter has been used and the batteries have been recharged up to 10 times For safety please follow the guidelines below 1 DO NOT use the charger if the power cord is damaged 2 DO NOT...

Page 20: ...ing water to wash or rinse the scooter in order to protect the electrical parts Polish with an automotive liquid polish SEAT AND ARMREST Using a damp cloth helps clean the upholstery Please note that...

Page 21: ...or stalled Turn the scooter power off leave for a few minutes and then turn the power back on again The controller has detected a shorted motor Check the loom for shorts and check the motor Contact yo...

Page 22: ...all electrical connections to be sure they are tight 4 If none of these correct the problem contact your authorized dealer If you have charged your scooter for over 10 hours and the light on the char...

Page 23: ...e Battery Weight Travel Range Battery Charger Electronics 1210 mm 47 6 625 mm 24 6 1160 mm 45 6 290 mm 11 290 mm 11 93 48 kg 206 lbs 12 kmph 7 5 mph 135 kg 300 lbs 60 mm 2 4 12 degree 80 mm 3 15 1110...

Reviews: