background image

Model: 11-8200

LIT. #:  98-0418/05-04

Summary of Contents for Image View 11-8200

Page 1: ...Model 11 8200 LIT 98 0418 05 04 ...

Page 2: ......

Page 3: ...he LCD display in front of the button come on You will see a battery indicator and 3 digits indicating the number of photos taken currently stored in You will see a battery indicator and 3 digits indicating the number of photos taken currently stored in the internal memory As you take new photos this counter will advance Press and hold MODE to turn the internal memory As you take new photos this c...

Page 4: ...O A COMPUTER first install the driver from the CONNECTING THE IMAGEVIEW TO A COMPUTER first install the driver from the CD ROM as directed in Software Installation After the driver has been installed you may install CD ROM as directed in Software Installation After the driver has been installed you may install Roxio PhotoSuite 5 as well following the on screen instructions if you do not already ha...

Page 5: ...AAA alkaline batteries as indicated on the inside of the battery compartment located on the bottom of the camera unit Turn the camera on by pressing and holding the MODE button until the display comes on and the camera beeps To turn the unit off press and hold the MODE button until the display goes out The camera will turn itself off automatically to save batteries if none of the buttons have been...

Page 6: ...each mode as you cycle through them by tapping the MODE button and blink unless you select or confirm it with the SNAP button icon will stop blinking If no button is pressed for more than 5 seconds the camera will return to normal operation The modes settings are shown as you cycle through them in the following order Timer selects the self timer which will take a photo after a 10 second delay when...

Page 7: ...ill film an avi movie until you release it or the memory is full When the SNAP button is released the camera reverts back to normal still photo operation assuming unused memory remains Repeat the steps to set AVI mode again if you wish to shoot more movie clips Power Frequency Setting 60 50 Hz This sets the correct electrical frequency to avoid any flickering in the camera s output The normal defa...

Page 8: ...the icon is filled in you should plan to replace the batteries soon Be sure to bring an extra set of batteries on a long trip or for important events WARNING Make sure you download all photos see directions below from the camera before removing or changing the batteries The camera memory is battery dependant and your photos will be lost if you take the batteries out or if the batteries are allowed...

Page 9: ...OMPUTER BEFORE INSTALLING THE DRIVER SOFTWARE To load software insert the supplied CD into your CD ROM drive and it will self start If your computer does not have an auto play function and does not automatically launch the CD install screen open the CD open My Computer and double click the ImageView CD icon and click Install Driver The CD contains the PhotoSuite software as well as the drivers tha...

Page 10: ...to reference that first DOWNLOADING PHOTOS TO YOUR COMPUTER 1 Connect the USB cable from the computer to the camera 2 You may have a brief wait for the process as Windows builds a driver information database and confirms that the PC matches the correct software to the attached hardware device 3 Open the program PhotoSuite 5 4 Click Transfer in the left frame area under Home Page 5 Select Transfer ...

Page 11: ...k with click again to deselect one then click Transfer photos second button from left at the bottom of the driver window You are then returned to the PhotoSuite transfer screen and should see all of your transferred photos identified by the date and file number beginning with 00000 12 Click Next then Done at the bottom of the left frame area 13 You may now wish to edit click Edit Create then Edit ...

Page 12: ...Your Eyes The distance between the eyes called interpupillary distance varies from person to person To achieve perfect alignment of lens to eye follow these simple steps 1 Hold your binocular in the normal viewing position 2 Grasp each barrel firmly Move the barrels closer together or further apart until you see a single circular field Always re set your binocular to this position before using How...

Page 13: ... 7 Using the diopter setting adjustment ring focus the same object being viewed Caution should be used as over turning or forcing the diopter eyepiece can cause damage or cause the eyepiece to break away from the chassis 8 Your binocular should be adjusted for your eyes Focus at any far or near distances can now be attained simply by turning the center focus wheel Make a note of the diopter settin...

Page 14: ...ake the batteries out of your ImageView if you are not going to use it for a long period of time Make sure you download any pictures from your camera before you remove the batteries from the camera CLEANING 1 Blow away any dust or debris on the lens or use a soft lens brush 2 To remove dirt or finger prints clean with a soft cotton cloth rubbing in a circular motion Use of 2 To remove dirt or fing...

Page 15: ...ct return 3 An explanation of the defect 4 Proof of Date Purchased 5 Product should be well packed in a sturdy outside shipping carton to prevent damage in transit with return postage prepaid to the address listed below IN U S A SEND TO IN CANADA SEND TO Bushnell Performance Optics Bushnell Performance Optics Attn Repairs Attn Repairs 8500 Marshall Drive 25A East Pearce Street Unit 1 Lenexa Kansas...

Page 16: ...e file The file will be displayed as a single frame labeled AVI You will see a progress bar as the movie downloads and the camera will beep when the download is complete 4 Click the AVI frame you want to select it or use the Select All icon in the driver window 4th from left Then click the computer disc icon in the center of the driver window to give the movie a name and save it to your desktop or h...

Page 17: ...www bushnell com 2004 Bushnell Performance Optics ...
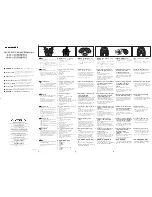
Reviews: