Buderus Logano plus SB325, Installation And Service Instructions Manual
The Buderus Logano plus SB325 is a high-performing boiler designed for residential use. With its innovative features and energy-efficient design, this product delivers optimum heating performance. Ensure a successful installation and maintenance with the convenient "Installation And Service Instructions Manual" available for free download at manualshive.com.
Share
Download


Reviews:
No comments
Related manuals for Logano plus SB325
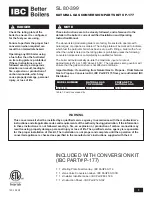
SL 80-399
Brand: IBC Pages: 4

Greenstar Danesmoor Utility Regular ErP+ 12/18
Brand: Worcester Pages: 16

BDS-080
Brand: Crown Boiler Pages: 23

BFRB-24
Brand: Blue Flame Pages: 16

minorca kr
Brand: Fondital Pages: 64

HERCULES DUO
Brand: Viadrus Pages: 76

JF92G
Brand: Nieco Pages: 28

mynute 14/48SE
Brand: VOKERA Pages: 12

Solo 110
Brand: Prestige Pages: 104

Excellence
Brand: Prestige Pages: 114

FP7107
Brand: Flotec Pages: 12

KN-10
Brand: ATH Pages: 24

KN Series
Brand: ATH Pages: 56

8114216
Brand: Sime Pages: 104

8112500
Brand: Sime Pages: 104

MAGIS Victrix
Brand: Immergas Pages: 44

futuria L 24 MB
Brand: Lamborghini Caloreclima Pages: 152

Barselona
Brand: Baxi Pages: 8


