

PC390
Web Cam
User’s Guide
Version 1.0
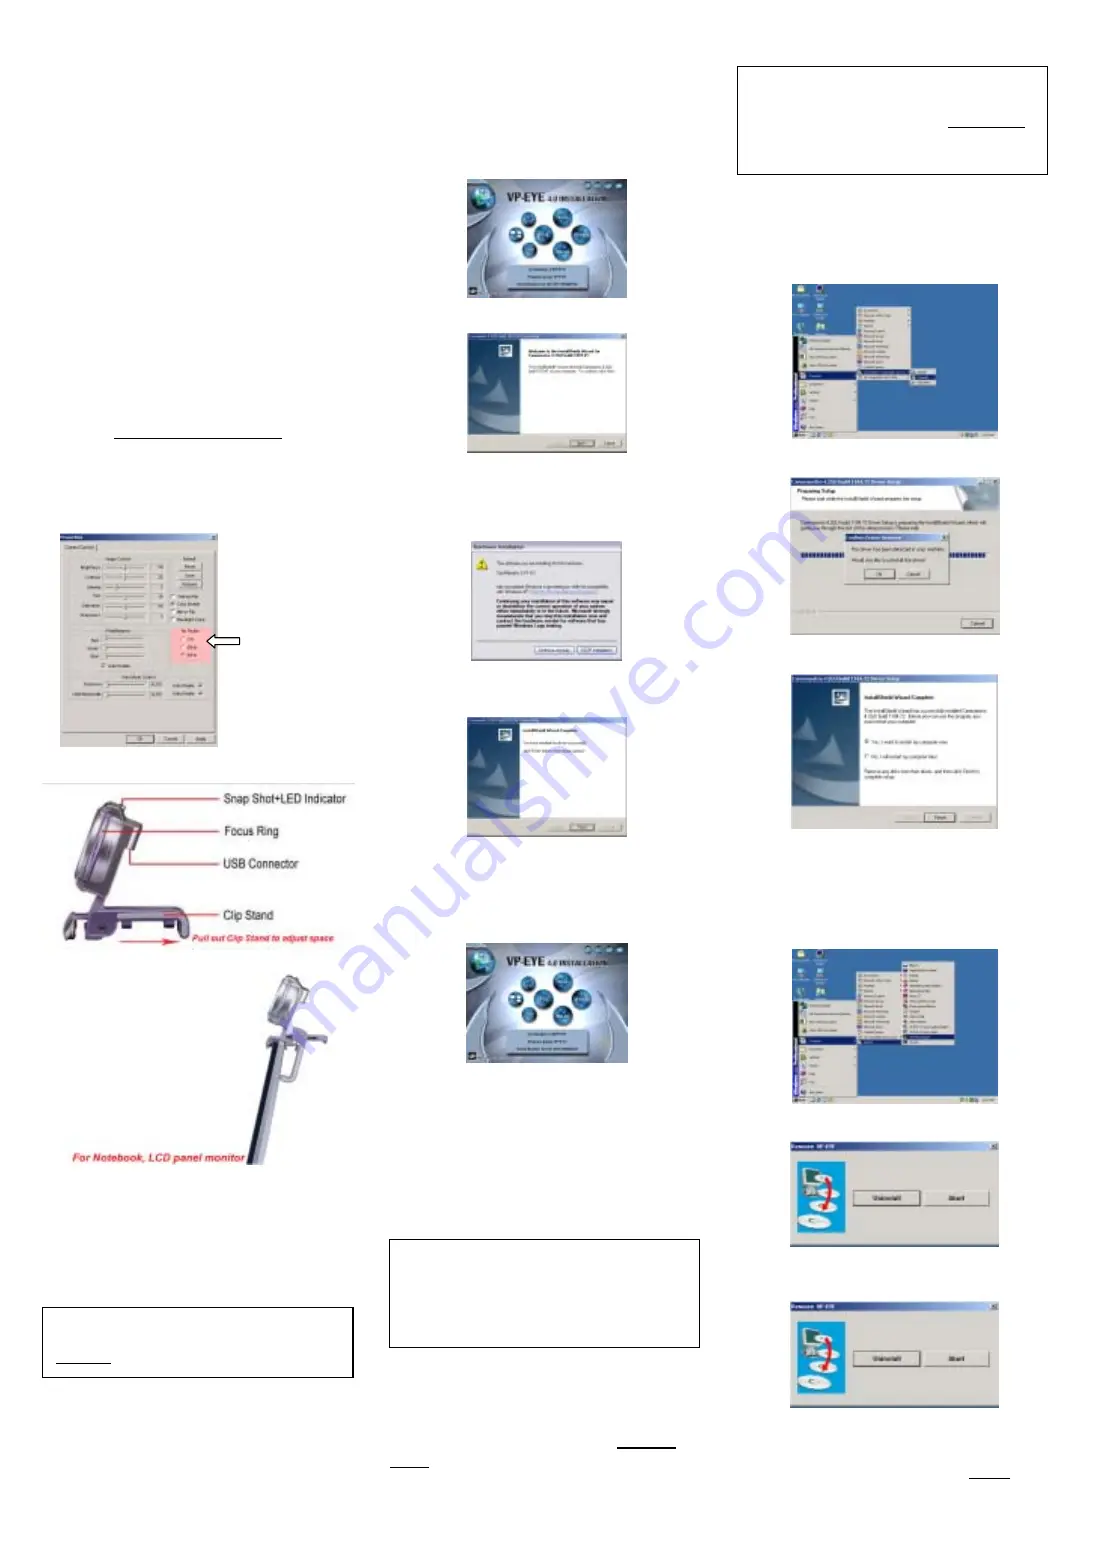
Power Source Adjustment
Choose the mode of “50Hz” or “60Hz” according to
your power source environment or video output
signal system to avoid the blurry image.
Amcap
Option
Video Capture Fliter
OK
System Requirements
Windows 98SE,Windows Me,
Windows 2000, Windows XP.
Software Installation
Attention:
Make sure to install the driver and software
BEFORE plugging the camera into USB port.
1.
Insert the VP-EYE software CD into the
CD-ROM drive of your computer.
2.
The installation program will run automatically. If
the installation does not auto play, please run
“
Setup.exe
” from the CD-ROM’s root directory
to install.
Driver install
1. After software installation, the “VP-EYE 4.0
INSTALLATION” dialogue box will pop-up on the
screen. Click the
“Driver”
icon to install device
drivers and then follow the on-screen instruction
to install the driver.
2. Click
“Next”
to continue.
3. Click
“Continue Anyway”,
if the “Hardware
Installation” dialogue box pop-up on screen. (OS
98SE/ME/2000)
4.
Click
“Finish”
once driver installation is
complete.
VP-EYE & Web Eye Install
1. Please click “VP-EYE” and “Web Eye” icons
separately, and then follow the on-screen
instruction to install the software applications.
2. When all setup procedures are finished, please
restart the operating system.
Hardware Installation
1. Plug the enclosed USB cable into camera and
USB port on the PC separately.
(to avoid low voltage, recommend to plug the
cable connector to USB port on PC directly)
Attention:
If a dialog box pops up and request to have
the language setting file replaced after
plugging the camera into USB port, please
simply click “Yes” to continue.
2. The camera LED indication will light up while
successful installation.
Notice:
Please download the latest update of
“Service
Pack”
(from Start
Windows Update) to keep the
camera running smoothly.
Attention:
If you have more than one image device in
your system, please select the CamMaestro
as the PC Camera device. In this way, you
can use this camera to capture images.
Driver Uninstallation
1. Run the “
Uninstall
” from “
Start”
“
Programs
”
“
Cammaestro
” icon to uninstall device driver.
2. Click
“OK”
to continue.
3. Click
“Finish”
once driver uninstall is completed.
VP-EYE Uninstallation
1. Run the “
VP-EYE Uninstall
” from the Taskbar of
“
Start”
“
Programs
”
“
VP-EYE
” icon to
uninstall software driver.
2. Click
“Uninstall”
to continue.
3. Click
“Exit”
while the VP-EYE software was
removed completely.
3100560440
Version1.0
Jan. 2005
Printed in China
English


