background image

HL7050_US_UG_FM5.5

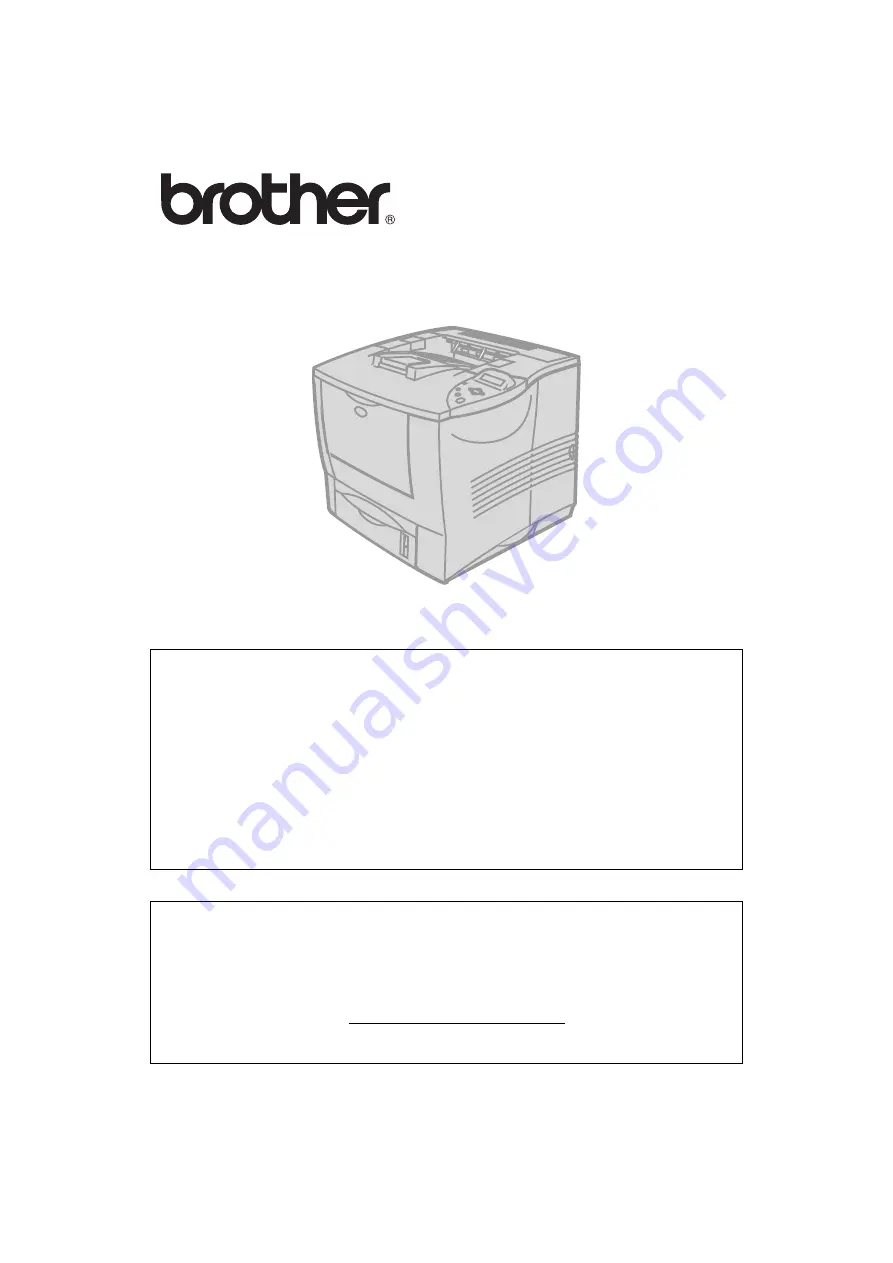
Brother Laser Printer 

HL-7050 series

User's Guide

Version 1

For visually-impaired users

Please see the two HTML files, index_win.html and 
index_mac.html, on the supplied CD-ROM. You can  
read them with Screen Reader ‘text-to-speech’ 
software.

For information on the use of the Braille control panel 
with buzzer function, see Chapter 3.

You must set up the hardware and install the driver before you can use the printer. 
Please use the Quick Setup Guide to set up the printer. You can find a printed 
copy in the box or view it on the CD-ROM we have supplied.  

Please read this Guide thoroughly before you use the printer. Keep the CD-ROM 
in a convenient place so you can use it quickly if you need to.  

Please visit our website ahttp://solutions.brother.com where you can get 
answers to Frequently Asked Questions (FAQs), Product Support and Technical 
Questions, and the latest Driver Updates and Utilities.

Summary of Contents for HL-7050 Series

Page 1: ...ust set up the hardware and install the driver before you can use the printer Please use the Quick Setup Guide to set up the printer You can find a printed copy in the box or view it on the CD ROM we have supplied Please read this Guide thoroughly before you use the printer Keep the CD ROM in a convenient place so you can use it quickly if you need to Please visit our website at http solutions bro...

Page 2: ...ons and notes We use the following terms throughout this User s Guide WARNING You must follow these warnings to prevent possible personal injury You must follow these instructions to make sure you use the printer properly and do not damage it Remember these useful tips when you use the printer ...

Page 3: ...nd unplugged the printer from the AC power outlet WARNING Do not handle the plug with wet hands it might give you an electrical shock WARNING After you have just used the printer some parts inside the printer will be extremely hot When you open the front or back cover of the printer never touch the shaded parts shown in the illustrations below Inside the printer Open the face up output tray High T...

Page 4: ...he printer holding the handles on both the right and left sides of the printer and the front of the printer as shown in the illustration below WARNING Do not stand on the printer or the optional Stabilizer unit WARNING Be careful not to trip on the legs of the optional Stabilizer unit ...

Page 5: ...ce claim by you in the event of product loss covered by insurance and will help us notify you of enhancements to your product an special offers Please complete the Brother Warranty Registration or for you convenience and most efficient way to register your new product register on line at Frequently asked questions FAQs The Brother Solutions Center is our one stop resource for all your Printer need...

Page 6: ...rvice center call 1 877 BROTHER Brother fax back system USA only Brother Customer Service has an easy to use fax back system so you can get instant answers to common technical questions and product information This is available 24 hours a day 7 days a week You can use the system to send the information to any fax machine Call the number below and follow the recorded instructions to receive a fax a...

Page 7: ... this equipment does cause harmful interference to radio or television reception which can be determined by turning the equipment off and on the user is encouraged to try to correct the interference by one or more of the following measures Reorient or relocate the receiving antenna Increase the separation between the equipment and receiver Connect the equipment into an outlet on a circuit differen...

Page 8: ...e la classe B est conforme à la norme NMB 003 du Canada Radio interference 220 240 volt model only This printer follows EN55022 CISPR Publication 22 Class B Before you use this product make sure that you use a double shielded interface cable with twisted pair conductors and that it is marked IEEE1284 compliant The cable must not be more than 1 8 metres long ...

Page 9: ...ter Product Name HL 7050 HL 7050N are in conformity with provisions of the Directives applied Low Voltage Directive 73 23 EEC as amended by 93 68 EEC and the Electromagnetic Compatibility Directive 89 336 EEC as amended by 91 263 EEC and 92 31 EEC and 93 68 EEC Standards applied Harmonized Safety EN60950 2000 EMC EN55022 1998 Class B EN55024 1998 EN61000 3 2 1995 A1 1998 A2 1998 EN61000 3 3 1995 Y...

Page 10: ...cannot escape from the machine during any phase of user operation FDA Regulations 110 to 120 volt Model Only U S Food and Drug Administration FDA has implemented regulations for laser products manufactured on and after August 2 1976 Compliance is mandatory for products marketed in the United States One of the following labels on the back of the printer indicates compliance with the FDA regulations...

Page 11: ...r adjustments or performance of procedures other than those specified herein may result in hazardous radiation exposure Varoitus Laitteen käyttäminen muulla kuin tässä käyttöohjeessa mainitulla tavalla saattaa altistaa käyttäjän turvallisuusluokan 1 ylittävälle näkymättömälle lasersäteilylle Varning Om apparaten används på annat sätt än i denna Bruksanvisning specificerats kan användaren utsättas ...

Page 12: ...r near a power outlet that is easily accessible In case of an emergency you must disconnect the power cord from the power outlet to shut off the power completely Caution for batteries Do not replace the battery There is a danger of explosion if the battery is incorrectly replaced Do not disassemble recharge or dispose of the battery in fire Dispose of used batteries according to local regulations ...

Page 13: ...may not match the coloured markings identifying the terminals in your plug If you need to fit a different plug you should do the following Remove a bit of the outer cover of the lead taking care not to damage the coloured insulation of the wires inside Cut each of the three wires to the appropriate length If you can leave the green and yellow wire longer than the others so that if the lead is pull...

Page 14: ...S and other countries PostScript is a registered trademark of Adobe Systems Incorporated ENERGY STAR is a U S registered mark All other terms and brand and product names mentioned in this User s Guide are registered trademarks of their respective companies Compilation and Publication Notice Under the supervision of Brother Industries Ltd this manual has been compiled and published covering the lat...

Page 15: ... 19 Printing from the paper tray Face down printing 1 19 Tray ID setting If the lower tray unit is installed 1 23 Printing from the multi purpose tray 1 24 Printing on envelopes Face up printing 1 28 Printing on labels transparencies and other special paper 1 35 Printing to the face up output tray Face up printing 1 40 Manual feed 1 41 2 Driver and software 2 1 Printer driver 2 1 Features in the P...

Page 16: ...inter settings 2 24 Factory settings 2 24 3 Control panel 3 1 Control panel 3 1 Buttons 3 2 Go button 3 3 Job Cancel button 3 4 Reprint button 3 5 Reprinting the last job 3 6 Printing PROOF data 3 8 Printing PUBLIC data 3 8 Printing SECURE data 3 9 or button 3 12 To move through menus on the LCD 3 12 To enter numbers 3 12 Set button 3 13 Back button 3 14 Light emitting diode LED 3 15 Data Orange L...

Page 17: ...on both sides of the paper 4 5 Mailbox unit 4 6 Network option NC 4100h For HL 7050 only 4 8 Installing the Network board 4 8 CompactFlash card 4 11 Installing the CompactFlash card 4 12 RAM expansion 4 13 Installing extra DIMM memory 4 14 Hard disk drive HD EX 4 17 Ir DA interface IR 1000 4 21 Optional font package BS 3000 4 22 Optional barcode fonts package BT 1000 4 22 5 Routine maintenance 5 1...

Page 18: ...r jam in the face up output tray 6 17 JAM D paper jam in the Duplex unit 6 19 JAM E paper jam inside the mailbox unit 6 22 Improving the print quality 6 23 Solving print problems 6 27 Other problems 6 28 Printing with the serial interface 6 28 Printing from DOS 6 29 Printer HDD Hard Disk Drive 6 29 BR Script 3 6 30 A Appendix A 1 Printer specifications A 1 Printing A 1 Functions A 3 Options A 4 El...

Page 19: ...upported by the printer s intellifont compatible typefaces A 39 Symbol sets supported by the printer s TrueType and Type 1 Font Compatible and original typefaces A 41 Quick reference for commands A 43 Bar code control A 43 Print bar codes or expanded characters A 43 INDEX I 1 ...

Page 20: ...is printer What is in the box When you unpack the printer check to see that you have all of the following parts Figure 1 1 1 Drum Unit Assembly Drum Unit with Toner Cartridge 2 AC Power Cord 3 Paper Tray 4 Quick Setup Guide 5 CD ROM 6 Printer 1 2 3 4 5 6 ...

Page 21: ...Do not use a parallel cable that is longer than 1 8 metres 6 feet The power cord length may differ slightly depending on the country where you bought the printer If you use a USB cable make sure it is a high speed twisted cable 12 Mbps and that you connect it to the USB connector of your PC Do not connect the USB cable to the front of your PC or to the iMac s keyboard For visually impaired users w...

Page 22: ... Install Software You can install the printer driver and the following items For All Users For more information see Chapter 2 Printer Driver For Administrators Web BRAdmin BRAdmin Professional Driver Deployment Wizard Network Print Software Storage Manager Analysis Tool 1 3 4 2 ...

Page 23: ... s Guide and other documents 3 Brother Solutions Center An introduction to our website You can easily access it and receive the latest drivers and information for this printer 4 Maintenance Tutorial See the maintenance videos for this printer We recommend that you watch the videos before getting started ...

Page 24: ... 6 9 2 and Mac OS X 10 1 or later 2 User s Guides Look at the printer User s Guide Network User s Guide and other documents 3 Brother Solutions Center An introduction to our website You can easily access it and receive the latest drivers and information for this printer 4 Maintenance Tutorial See the maintenance videos for this printer We recommend that you watch the videos before getting started ...

Page 25: ...THIS PRINTER HL7050_US_UG_FM5 5 General view Figure 1 2 1 Control Panel 2 Face down Output Tray 3 Support Flap 4 Top Cover 5 Multi purpose Tray 6 Multi purpose Extension Support 7 Paper Tray Tray 1 1 2 3 4 5 6 7 ...

Page 26: ...re 1 3 1 Face up Output Tray 2 Parallel Interface Connector 3 USB Connector 4 Serial Interface Connector 5 Network Board Slot 6 Card Slot For optional CompactFlashTM card 7 Duplex Unit Connector 8 AC Power Connector 9 Power Switch 1 2 3 4 5 6 7 9 8 ...

Page 27: ...Hz 220 240 V or 50 60 Hz 110 120 V The power cord including extensions should be no longer than 5 metres 16 feet Do not share the same power circuit with other high power appliances such as an air conditioner copier shredder and so on If you cannot avoid using the printer with these appliances we recommend that you use a voltage transformer or a high frequency noise filter Use a voltage regulator ...

Page 28: ...ange Temperature 10 C to 32 5 C 50 F to 90 5 F Humidity 20 to 80 without condensation Recommended operation range Temperature 17 5 C to 25 C 63 5 F to 77 F Humidity 30 to 70 without condensation The machine must be level within 5 mm 0 2 in both front to back and left to right To avoid ozone building up put this machine in a large well ventilated room ...

Page 29: ...e printer You will need this space to use the printer properly The recommended or minimum space requirements are as follows No Options InstallOptionalDuplexUnit LowerTrayandMailbox Figure 1 4 Figure 1 5 100 mm 3 94 inches 500 mm 19 7 in 400 mm 15 8 in 150 mm 5 9 in 600 mm 23 6 in 100 mm 3 94 in 600 mm 23 6 in ...

Page 30: ... the power outlet is near the machine and is easy to get to so that if there is an emergency it can be easily unplugged Only connect the machine to the power source described under Power Supply in this User s Guide Put the printer on a flat horizontal surface Do not damage break or make any changes to the power cord Do not put heavy objects on it pull it hard or bend it more than necessary These a...

Page 31: ...lex Unit for Duplex Printing DX Optional Mailbox unit MX Plain paper 70 g m2 to 90 g m2 19 to 24 lb Bond paper Rough paper 60 g m2 to 200 g m2 16 to 53 lb Thick paper 90 g m2 to 120 g m2 24 to 32 lb Thicker paper 120 g m2 to 200 g m2 32 to 53 lb Transparency Overhead projector film Thin paper 60 g m2 to 70 g m2 16 to 19 lb When you print on thick paper labels or card stock we recommend that you se...

Page 32: ...lb Tray 2 3 4 60 105g m2 16 28 lb DX 60 105g m2 16 28 lb MX 60 105g m2 16 28 lbs Select the Media type from the printer driver Plain paper Plain paper Recycled paper Plain paper Bond paper Bond paper Thick paper Thick paper or Thicker paper Transparency A4 or Letter Transparency Labels A4 or Letter Plain paper Envelope Envelope Card stock Thick paper or Thicker paper Thin paper Thin paper i i i i ...

Page 33: ... 216 mm 4 13 to 8 5 in Height 148 5 to 356 mm 5 85 to 14 0 in A4 Letter Legal B5 JIS B5 ISO Executive A5 Number of Sheets 500 sheets 80 g m2 or 20 lb 100 sheets 80 g m2 or 20 lb Transparency 10 sheets Envelope 10 sheets Label stock 10 sheets 500 sheets 80 g m2 or 20 lb DX MX Paper size A4 Letter Legal B5 JIS B5 ISO Executive A4 Letter B5 JIS B5 ISO Executive Number of Sheets 100 sheets per bin 80 ...

Page 34: ...Chapter 3 Media type Face down Face up Plain paper Recycled paper Bond paper Thick paper Thicker paper Transparency Labels Envelope Card stock Thin paper If you print on thick paper that weighs more than 150 g m2 40 lb use face up printing We recommend that you use face up printing when you print on transparencies If the paper is misfeeding or a lot of pages are going through at the same time when...

Page 35: ...aper please test some to make sure that the paper is suitable Use paper that is made for plain paper copying Use paper that is 75 to 90 g m2 20 to 24 lb Use neutral paper Do not use acidic or alkaline paper Use long grain paper Use paper with a moisture content of approximately 5 This printer can use recycled paper according to DIN 19309 Plain Paper Xerox Premier 80 g m2 Xerox 4200DP 20 lb Recycle...

Page 36: ...3 4 2 mm 0 17 in 4 2 mm 0 17 in 4 2 mm 0 17 in 4 2 mm 0 17 in 4 2 mm 0 17 in 4 2 mm 0 17 in 4 2 mm 0 17 in 4 6 01 mm 0 24 in 6 35 mm 0 25 in 6 35 mm 0 25 in 5 84 mm 0 23 in 6 01 mm 0 24 in 6 35 mm 0 25 in 6 01 mm 0 24 in A6 B6 COM10 Monarch C5 DL 1 4 2 mm 0 17 in 4 2 mm 0 17 in 4 2 mm 0 17 in 4 2 mm 0 17 in 4 2 mm 0 17 in 4 2 mm 0 17 in 2 6 01 mm 0 24 in 6 01 mm 0 24 in 6 35 mm 0 25 in 6 35 mm 0 2...

Page 37: ... 4 2 mm 0 17 in 4 2 mm 0 17 in 4 2 mm 0 17 in 4 2 mm 0 17 in 4 5 0 mm 0 19 in 5 08 mm 0 2 in 5 08 mm 0 2 in 5 08 mm 0 2 in 5 0 mm 0 19 in 5 08 mm 0 2 in 5 0 mm 0 19 in A6 B6 COM10 Monarch C5 DL 1 4 2 mm 0 17 in 4 2 mm 0 17 in 4 2 mm 0 17 in 4 2 mm 0 17 in 4 2 mm 0 17 in 4 2 mm 0 17 in 2 5 0 mm 0 19 in 5 0 mm 0 19 in 5 08 mm 0 2 in 5 08 mm 0 2 in 5 0 mm 0 19 in 5 0 mm 0 19 in 3 4 2 mm 0 17 in 4 2 m...

Page 38: ...the paper tray Face down printing 1 Pull the paper tray out of the printer 2 While pressing the blue paper guide release lever slide the paper guides to fit the paper size Check that the guides are firmly in the slots Figure 1 8 Press the blue lever and slide the paper guides ...

Page 39: ...per tray Check that the paper is flat and below the maximum paper mark Figure 1 10 4 Put the paper tray back in the printer For Legal size paper press the blue universal guide release button and pull out the rear of the paper tray Figure 1 9 Up to Maximum Paper Mark ...

Page 40: ...T THIS PRINTER 1 21 HL7050_US_UG_FM5 5 5 Change the following settings in the printer driver PCL driver PS driver Select the Paper Size Media Type and so on Select Tray 1 Select the Paper Size Select Tray 1 ...

Page 41: ...ot of pages are going through at the same time when you print on small or thick paper change the paper thickness switches at the bottom of the paper tray as follows A6 Switch 1 OFF Switch 2 OFF A4 100 g m2 27 lb Letter 105 g m2 28 lb Legal 105 g m2 28 lb Switch 1 ON Switch 2 ON Executive A5 B6 Switch 1 OFF Switch 2 ON Other Default setting Switch 1 ON Switch 2 OFF ...

Page 42: ...y ID setting If the lower tray unit is installed If somebody moves the tray into another tray position and you print the data without knowing this has been done the driver finds the tray and prints according to this setting Figure 1 12 Blue Tray ID ...

Page 43: ...i purpose support flap Figure 1 14 For proper printing you must select the same paper size in your software application as the paper in the tray If your application software does not allow you to select the paper size in its Print menu you can use the control panel Menu buttons to go to the PAPER menu to change the paper size For more information see Chapter 3 ...

Page 44: ... 16 When you print on special paper such as envelopes thick paper labels and so on open the face up output tray to print face up See Printing on envelopes Face up printing or Printing on labels transparencies and other special paper in this chapter Make sure that the paper is neatly stacked and in the proper position on the multi purpose tray If it is not the paper may not be fed correctly resulti...

Page 45: ...inting the inside tray rises to feed paper into the printer The print surface must be face up Put the leading edge of the paper in first and push it gently into the tray The top of the paper stack must be under the maximum paper marks that are on both sides of the tray The stack should be no more than 10 mm 0 39 in high Select the Paper Size Media Type and so on Select the MP Tray and so on ...

Page 46: ...ABOUT THIS PRINTER 1 27 HL7050_US_UG_FM5 5 PS driver Select MP Tray Select the Paper Size ...

Page 47: ...embossed have raised writing on them that were previously printed by a laser printer that are pre printed on the inside that cannot be arranged when put in a pile that are made of paper that weighs more than the paper weight specifications for the printer that have been badly made with edges that are not straight or consistently square or with windows holes cutouts or perforations Figure 1 17 IF Y...

Page 48: ...same time in the paper tray because it may cause paper jams or misfeeds Do not print envelopes using duplex printing For proper printing you must choose the same paper size from your software application as the paper in the tray If your application software does not allow you to select the paper size in its Print menu you can use the control panel Menu buttons to go to the PAPER menu to change the...

Page 49: ...1 30 ABOUT THIS PRINTER HL7050_US_UG_FM5 5 2 Pull out the multi purpose support flap Figure 1 20 3 Open the face up output tray and then pull out the face up output tray support if necessary Figure 1 21 ...

Page 50: ...utput tray and push down the blue tabs at the left hand and right hand sides as shown in the figure below When you have finished printing your envelopes close the face up output tray to reset the blue tabs automatically To reset the blue tabs manually push the blue tabs back to their original position Make sure that the paper is neatly stacked and in the proper position on the multi purpose tray I...

Page 51: ...e size Figure 1 24 When you put paper in the multi purpose tray please remember the following The print surface must be face up Put the leading edge of the paper in first and push it gently into the tray The top of the paper stack must be under the maximum paper marks that are on both sides of the tray ...

Page 52: ...7050_US_UG_FM5 5 6 Change the following settings in the printer driver PCL driver PS driver Select the envelope size Orientation and so on Select MP Tray Select Envelopes Select the envelope size Select MP Tray Select Envelopes ...

Page 53: ... a lot of envelopes test one to make sure that the print results are what you want During printing the inside tray rises to feed paper into the printer If envelopes get smudged during printing in the printer driver select MP Tray as the Paper Source for a straight paper path Then set the Media Type to Thick Paper or Thicker Paper to increase the fixing temperature To adjust the print density setti...

Page 54: ...o not put the punched holes near the actuator paper sensor Do not use organizer sheets that are stuck together The glue that is used might damage the printer Do not load different types of paper at the same time in the paper tray because it may cause paper jams or misfeeds For proper printing you must choose the same paper size from your software application as the paper in the tray If your applic...

Page 55: ...1 36 ABOUT THIS PRINTER HL7050_US_UG_FM5 5 1 Open the multi purpose tray and lower it gently Figure 1 27 2 Pull out the multi purpose support flap Figure 1 28 ...

Page 56: ...5 5 3 Open the face up output tray Figure 1 29 4 When you load paper in the multi purpose tray make sure it touches the back of the tray and remains below the paper guide Figure 1 31 Pull out the face up output tray support Figure 1 30 Up to ...

Page 57: ...n the proper position on the multi purpose tray If it is not the paper may not be fed correctly resulting in a skewed printout or a paper jam When you put paper in the multi purpose tray please remember the following During printing the inside tray rises to feed paper into the printer The print surface must be face up Put the leading edge of the paper in first and push it gently into the tray The ...

Page 58: ...ER 1 39 HL7050_US_UG_FM5 5 6 Select the following setting in the printer driver PCL driver PS driver Select the Paper Size Media Type and so on Select MP Tray Select the Paper Size Select MP Tray Select the Media Type ...

Page 59: ... back of the printer Use this method when you want to print on special media that is thick or should not be bent such as thick paper labels card stock or envelopes 1 Open the face up output tray Figure 1 33 2 Pull out the face up output tray support Figure 1 34 3 Put the paper in the paper tray or the multi purpose tray 4 After all the printed pages come out of the printer remove them and close th...

Page 60: ... paper manually please remember the following If your application software allows you to select manual feed in the Print menu you can select it through the software Since the software or command setting overrides the control panel button setting you do not need to set the MANUAL FEED mode and the paper size in the PAPER menu If you use pre printed paper in the multi purpose tray you should put the...

Page 61: ...other Solutions Center at http solutions brother com PCL Driver Hewlett Packard LaserJet compatible laser printer BR Script Driver Postscript 3 language emulation Windows 95 98 Me Windows 2000 Windows NT 4 0 Windows XP BR Script Driver Postscript 3 language emulation Mac OS 8 6 9 2 Use the LaserWriter 8 Driver that we have supplied for your OS Mac OS X 10 1 Use the PostScript Driver that we have s...

Page 62: ...er Size Multiple Page Orientation and so on 1 Select Paper size Multiple page Orientation Portrait or Landscape Copies and Media Type 2 Select the Paper Source and so on The screens in this section are from Windows XP The screens on your PC will vary depending on your Operating System If you are using Windows NT 4 0 Windows 2000 or XP you can access the Basic tab by clicking Printing Preferences i...

Page 63: ...ing icons 1 Print Quality 2 Duplex Booklet Printing 3 Watermark 4 Page Setting 5 Device Options 6 Destination If you are using Windows NT 4 0 Windows 2000 or XP you can access the Advanced tab by clicking Printing Preferences in the General tab of the Brother HL 7050 series Properties screen 1 2 3 4 5 6 ...

Page 64: ...t to Manual you can change the Brightness Contrast Graphics Mode settings and TrueType mode options Duplex Printing To use duplex printing you need to install the optional Duplex unit onto your printer If you click the Duplex icon the dialog box for duplex settings will appear There are six types of duplex print options available Booklet Printing For PCL driver Only A Booklet Printing function can...

Page 65: ...ents When you use a bitmap file as a watermark you can change the size of the watermark and put it anywhere you like on the page When you use text as a watermark you can change the font darkness and angle settings Page Setting You can change the Scaling of the print image and select Mirror Print and Reverse Print options ...

Page 66: ... the following Printer Function modes in this tab Jump to the page for each Printer Function by clicking the function name Job Spooling For more information see Chapter 3 Quick Print Setup Sleep Time Status Monitor Macro Page Protection Print Date Time HRC TrueType Mode ...

Page 67: ...ng functions Multiple Page Duplex Toner Save Mode Paper Source Media Type Sleep Time When the printer does not receive data for a certain period of time timeout it enters sleep mode Sleep mode acts as though the printer was turned off The default timeout is 5 minutes and it is automatically adjusted to the most suitable time out setting depending on the frequency of your printer use Intelligent Sl...

Page 68: ...t reserves additional memory for the creation of full page images Selections are AUTO OFF LTR Letter size paper A4 or LGL legal size paper The page protection feature allows the printer to create the full page image to be printed in memory before physically moving the paper through the printer When the image is very complicated and the printer has to wait to process the image before printing use t...

Page 69: ...at is installed on the printer Tray settings will match the installed options 2 Auto detection of printer options The Auto Detect function finds the currently installed optional unit devices and shows the available settings in the printer driver When you click the Auto Detect button options that are installed on the printer will be listed You can manually add or remove options Tray and other setti...

Page 70: ...rother com You can see the printer driver version You can check the current driver settings You can print the Configuration page Print Settings and the internal fonts list If you are using Windows NT 4 0 Windows 2000 or XP you can access the Support tab by clicking Printing Preferences in the General tab of the Brother HL 7050 series Properties screen ...

Page 71: ...other Solutions Center at http solutions brother com For more information please see the online Help in the printer driver Ports tab Select the port where your printer is connected or the path to the network printer you are using The screens in this section are from Windows XP The screens on your PC will vary depending on your Operating System ...

Page 72: ...ou can change the Layout setting by selecting the setting in the Orientation Print on Both Sides Page Order and Page Per Sheet If you are using Windows NT 4 0 Windows 2000 or XP you can access the Layout tab by clicking Printing Preferences in the General tab of the Brother HL 7050 BR Script3 Properties screen ...

Page 73: ...er Quality tab Select the paper source Advanced Options If you are using Windows NT 4 0 Windows 2000 or XP you can access the Brother HL 7050 BR Script3 Advanced Options tab by clicking Advanced button in the Layout tab or the Paper Quality tab 1 2 ...

Page 74: ...ty Scaling and TrueType Font setting 3 You can change settings by selecting the setting in the Printer Features list Media Type Output Bin Collate APT Job spooling You will need to set the RAM Disk size first For more information see Chapter 3 Password Job Name HRC Toner Save Sleep Time BR Script Level 3 ...

Page 75: ... X 10 1 You can download the latest driver by accessing the Brother Solutions Center at http solutions brother com Page setup You can set the Paper size Orientation and Scale The screens in this section are from Laser Writer 8 of Mac OS 9 0 The screens on your PC will vary depending on your Operating System ...

Page 76: ...DRIVER AND SOFTWARE 2 16 HL7050_US_UG_FM5 5 Layout Set the layout Pages per sheet and so on Specific options Set the Media Type Resolution secure printing and so on ...

Page 77: ...r Brother network connected devices such as our network ready printers and multifunction centers BRAdmin Professional can also manage other manufacturers products that support SNMP Simple Network Management Protocol Driver Deployment Wizard This installer includes the Windows PCL driver and Brother network port driver LPR and NetBIOS The administrator should set up the IP address Gateway and Subne...

Page 78: ... Professional software which is designed for Windows systems only the Web BRAdmin server software can be accessed from any client computer with a web browser that supports Java IIS Internet Information Server 4 0 or 5 0 Web BRAdmin and Internet Information Server 4 0 is supported on the following operating systems Windows NT 4 0 Workstation Windows NT 4 0 Server Web BRAdmin and Internet Informatio...

Page 79: ...s follows 1 Insert the CD ROM into the CD ROM drive The opening screen appears automatically If the screen does not appear click Start and select Run and then enter the CD drive letter and type START EXE for example D START EXE 2 Select your language and then follow the instructions on the screen The printer driver will complete the installation ...

Page 80: ...en installed with your system If it is not it is available at http www apple com LaserWriter 8 versions 8 6 and 8 7 have been tested for use with this printer PostScript Printer Description files PPDs PPDs in combination with the Apple LaserWriter 8 driver access the printer features and allow the computer to communicate with the printer There is an installation program for the PPDs BR Script PPD ...

Page 81: ...serJet BR Script 3 HP GL EPSON FX 850 HP LaserJet BR Script 3 HP GL IBM Proprinter XL When you use the Automatic Emulation Selection please remember the following You must select the EPSON or IBM emulation mode priority because the printer cannot tell the difference between them Since the factory setting is the EPSON emulation mode you might need to select the IBM emulation mode by using the contr...

Page 82: ...ave the same communications settings on both the printer and the computer Since the Automatic Interface Selection feature has been factory set you may be able to simply connect the interface cable to the printer if your computer has the settings listed below If a network board Brother NC 4100h has been installed use the control panel to select NETWORK When necessary use the control panel in the IN...

Page 83: ...NTERFACE menu The printer allocates the entire input buffer to that interface when only one interface is selected When you use the Automatic Interface Selection note the following This function takes a few seconds to work If you want to speed up printing select the required interface manually in the SELECT menu by using the control panel in the INTERFACE menu ...

Page 84: ...are called Factory settings Although you can use the printer without changing these factory settings you can tailor the printer to your particular needs by changing the user settings See List of factory settings in Chapter 3 You can reset the changed user settings to the factory settings in the RESET menu For more information see Chapter 3 ...

Page 85: ...3 1 CONTROL PANEL 3 HL7050_US_UG_FM5 5 3Control panel Control panel Figure 3 1 ...

Page 86: ...nu reprint settings and error messages Pause and continue printing Job Cancel Stop and cancel the printing job in progress Reprint Select the number of extra copies 1 999 Move forward through menus Move forward through the options you can choose Move backward through menus Move backward through the options you can choose Set Select the control panel menu Set the selected menus and settings Back Go...

Page 87: ...nel only changes when the error is cleared You can pause printing with the Go button Pressing the Go button again restarts the print job and clears the pause During a pause the printer is off line If the printer is in PAUSE mode and you do not want to print the remaining data you can cancel the job by pressing the Job Cancel button Once the job has been cancelled the printer will return to the REA...

Page 88: ...sing or printing of data with the Job Cancel button The display shows JOB CANCELLING until the job is cancelled After cancelling the job the printer returns to the READY state When the printer is not receiving data or printing the display shows NO DATA and you cannot cancel the job ...

Page 89: ... EX in Chapter 4 or CompactFlash card see CompactFlash card in Chapter 4 you can reprint from random access memory RAM The reprint data in RAM will be deleted when the printer is turned off When you use RAM to reprint 1 Press the Set button on the control panel to exit from the READY state and select RAMDISK SIZE in the SETUP menu 2 The present RAM disk is 0MB Press the button to increase the repr...

Page 90: ...int button the LCD shows NO DATA STORED for a short time If you want to cancel reprinting press the Job Cancel button If the printer does not have enough memory to spool the print job data it will only print the last page Pressing the or button makes the number of reprint copies decrease or increase You can select between 1 and 999 COPIES For more information about the settings in the printer driv...

Page 91: ...e control panel For more information see Job Spooling in Chapter 2 If you press the Go button twice the printer will leave the REPRINT setting If you want to reprint the data and have pressed the Go button the display shows PRESS SET TO PRINT Press the Set or Reprint button to start reprinting or press Go again to cancel the reprint job If you wait too long to continue the control panel button ope...

Page 92: ...and anyone can access them using the front panel or a web browser The printer will not print a PUBLIC document when you send it to the printer You must use the control panel of the printer or connect to the printer through a web browser PUBLIC data can be deleted using the control panel of the printer or from the web based management software When you reprint PUBLIC data please see How to print SE...

Page 93: ...g To print the document you must use the control panel of the printer with the password or connect to the printer using a web browser If you want to delete the spooled data you can carry out this operation using the control panel or the web based management software If there is data in the job information that cannot be displayed on the LCD the display shows For more information about the settings...

Page 94: ...or button to select the job Press the Set button to set the job Type your password Press the Set button to set the password The printer will exit this menu after a time out period Press the Set button or the Reprint button If you press the Go button the display shows PRESS SET TO PRINT NO DATA STORED REPRINT LAST JOB REPRINT SECURE FILE SECURE FILE USER XXXXXX USER XXXXXX JOB XXXXXX JOB XXXXXXX PA...

Page 95: ...he printer does not have reprint data in the memory and you press the Reprint button the LCD shows NO DATA STORED To cancel the reprint job Pressing the Job Cancel button allows you to cancel the current reprint job The Job Cancel button also allows you to cancel a paused reprint job ...

Page 96: ...LCD displays the current mode You can go to other menus by pressing the or button Pressing the or button allows you to move forward or backward through the menus and settings on the display Press or keep pressing the button until you see the setting you want To enter numbers You can enter numbers in two ways You can press the or button to move up or down one number at a time or you can hold down t...

Page 97: ...the Set button when the printer is the on line READY it goes off line and the LCD goes to the menu Pressing the Set button allows you to choose the displayed menu or option After changing a setting an asterisk appears briefly on the right hand side of the message ...

Page 98: ...lso allows you to choose the previous digit while setting numbers When you select a setting and it does not have and asterisk Set button was not pressed the Back button allows you to return to the previous menu level with the original setting unchanged When you press the Set button to choose a setting an asterisk appears briefly at the end of the display Since the asterisk shows what you have chos...

Page 99: ..._US_UG_FM5 5 Light emitting diode LED The LED is a light that shows the printer status Data Orange LED LED indication Meaning On Data is in the printer memory Blinking Receiving or processing data Off No data left in the memory ...

Page 100: ...he display will change If you take the printer off line the display changes to show the emulation you have chosen If there are any problems the display shows the appropriate error message maintenance message or call service message so you will know that you need to take action For more information about these messages see Troubleshooting in Chapter 6 ...

Page 101: ..._FM5 5 Back light Light Meaning OFF The printer is off line or in sleep status Green General Ready to print Printing Warming Up Red Error There is a problem with the printer Orange Setting Choosing a menu Setting Reprint times Pause ...

Page 102: ...S_UG_FM5 5 LCD message You can choose the message that is displayed on the second line of the LCD as shown below Select NONE PAGE COUNTER or JOB NAME in the lower LCD setting of the SETUP menu READY READY JOB NAME READY PAGE XXXX ...

Page 103: ...s functions Pressing the Go button starts the printer again NOW INITIALIZING The printer is setting up WARMING UP The printer is warming up RAM SIZE XX MB This printer has XX MB memory JOB CANCELLING Cancelling the job RESOLUTION ADAPT Printing with reduced resolution PRESS SET TO PRINT Press the Set button to start printing RESET TO FACTORY SETTING The printer setting returns to the factory setti...

Page 104: ...n asterisk appears at the end of the display for a short time After that the display returns to the previous menu level After changing the status or a setting pressing the Back button before you press the Set button will cause the display to return to the previous menu level with the original settings unchanged There are two ways to input numbers You can press or to scroll up or down one number at...

Page 105: ...n the printer off line Press the or button to move forward or backward through the menus Press the Set button to move to the next menu level Press the or button Press the Set button Press the button Press Set button An asterisk briefly appears at the end of the display The default setting is indicated by an READY MENU INFORMATION MENU PAPER PAPER SOURCE PAPER MP FIRST MP FIRST ON MP FIRST OFF MP F...

Page 106: ...TY For more information see page 3 24 SETUP For more information see page 3 25 PRINT MENU For more information see page 3 27 NETWORK For more information see page 3 31 INTERFACE For more information see page 3 32 RESET MENU For more information see page 3 33 The control panel LCD names for the paper trays are as follows Paper tray TRAY 1 Multi purpose tray MP TRAY Optional lower tray TRAY 2 TRAY 3...

Page 107: ...k users NET DATE Shows Network build date only Network users RAM SIZE MB Shows the size of memory in this printer MAINTENANCE PAGE COUNTER Shows the current total printed pages DRUM COUNT Shows the pages printed with drum unit REMAIN DRUM Shows the pages left to print with drum unit REMAIN PF KIT MP Shows the pages left toprintwithPFkitMP REMAIN PF KIT 1 Shows the pages left to print with PF kit 1...

Page 108: ...er or not you want to feed paper manually DUPLEX OFF ON LONG BIND ON SHORT BIND Select whether you want to automatically print on both sides of the paper OUTPUT STANDARD MAILBOX1 10 MX STACK MX SORT Select where you want the printed pages to go QUALITY Display Shows Description RESOLUTION 300 600 1200 You can select a print resolution of 300 600 or 1200 dpi dots per inch HRC OFF LIGHT MEDIUM DARK ...

Page 109: ...y setting is Level 1 ERROR BUZZER OFF NORMAL There will be three sets of five Buzzes when an error occurs SPECIAL Buzzes five times consecutively until the error is cleared PANEL BUZZER OFF Disables buzz function when you press the button ON Enables buzz function when you press the button BUZZER VOLUME LOW Makes the buzz lower HIGH Makes the buzz higher POWER SAVE TIME 1MIN 240MIN TONER LOW CONTIN...

Page 110: ...ion SECURE FILE Select the user name job name and password PUBLIC FILE Select the user name and job name PROOF FILE Select the user name and job name DATA ID HD DATA ID CF MACRO ID HD MACRO ID CF FONT ID HD FONT ID CF FORMAT HD OK FORMAT CF OK TIME STYLE YY MM DD or MM DD YY or DD MM YY DATE TIME DISPLAY YYYY MM DD HH MM YEAR MONTH DAY HOUR MINUTE SETUP continued Display Shows Description ...

Page 111: ...This printer can be adjusted to align the page format Subsetting Description X OFFSET 0 500 500 Move the print start position at the top left corner of pages horizontally up to 500 left to 500 right dots in 300 dpi Y OFFSET 0 500 500 Move the print start position at the top left corner of pages vertically up to 500 up to 500 down dots in 300 dpi AUTO FF TIME OFF 1 99 sec Allows you to print the re...

Page 112: ...rgin at column 0 to 70 columns at 10 cpi RIGHT MARGIN Set the right margin at column 10 to 80 columns at 10 cpi TOP MARGIN Set the top margin at a distance from the top edge of the paper 0 0 33 0 5 1 0 1 5 or 2 0 The factory setting is 0 5 BOTTOM MARGIN Set the bottom margin at a distance from the bottom edge of the paper 0 0 33 0 5 1 0 1 5 or 2 0 The factory setting is 0 33 None HP 0 5 HP LINES S...

Page 113: ...ting is 0 33 BOTTOM MARGIN Set the bottom margin at a distance from the bottom edge of the paper 0 0 33 0 5 1 0 1 5 or 2 0 The factory setting is 0 33 LINES Set the number of lines on each page from 5 to 128 lines IBM PROPRINTER FONT NO I000 FONT PITCH CHARACTER SET PC 8 Set the symbol set or the character set TABLE PRINT Print code table AUTO LF OFF ON ON CR CR LF OFF CR CR AUTO CR OFF ON AUTO MA...

Page 114: ...et the bottom margin at a distance from the bottom edge of the paper 0 0 33 0 5 1 0 1 5 or 2 0 The factory setting is 0 33 LINES Set the number of lines on each page from 5 to 128 lines HP GL CHAR SET STD CHAR SET ALT PEN SIZE PEN1 to 6 Set size and gray percentage for the selected pen PEN GRAY PEN1 to 6 15 30 45 75 90 or 100 is the selected pen number BR SCRIPT3 ERROR PRINT OFF ON PRINT MENU cont...

Page 115: ...tion TCP IP ENABLE ON OFF IP ADDRESS SUBNET MASK GATEWAY IP BOOT TRIES IP METHOD AUTO STATIC RARP BOOTP DHCP NETWARE NETWARE ENABLE ON OFF NET FRAME AUTO 8023 ENET 8022 SNAP APPLETALK ON OFF NETBEUI ON OFF DLC LLC ON OFF BANYAN ON OFF LAT ON OFF NETBIOS IP ON OFF APIPA ON OFF ENET AUTO 100B FD 100B HD 10B FD 10B HD ...

Page 116: ...speed parallel communications on or off BI DIR ON OFF Turns bi directional parallel communications on or off RS 232C When using the serial interface Sub setting Menu Description FAX MODE OFF ON RESTART PRINTER BAUDRATE 1 Data transfer speed can be set to 150 300 600 1200 2400 4800 9600 19200 38400 57600 115200 baud CODETYPE 1 8 BITS 7 BITS The data length can be set to 7 or 8 bits PARITY 1 NONE OD...

Page 117: ...VE 2 ON OFF INTERVAL 2 OFF 6H 12H 24H 2D 4D 7D RESET MENU Display Shows Description RESET PRINTER Resets the printer and restores all printer settings including command settings to settings you have previously made with the control panel buttons FACTORY RESET Resets the printer and restores all printer settings including command settings to the factory settings See List of factory settings in this...

Page 118: ...nd then press the or button until DATE TIME appears Press the Set button and then press the or button until YEAR appears Press the Set button Press the button Press the Set button Press the Set button Press the Set button MENU INFORMATION MENU SETUP SETUP DATE TIME DATE TIME YEAR YEAR 1999 YEAR 2000 YEAR 2000 DATE TIME YEAR DATE TIME MONTH DATE TIME 2000 04 25 10 22 ...

Page 119: ...rt of the number is blinking Press the or button to increase or decrease the number Press the Set button to go to the next number Repeat this process until you have set your IP address Press the Set button to complete the IP address An asterisk appears at the end of the display MENU INFORMATION MENU NETWORK NETWORK TCP IP TCP IP TCP IP ENABLE TCP IP IP ADDRESS IP ADDRESS 192 0 0 192 IP ADDRESS 123...

Page 120: ...vel 3 The BR Script interpreter of this printer allows you to control text and graphics on pages For technical information about PostScript commands see the following manuals Adobe Systems Incorporated PostScript Language Reference Manual 3rd Edition Menlo Park Addison Wesley Publishing Company Inc 1999 Adobe Systems Incorporated PostScript Language Program Design Menlo Park Addison Wesley Publish...

Page 121: ...er Use this mode so your printer will work when printing from those types of applications EPSON FX 850 and IBM Proprinter XL Mode The EPSON FX 850 and IBM Proprinter XL modes are the emulation modes that this printer supports to meet the industry standard for dot matrix printers Some applications support these dot matrix printer emulations Use these emulation modes so your printer will work well w...

Page 122: ... when the printer is turned off and on again It is not possible to reset the network settings using the control panel If you want to reset the print server to its factory settings resetting all information such as the password and IP address information hold down the Network Test button on the Network board NC 4100h for more than 5 seconds Display Shows Submenu Factory setting PAPER SOURCE AUTO PR...

Page 123: ...DISK SIZE 0MB TIME STYLE YY MM DD hh mm PRINT MENU MEDIA TYPE PLAIN PAPER PAPER A4 LETTER COPIES 1 ORIENTATION PORTRAIT PRINT POSITION X OFFSET 0 Y OFFSET 0 AUTO FF TIME 5 FF SUPPRESS OFF HP LASERJET FONT NO 59 FONT PITCH 10 00 12 00 SYMBOLSET PC8 AUTO LF OFF AUTO CR OFF AUTO WRAP OFF AUTO SKIP ON LEFT MARGIN RIGHT MARGIN TOP MARGIN BOTTOM MARGIN LINES Display Shows Submenu Factory setting ...

Page 124: ...TOP MARGIN BOTTOM MARGIN LINES IBM PROPRINTER FONT NO 59 FONT PITCH 10 00 12 00 SYMBOLSET PC8 AUTO LF OFF AUTO CR OFF LEFT MARGIN RIGHT MARGIN TOP MARGIN BOTTOM MARGIN LINES HP GL CHAR SET STD CHAR SET ALT PEN SIZE PEN GRAY BR SCRIPT ERROR PRINT OFF NETWORK TCP IP TCP IP ENABLE ON IP ADDRESS 192 0 0 192 SUBNET MASK 0 0 0 0 GATEWAY 0 0 0 0 Display Shows Submenu Factory setting ...

Page 125: ...C LLC ON BANYAN ON LAT ON NETBIOS IP ON APIPA OFF ENET AUTO INTERFACE SELECT AUTO AUTO IF TIME 5 INPUT BUFFER LEVEL 3 PARALLEL HIGH SPEED ON BI DIR ON RS 232C FAX MODE OFF BAUD RATE 9600 CODE TYPE 8 BITS PARITY NONE STOP BIT 1 BITS X ON X OFF ON DTR ER ON ROBUST XON OFF RING DELAY 0 REDUCTION AUTO RAM SIZE 1MB RECEIVE ON INTERVAL OFF Display Shows Submenu Factory setting ...

Page 126: ... marked with Braille characters for visually impaired users as shown in the table Braille indicates the first 2 or 3 letters of the English button name For example Job Cancel is shown as can and Plus is shown as plu in Braille Button Abbreviations Braille Go Go Job Cancel Can Reprint Rep Plu Min Set Set Back Bac ...

Page 127: ...plus button until ERROR BUZZER PANEL BUZZER or BUZZER VOLUME is displayed and press Set See SETUP in this chapter for a description of the buzzer settings Buzz indications Conditions A short buzz When you enter any information using the button Two short buzzes When you come back to the top menu option after you move forward or backward through the menus When you move to another menu level Five sho...

Page 128: ...items Options Lower tray unit Three paper trays Duplex unit Mailbox unit Network board For HL 7050 only LT 7000 DX 7000 MX 7000 series NC 4100h see 4 3 see 4 4 see 4 6 see 4 8 CompactFlash card DIMM memory HDD Ir DA interface HD EX IR 1000 see 4 11 see 4 13 see 4 17 see 4 21 Optional font package Optional Barcode Font Optional stabilizer BS 3000 BT 1000 SB 4000 see 4 22 see 4 22 see 4 2 ...

Page 129: ...or lower tray unit and stabilizer SB 4000 When you have the following printer options you must install the small pads or the optional stabilizer 1 Lower tray 2 Lower trays 3 Lower trays Non mailbox unit Mailbox unit 5 bins Mailbox unit 10 bins ...

Page 130: ...r you bought the printer from Expands up to a total of 2100 sheets Figure 4 1 To install the lower tray unit please see the User s Guide that we have supplied with the lower tray If you put the lower tray unit on the floor we strongly recommend that you put the small pads that we have supplied on the underside of the lower tray unit as shown above Even if a tray has been moved to another tray posi...

Page 131: ... with a software command For more information about the control panel see PAPER menu in Chapter 3 To install the duplex unit please see the User s Guide that we have supplied with the Duplex unit Figure 4 2 Guidelines for printing on both sides of the paper If the paper is thin it may wrinkle If paper is curled straighten it and then place it in the paper tray If the paper is not feeding correctly...

Page 132: ... must be put into the paper tray in the following way For the multi purpose MP tray Put the side to be printed on first face up with top of the paper furthest away from the printer If letterhead paper is used this would be put in to the MP tray with the heading facedown and the furthest away from the printer For the paper tray and optional lower tray tray1 2 3 or 4 Put the side to be printed on fi...

Page 133: ...e installed on the HL 7050 laser printer to allow you to direct your printouts to any bin that you want Figure 4 3 To install the Mailbox unit please see the User s Guide that we have supplied with the Mailbox Mailbox This setting allows you to direct your printouts to any bin that you specify ...

Page 134: ...it to the bin that you want You will not have to sort the copies after printing them Stacker You can print large print jobs when no one is in the office You can print 100 sheets of plain paper to each bin of the mailbox When you remove bins 2 4 7 and 9 the total output increases to 1900 sheets including the printer output tray ...

Page 135: ...lk DLC LLC Banyan VINES DEC LAT and NetBEUI Many useful features such as BRAdmin Professional for the administrator and Brother network printing software are included on the CD ROM supplied with the HL 7050 printer For setup see the Network User s Guide Installing the Network board 1 Turn off the printer power switch and then unplug the printer 2 Open the side cover Figure 4 4 ...

Page 136: ...OPTIONS 4 9 HL7050_US_UG_FM5 5 3 Loosen the three screws and then remove the metal plate by lifting up slightly Figure 4 5 4 Unscrew the two screws and then remove the Network cover plate Figure 4 6 ...

Page 137: ...ure 4 7 6 Secure the metal plate with the three screws Figure 4 8 7 Close the side cover 8 Connect one end of the Ethernet Cable to the Network port of the printer 9 Plug the printer back in and then turn on the power switch 10 For details about how to use the Network board please see the Network User s Guide on the CD ROM that we have supplied with this printer ...

Page 138: ...twork You can install the following types of CompactFlash memory cards SanDisk or SanDisk OEM Products Type I 16 MB SDCFB 16 801 32 MB SDCFB 32 801 64 MB SDCFB 64 801 96 MB SDCFB 96 801 128 MB SDCFB 128 801 192 MB SDCFB 192 801 256 MB SDCFB 256 801 384 MB SDCFB 384 801 512 MB SDCFB 512 801 Make sure the printer power is OFF before you install or remove a card so you don t seriously damage it or lo...

Page 139: ... 1 Turn off the printer power switch and then unplug the printer 2 Insert a CompactFlash card into the slot with the label facing to the left Make sure you put it in properly Figure 4 9 Before you remove the card turn the power switch OFF and then unplug the printer To remove the card pull it out of the printer ...

Page 140: ... 12459 0001 Europe 16 MB Buffalo Technology 12323 0001 32 MB Buffalo Technology 12324 0001 64 MB Buffalo Technology 12325 0001 128 MB Buffalo Technology 12326 0001 In general the DIMM must have the following specifications Type 100 pin and 32 bit output CAS lantency 2 or 3 Clock frequency 66 MHz or more Capacity 16 32 64 or 128 MB Height 46 mm 1 8 in or less Parity NONE Dram Type SDRAM 4 Bank SDRA...

Page 141: ...nstall extra memory follow these steps 1 Turn off the printer power switch and then unplug the printer Disconnect the interface cable from the printer 2 Remove the side cover Figure 4 10 Make sure you turn the power to the printer OFF before you install or remove the DIMM ...

Page 142: ...ing it up slightly Figure 4 11 4 Unpack the DIMM and hold it by its edges 5 Hold the DIMM with your fingers on the side edges and your thumb on the back edge Line up the notches on the DIMM with the DIMM slot Check that the locks on each side of the DIMM slot are open or facing outwards Figure 4 12 ...

Page 143: ...gure 4 13 7 Secure the metal plate with the three screws Figure 4 14 8 Put the side cover back on 9 Reconnect the interface cable to your printer Plug the printer back in and then turn on the printer power switch 10 To check whether the DIMM has been installed properly you can print the Print Settings listing that shows the current memory size To print the Print Settings listing see Chapter 3 ...

Page 144: ...wser See the sections on printing PROOF PUBLIC and SECURE data in Chapter 3 Make sure that the box contains the following items Hard disk Two hard disk cables Four shoulder screws Four screws 4 Quick Setup Guide Figure 4 15 1 Turn off the printer power switch and then unplug the printer Disconnect the interface cable from the printer 2 Remove the side cover Figure 4 16 Use the longer cable for thi...

Page 145: ...S HL7050_US_UG_FM5 5 3 Loosen the three screws and then remove the metal plate by lifting it up slightly Figure 4 17 4 Put the four shoulder screws supplied with the HDD unit into the bottom of the HDD Figure 4 18 ...

Page 146: ... cable to the HDD with the keyed side facing up Figure 4 19 6 Install the HDD base plate by putting the four screws into the four holes of the metal plate so that the HDD pins point to the back of the printer Then secure the plate with the four screws Figure 4 20 ...

Page 147: ...rd Figure 4 21 8 Secure the metal plate with the three screws Figure 4 22 9 Put the side cover back on 10 Reconnect the interface cable to your printer Plug the printer back in and then turn on the printer power switch 11 Format the HDD from the control panel See Chapter 3 for details ...

Page 148: ...Windows 95 98 Me Windows NT 4 0 and Windows 2000 infrared printer device Transmits and receives data at up to 4 MB a second Connects to the parallel ports of the computer and printer Allows a printer to communicate with an infrared equipped portable computer Transmission range 1 cm 3 9 in up to 100 cm 39 in meets the IrDA standard 30 degree cone angle Switches between infrared or parallel port Fig...

Page 149: ... BS 3000 The optional font package BS 3000 is the CD ROM you need for installing the 136 PS3 Agfa and TrueType Fonts Optional barcode fonts package BT 1000 The optional Barcode fonts package BT 1000 is the CD ROM you need for installing the Barcode fonts ...

Page 150: ...following messages will appear on the LCD panel Appears at intervals See the TONER LOW explanation in this chapter See the TONER LIFE END explanation in this chapter See the CHANGE DRUM SOON explanation in this chapter Accessories Toner Cartridge Drum Unit See Replacing the toner cartridge in this chapter See Replacing the drum unit in this chapter TONER LOW TONER LIFE END CHANGE DRUM SOON ...

Page 151: ...s happened First condition Actual this is when the Actual amount of toner in the toner cartridge has been used up Second condition Mechanical this is when the Mechanical components of the toner cartridge have physically reached the end of their life For both conditions the printer will stop printing until a new toner cartridge has been put into the printer TONER LIFE END can only be cleared by put...

Page 152: ...gure 5 2 To make sure you get high quality print make sure you use quality toner cartridges When you want to buy toner cartridges call the dealer you bought the printer from Handle the toner cartridge carefully If toner scatters on your hands or clothes immediately wipe or wash it off with cold water Do not touch the shaded parts shown in Figure 5 3 and Figure 5 4 Figure 5 3 Figure 5 4 ...

Page 153: ... yellow plastic protective cover Figure 5 6 Be sure to seal the toner cartridge tightly so toner powder does not spill out of the cartridge Discard the used toner according to local regulations keeping it separate from domestic waste If you have questions call your local waste disposal office Put the toner cartridge in the printer immediately after you remove the protective cover Do not touch the ...

Page 154: ...er cartridge firmly into the printer If you put it in properly the blue lock lever will lift automatically Figure 5 8 6 Close the top cover of the printer 7 If the LCD shows CARTRIDGE ERROR take out the toner cartridge and then put it back into the printer again ...

Page 155: ...int A4 or Letter size The actual number of printed pages will vary depending on the average type of print job and paper There are many factors that determine the actual drum life such as temperature humidity type of paper type of toner used the number of pages per print job and so on Under ideal conditions the average drum life is estimated at up to 40 000 pages The actual number of pages that you...

Page 156: ...t assembly drum unit with the toner cartridge Figure 5 10 We recommend that you place the drum unit assembly on a piece of disposable paper or cloth in case you accidentally spill or scatter toner To prevent damage to the printer from static electricity do not touch the electrodes shown in Figure 5 11 Figure 5 11 ...

Page 157: ...ers on your hands or clothes wipe or wash it off with cold water immediately Do not touch the shaded parts shown in Figure 5 13 Figure 5 13 Discard the used drum unit according to local regulations keeping it separate from domestic waste If you have questions call your local waste disposal office Be sure to seal up the drum unit tightly in a bag so that toner powder does not spill out of the unit ...

Page 158: ... the blue lock lever is lifted automatically Figure 5 15 Wait to unpack a drum unit until immediately before you put it in the printer Exposure to direct sunlight or room light may damage the drum unit Do not touch the shaded parts shown in Figure 5 14 Make sure you install the toner cartridge properly or it may separate from the drum when you pick up the drum unit ...

Page 159: ...et the page counter following the instructions we have supplied with the new drum unit 8 Close the top cover of the printer We recommend that you clean the inside of the printer when you replace the drum unit See Cleaning in this chapter If you replace only the toner cartridge do not reset the page counter ...

Page 160: ...aintenance parts regularly to maintain print quality When it is time to replace these parts the following messages will appear on the LCD See Maintenance Messages in this chapter See Maintenance Messages in this chapter See Maintenance Messages in this chapter REPLACE PF KIT REPLACE FUSER REPLACE LASER ...

Page 161: ...re you clean the inside of the printer If printed pages are stained with toner clean the inside of the printer with a dry soft cloth Cleaning the outside of the printer Clean the outside of the printer as follows 1 Turn off the printer power switch and then unplug the printer power cord 2 Pull the paper tray out of the printer 3 Open the multi purpose tray ...

Page 162: ...er with a soft cloth to remove dust Figure 5 17 5 Remove anything that is stuck inside the paper tray Figure 5 18 6 Put the paper tray back in the printer and then close the multi purpose tray 7 Plug the printer power cord back in and then turn the printer power switch back on ...

Page 163: ... the printer power cord 2 Open the top cover 3 Take out the drum unit assembly When you clean the inside of the printer pay attention to the following If your clothes are smeared with toner wipe off the toner with a dry cloth and immediately wash the clothes in cold water to avoid stains Never touch the hot fuser Be careful not to inhale the toner Figure 5 19 Fuser is HOT ...

Page 164: ...h Figure 5 21 5 Wipe the scanner window with a dry soft cloth Figure 5 22 WARNING After you have just used the printer some parts inside the printer are extremely hot When you open the top cover of the printer never touch the fuser and fixing roller Inside the printer Open the face up output tray Figure 5 20 Fuser is HOT Metal plate ...

Page 165: ...5 16 ROUTINE MAINTENANCE HL7050_US_UG_FM5 5 6 Put the drum unit assembly in the printer 7 Close the top cover 8 Plug the printer power cord back in and then turn the printer power switch back on ...

Page 166: ...r switch and then unplug the printer power cord 2 Open the top cover 3 Take out the drum unit assembly drum unit with the toner cartridge We recommend that you put the drum unit Assembly on a piece of disposable paper or cloth in case you accidentally spill the toner To prevent damage to the printer from static electricity do not touch the electrodes shown in Figure 5 23 Figure 5 23 ...

Page 167: ...b from right to left several times Figure 5 24 5 Put the drum unit assembly back in the printer 6 Close the top cover 7 Plug the printer power cord back in and then turn the printer power switch back on Make sure to return the tab to the Home position If you do not printed pages will have a black vertical stripe Home Position ...

Page 168: ...proximate Life To Purchase Replacement REPLACE PF KIT MP Paper feeding kit 100 000 pages 1 Call Customer Support REPLACE PF KIT 1 Paper feeding kit 100 000 pages 1 Call Customer Support REPLACE PF KIT 2 Paper feeding kit 100 000 pages 1 Call Customer Support REPLACE PF KIT 3 Paper feeding kit 100 000 pages 1 Call Customer Support REPLACE PF KIT 4 Paper feeding kit 100 000 pages 1 Call Customer Sup...

Page 169: ...artridge in Chapter 5 NO PAPER XXX Put paper in the empty tray NO TRAY XXX Put the paper tray in the printer COVER OPEN Close the top cover of the printer Close the Duplex cover Close the back cover of the mailbox FACEUP OPEN Close the face up output tray FACEUP CLOSE Open the face up output tray Push down the two blue levers and then press Go JAM XXX Carefully pull out the jammed paper from the i...

Page 170: ...rties or install the Mailbox unit correctly DIMM ERROR Re install the DIMM correctly Turn off the printer Wait a few seconds and then turn it on again If this error message appears again replace the DIMM with a new one CARD ERROR Make sure of the following The CompactFlash card is installed properly The installed CompactFlash card is formatted properly Turn off the printer Wait a few seconds then ...

Page 171: ...ORE DATA Add more memory See Installing extra DIMM memory in Chapter 4 ACCESSORY ERROR The accessory you added was not installed properly OPTION MISMATCH Your Duplex unit is not a DX 7000 Change to a DX 7000 Your Lower tray is not an LT 7000 Change to an LT 7000 Your Mailbox unit is not a MX 7000 series Change to a MX 7000 series CLEAN DRUM UNIT Open the top cover Pull out the Drum unit assembly G...

Page 172: ...Chapter 5 TONER LIFE END Replace the new toner cartridge referring to Chapter 5 REPLACE PF KIT MP Call your dealer for a replacement paper feeding kit REPLACE PF KIT1 Call your dealer for a replacement paper feeding kit REPLACE PF KIT2 Call your dealer for a replacement paper feeding kit REPLACE PF KIT3 Call your dealer for a replacement paper feeding kit REPLACE PF KIT4 Call your dealer for a rep...

Page 173: ...US_UG_FM5 5 Call service messages Call service message Action ERROR Turn off the printer Wait a few seconds then turn it on again If this does not clear the problem call your dealer or a Brother authorized service representative ...

Page 174: ... and put it back in firmly Make sure you have chosen the manual feed mode in the printer driver The printer does not load envelopes The printer can load envelopes from the multi purpose tray You must set up your application software to print on the size of envelopes you are using This is usually done in the page setup or document setup menu of your software Please see your software application man...

Page 175: ...r in the paper tray Change the printer driver setting in Media Type to a thicker setting The printer does not print Make sure that the cable is connected to the printer Make sure that you have chosen the appropriate printer driver When printing on normal paper it creases Change the printer driver setting in Media to the Thin setting Problem Recommendation ...

Page 176: ...er Figure 6 1 Paper jam in the multi purpose tray Paper jam in the upper paper tray TRAY1 Paper jam in the lower tray TRAY 2 Paper jam in the lower tray TRAY 3 Paper jam in the lower tray TRAY 4 Paper jam inside the printer Paper jam where the paper comes out Paper jam in the face up output tray Paper jam in the Duplex unit Paper jam in the Mailbox unit JAM A1 JAM A2 JAM A3 JAM A4 JAM A5 JAM B JAM...

Page 177: ...er you have removed all the jammed paper open the top cover and then close it again to start printing Do not use the following Bent paper Moist paper Paper that does not meet specifications If the paper is misfeeding or a lot of pages are going through at the same time when you print on small or thick paper change the paper thickness switches that are on the bottom of the paper tray as follows Fig...

Page 178: ...se steps 1 Remove the paper from the multi purpose tray 2 Fan the paper stack then put it back in the multi purpose tray Figure 6 3 3 When loading paper in the multi purpose tray make sure it touches the back of the tray and stays below the maximum paper mark 4 Open the top cover of the printer and close it or press Go to start printing JAM A1 ...

Page 179: ... Paper jam inside the Paper tray The LCD names for the paper trays are as follows Tray Name LCD Panel Desctiption Upper paper tray Tray 1 A2 Optional Lower tray Tray 2 Tray 3 Tray 4 A3 A4 A5 Figure 6 4 Tray 1 Tray 2 Tray 3 Tray 4 JAM A2 JAM A3 JAM A4 JAM A5 ...

Page 180: ...out the jammed paper Figure 6 5 3 Load paper below the maximum paper mark While pressing the blue paper guide release lever slide the paper guides to fit the paper size Check that the guides are firmly in the slots If you cannot pull out a small piece of jammed paper you can remove it by turning the dial to the lower position as shown below Figure 6 6 ...

Page 181: ...5 5 4 Put the paper tray back in the printer 5 Open the top cover of the printer and then close it to resume printing Do not pull out the upper paper tray while paper is feeding from a lower paper tray because this will cause a paper jam ...

Page 182: ... are extremely hot When you open the top cover of the printer never touch the fuser or the fixing roller Inside the printer Open the face up output tray Figure 6 7 After you have removed the jammed paper print a few test pages This is to make sure that the printed pages have no toner stains on them before you restart the print job Remove the jammed paper carefully so you do not spread toner Take c...

Page 183: ...drum unit assembly and take the toner cartridge out of the drum unit assembly Remove a piece of jammed paper if there is any inside the drum unit Figure 6 9 Figure 6 10 Figure 6 11 Handle the toner cartridge carefully If toner scatters on your hands or clothes wipe or wash it off with cold water immediately Do not touch the shaded parts shown in Figure 6 10 and 6 11 ...

Page 184: ...TROUBLESHOOTING 6 16 HL7050_US_UG_FM5 5 5 Put the drum unit assembly back in the printer press firmly 6 Close the top cover of the printer ...

Page 185: ... paper jams where the paper comes out or behind the face up output tray remove the jammed paper as follows 1 Use both hands to slowly pull the jammed paper from the paper exit Figure 6 12 If a Duplex unit is on the printer take it off the printer After you pull out the jammed paper put the Duplex unit back on the printer JAM C ...

Page 186: ...50_US_UG_FM5 5 2 Open the face up output tray Figure 6 13 3 Use both hands to slowly pull out the jammed paper Figure 6 14 4 Close the face up output tray 5 Open the top cover of the printer and then close it to resume printing ...

Page 187: ...TING HL7050_US_UG_FM5 5 JAM D paper jam in the Duplex unit 1 Use both hands to slowly pull the jammed paper from the paper exit of the Duplex unit Figure 6 15 2 Use both hands to gently open the Duplex unit cover JAM D ...

Page 188: ...ex unit out of the printer Figure 6 16 Look inside the printer s slot for the Duplex unit to make sure that the jammed paper is not in there When you pull out the Duplex unit be sure to hold it firmly with both hands the shaded part in the illustration is heavier Figure 6 17 ...

Page 189: ...6 21 TROUBLESHOOTING HL7050_US_UG_FM5 5 4 Pull out the jammed paper from inside the Duplex unit Figure 6 18 5 Put the Duplex unit back in the printer Figure 6 19 6 Gently close the Duplex unit cover ...

Page 190: ...nit If there is a paper jam in the Mailbox unit follow these steps 1 Open the back cover of the Mailbox unit Figure 6 20 2 Pull out the jammed paper Figure 6 21 3 Close the back cover of the mailbox 4 Open the top cover of the printer and then close it to restart printing JAM E ...

Page 191: ...mount of background shading See Positioning the printer in Chapter 1 Use a new toner cartridge See Replacing the toner cartridge in Chapter 5 Ghost image Make sure you use paper that meets our specifications Rough surfaced paper paper that has absorbed moisture or thick paper can cause this problem See What kind of paper can I use in Chapter 1 Make sure that you choose the appropriate media type i...

Page 192: ... the paper type and quality See What kind of paper can I use in Chapter 1 Curl or wave Check the paper type and quality High temperatures and high humidity will cause paper to curl See What kind of paper can I use in Chapter 1 If you don t use the printer very often the paper may have been in the paper tray too long Turn over the stack of paper in the paper tray Also try fanning the paper stack an...

Page 193: ...ons to go to the INFORMATION menu and then to the MAINTENANCE menu to select CLEANING PAGE If the black spots still appear print the cleaning page again For more information see Chapter 3 All black You may clear the problem by cleaning the primary corona wire inside the drum unit by sliding the blue tab Make sure you return the blue tab to the Home position See Cleaning the corona wire in Chapter ...

Page 194: ...m unit See Replacing the drum unit in Chapter 5 White Spots on black text and graphics at 94mm 3 7 in intervals The drum unit may be damaged Put in a new drum unit See Replacing the drum unit in Chapter 5 Black spots at 94 mm 3 7 in intervals The drum unit may be damaged Put in a new drum unit See Replacing the drum unit in Chapter 5 Examples of poor print quality Recommendation ABCDEFGH abcdefghi...

Page 195: ... Windows driver and then try again The best combination of the settings below will vary depending on your document Graphics mode TrueTypeTM mode Use printer TrueTypeTM fonts The printer cannot print full pages of a document An error message MEMORY FULL appears Press the Go button to print the data that is left in the printer Reduce the print resolution or reduce the complexity of your document Exp...

Page 196: ... you are using a serial interface make sure that the slide switch of the serial interface is in the correct position Make sure that the interface settings have been properly set up in the INTERFACE menu using the control panel For connecting using the RS 232C interface only The printer prints the first couple of pages correctly but some following pages have text missing This problem is usually rel...

Page 197: ...ter in your application software If the serial interface is used make sure that the RS 232C serial interface has been selected with the slide switch Make sure the interface settings were correctly set up in INTERFACE menu using the control panel Make sure the baud rate parity and stop bits in your application software matches the settings in the printer Problem Recommendation Printer does not reco...

Page 198: ...ss Go 3 If the printer prints out the error message page which says ERROR NAME limitcheck add more memory See Installing extra DIMM memory in Chapter 4 The print speed slows down Add optional memory See Installing extra DIMM memory in Chapter 4 The printer cannot print EPS data You need the following settings to print EPS data 1 In the Printer folder select the printer you use 2 Press the Advanced...

Page 199: ...6 31 TROUBLESHOOTING HL7050_US_UG_FM5 5 ...

Page 200: ...ows NT 4 0 Windows 2000 and Windows XP 1200 x 1200 dpi 600 x 600 dpi 300 x 300 dpi DOS 600 x 600 dpi Mac OS 1200 x 1200 dpi 600 x 600 dpi 300 x 300 dpi Print speed 28 pages per minute for Europe and other countries 1200 600 or 300 dpi A4 size 30 pages per minute for USA and Canada 1200 600 or 300 dpi Letter size Warm up 20 seconds at 23 C 68 F First print 11 seconds or less A4 or letter size using...

Page 201: ...l 0 and about 5 coverage Resident printer fonts HP LaserJet EPSON FX 850 and IBM Proprinter XL modes 66 scalable fonts and 12 bitmapped fonts BR Script 3 mode 66 scalable fonts PostScript 3 language emulation For more information about resident fonts see Resident Fonts in Appendix When the printer does not receive data for a certain period of time timeout it enters sleep mode Sleep mode acts as th...

Page 202: ...c interface selection among bi directional parallel RS 232C serial and Universal Serial Bus RAM HL 7050 32 MB expandable to 288 MB with two DIMMs HL 7050N 32 MB expandable to 288 MB with two DIMMs The factory installed standard memory varies depending on the printer model and country Control panel Seven buttons one LED and one LCD that is a two line 16 column display with a three color back light ...

Page 203: ...t for duplex printing DX 7000 Mailbox unit for output source MX 7000 series Stabilizer Stabilizer for safety after installing multiple optional devices on the printer SB 4000 Network connectivity Ethernet 10BaseT 100BaseTX Print server NC 4100h For HL 7050 only Storage device Hard Disk Drive CompactFlash Card ...

Page 204: ...of room temperature 2 The only way to achieve 0 W power is to unplug the printer from the power source Noise per ISO 9296 Printing Lwad about 67 dB A see note below Stand by Lwad about 48 dB A You might want to install printers with a sound power level of Lwad 63 dB A or more in a separate room or cubicle Temperature Operating 10 to 32 5 C 50 to 90 5 F Storage 0 to 35 C 32 to 95 F Humidity Operati...

Page 205: ...MP tray 60 200g m2 16 53 lb Tray 2 3 4 60 105g m2 16 28 lb DX 60 105g m2 16 28 lb MX 60 105g m2 16 28 lb Select this media type from the printer driver Plain paper Plain paper Recycled paper Plain paper Bond paper Bond paper Thick paper Thick paper or thicker paper Transparency A4 or Letter Transparency Labels A4 or Letter Plain paper Envelope Envelope Card stock Thick paper or thicker paper Thin ...

Page 206: ...4 13 to 8 5 in Height 148 5 to 356 mm 5 85 to 14 0 in A4 Letter Legal B5 JIS B5 ISO Executive A5 Number of sheets 500 sheets 80 g m2 or 20 lb 100 sheets 80 g m2 or 20 lb Transparencies 10 sheets Envelopes 10 sheets Label stock 10 sheets 500 sheets 80 g m2 or 20 lb DX MX Paper size A4 Letter Legal B5 JIS Executive A4 Letter B5 JIS B5 ISO Executive Number of sheets 100 sheets per bin 80 g m2 or 20 l...

Page 207: ... g m2 16 to 28 lb Recycled paper Bond paper Thick paper 105 g m2 to 150 g m2 28 to 40 lb Thicker paper 150 g m2 to 200 g m2 40 to 53 lb Transparency Overhead projector film Labels Envelope Card stock Thin paper If you print on thick paper that weighs more than 150 g m2 40 lb use face up printing We recommend that you use face up printing when you print on transparencies If the paper is misfeeding ...

Page 208: ...ctor film Envelope Thin paper Recommended paper Before you buy a lot of paper please test a page to make sure that the paper is suitable Use paper that is designed for plain paper copying Use paper that is 75 to 90 g m2 20 to 24 lb Use neutral paper Do not use acidic or alkaline paper Use long grain paper Use paper with a moisture content of approximately 5 This printer can use recycled paper that...

Page 209: ...Guatemala Antique Italic Bold BoldItalic Letter Gothic Oblique Bold Maryland Oklahoma Oblique Bold BoldOblique PC Brussels Light LightItalic Demi DemiItalic PC Tennessee Roman Italic Bold BoldItalic Utah Oblique Bold BoldOblique Utah Condensed Oblique Bold BoldOblique Microsoft Windows 95 98 Me Windows 2000 and Windows NT TrueType compatible fonts BR Symbol Helsinki Oblique Bold BoldOblique Tennes...

Page 210: ...A 11 HL7050_US_UG_FM5 5 Brother Original Fonts Bermuda Script Germany San Diego US Roman Bitmapped fonts portrait and landscape LetterGothic16 66 Medium Italic Bold BoldItalic OCR A OCR B ...

Page 211: ... DemiItalic Calgary MediumItalic Cleveland Condensed Connecticut Copenhagen Roman Italic Bold BoldItalic Germany Guatemala Antique Italic Bold BoldItalic Helsinki Oblique Bold BoldOblique Helsinki Narrow Oblique Bold BoldOblique Letter Gothic Oblique Bold Maryland Oklahoma Oblique Bold Bold Oblique Portugal Roman Italic Bold BoldItalic San Diego Tennessee Roman Italic Bold BoldItalic US Roman Utah...

Page 212: ...select the symbol and character sets in the PRINT MENU See About emulation modes in Chapter 3 If you have chosen the HP GL emulation menu you can choose the standard or alternate character set in the PRINT MENU See PRINT MENU Chapter 3 OCR symbol Sets When you choose the OCR A or OCR B font the matching symbol set is always used ...

Page 213: ...A 14 HL7050_US_UG_FM5 5 HP LaserJet Mode ...

Page 214: ...A 15 HL7050_US_UG_FM5 5 ...

Page 215: ...A 16 HL7050_US_UG_FM5 5 ...

Page 216: ...A 17 HL7050_US_UG_FM5 5 ...

Page 217: ...A 18 HL7050_US_UG_FM5 5 ...

Page 218: ...A 19 HL7050_US_UG_FM5 5 ...

Page 219: ...A 20 HL7050_US_UG_FM5 5 ...

Page 220: ...ws characters that are only available in the matching character set The numbers at the top of the table are hexadecimal code values so that characters will be replaced with the Roman 8 character set For other characters see the Roman 8 character set ...

Page 221: ...A 22 HL7050_US_UG_FM5 5 ...

Page 222: ...A 23 HL7050_US_UG_FM5 5 ...

Page 223: ...A 24 HL7050_US_UG_FM5 5 ...

Page 224: ...A 25 HL7050_US_UG_FM5 5 ...

Page 225: ...A 26 HL7050_US_UG_FM5 5 ...

Page 226: ...A 27 HL7050_US_UG_FM5 5 ...

Page 227: ...A 28 HL7050_US_UG_FM5 5 ...

Page 228: ... shows characters that are only available in the matching character set The numbers at the top of the table are hexadecimal code values so that characters will be replaced with the US ASCII character set For other characters see the US ASCII character set ...

Page 229: ...A 30 HL7050_US_UG_FM5 5 ...

Page 230: ...A 31 HL7050_US_UG_FM5 5 ...

Page 231: ...A 32 HL7050_US_UG_FM5 5 IBM Mode ...

Page 232: ...A 33 HL7050_US_UG_FM5 5 ...

Page 233: ...A 34 HL7050_US_UG_FM5 5 HP GL Mode ...

Page 234: ...A 35 HL7050_US_UG_FM5 5 ...

Page 235: ...A 36 HL7050_US_UG_FM5 5 ...

Page 236: ...A 37 HL7050_US_UG_FM5 5 ...

Page 237: ...A 38 HL7050_US_UG_FM5 5 ...

Page 238: ...e Oakland Alaska Medium PC Brussels LetterGothic 16 66 OCR A OCR B 0D ISO 60 Norwegian 1 0F ISO 25 French 0G HP German 0I ISO 15 Italian 0K ISO 14 JIS ASCII 0N ISO 8859 1 Latin 1 0S ISO 11 Swedish 0U ISO 6 ASCII 1D ISO 61 Norwegian 2 1E ISO 4 United Kingdom 1F ISO 69 French 1G ISO 21 German 1S HP Spanish 1U Legal 2K ISO 57 Chinese 2N ISO 8859 2 Latin 2 2S ISO 17 Spanish 2U ISO 2 International 3S I...

Page 239: ...icut Cleveland Maryland Utah Utah Cond Antique Oakland Alaska Medium PC Brussels LetterGothic 16 66 OCR A OCR B 6S ISO 85 Spanish 7J Desk Top 8M Math 8 8U Roman 8 9E Windows 3 1 Latin 2 9J PC 1004 OS 2 9T PC Turkish 9U Windows 3 0 Latin 1 10J PS Text 10U PC 8 11U PC 8 D N 12J MC Text 12U PC 850 13J Ventura International 14J Ventura US 15U Pi Font 17U PC 852 19L Windows Baltic 19U Windows 3 1 Latin...

Page 240: ... 0D ISO 60 Norwegian 1 0F ISO 25 French 0G HP German 0I ISO 15 Italian 0K ISO 14 JIS ASCII 0N ISO 8859 1 Latin 1 0S ISO 11 Swedish 0U ISO 6 ASCII 1D ISO 61 Norwegian 2 1E ISO 4 United Kingdom 1F ISO 69 French 1G ISO 21 German 1S HP Spanish 1U Legal 2K ISO 57 Chinese 2N ISO 8859 2 Latin 2 2S ISO 17 Spanish 2U ISO 2 International 3S ISO 10 Swedish 4S ISO 16 Portuguese 5M PS Math 5N ISO 8859 9 Latin ...

Page 241: ... Atlanta Book Copenhagen Portugal Calgary Germany San Diego Bermuda Script US Roman 9E Windows 3 1 Latin 2 9J PC 1004 OS 2 9T PC Turkish 9U Windows 3 0 Latin 1 10J PS Text 10U PC 8 11U PC 8 D N 12J MC Text 12U PC 850 13J Ventura International 14J Ventura US 15U Pi Font 17U PC 852 19L Windows Baltic 19U Windows 3 1 Latin 1 26U PC 775 19M Symbol 579L Wingdings 0O OCR A 1O OCR B ...

Page 242: ...nition of Parameters This command must end with the code 5CH Definition of Parameters This bar code command can have the following parameters in the parameter segment n n As parameters are effective within the single command syntax ESC i n n they don t apply in the bar code commands If certain parameters are not given they take the preset settings The last parameter must be the bar code data start...

Page 243: ...9 or T9 Codabar n t12 or T12 Code 128 set A n t13 or T13 Code 128 set B n t14 or T14 Code 128 set C n t130 or T130 ISBN EAN n t131 or T131 ISBN UPC E n t132 or T132 EAN 128 set A n t133 or T133 EAN 128 set B n t134 or T134 EAN 128 set C This parameter selects the bar code mode as shown above When n is t5 or T5 the bar code mode EAN 8 EAN 13 or UPC A varies according to the number of characters in ...

Page 244: ...de style parameter is ignored Expanded Character S 0 White 1 Black 2 Vertical stripes 3 Horizontal stripes 4 Cross hatch For example S n1 n2 n1 Background fill pattern n2 Foreground fill pattern If S is followed by only one parameter the parameter is a foreground fill pattern Line block drawing box drawing S 1 Black 2 Vertical stripes 3 Horizontal stripes 4 Cross hatch Bar Code n mnnn or Mnnn nnn ...

Page 245: ...nts are masked The factory setting is determined by the bar code mode selected by t or T Quiet zone n onnn or Onnn nnn 0 32767 Quiet zone is the space on both sides of the bar codes Its width can be shown using the units that are set by the u of U parameter For the description of u or U parameter see the next section The factory setting of the quiet zone width is 1 inch Bar code expanded character...

Page 246: ...EAN13 EAN8 UPC A ISBN EAN13 EAN8 UPC A ISBN UPC E 22 mm 2 UPC E 18 mm 3 Others 12 mm Expanded characters 2 2 mm preset Line block drawing and box drawing 1 dot This parameter shows the height of bar codes or expanded characters as shown above It can start with h H d or D The height of bar codes is shown in the u or U specified unit The factory setting of the bar code height 12 mm 18 mm or 22 mm is...

Page 247: ...h an asterisk start character and stop character If the received data has an asterisk at the beginning or end the asterisk is regarded as a start character or stop character When Interleaved 2 of 5 is selected with the parameter t1 or T1 Ten numerical characters 0 to 9 can be accepted as bar code data Other characters cause a data error The number of characters for bar codes is not limited Because...

Page 248: ...on code When UPC E is selected with the parameter t6 or T6 The numbers 0 to 9 can be accepted as bar code data 1 Eight digits standard format The first character must be 0 and the data must end with a check digit Total eight digits 0 plus 6 digits plus 1 check digit 2 Six digits The first character and the last check digit are removed from the eight digit data 1 For eight digits can be used instea...

Page 249: ...ISBN EAN is selected with the parameter t130 or T130 The same rules apply as for t5 or T5 When ISBN UPC E is selected with the parameter t131 or T131 The same rules apply as for t6 or T6 When EAN 128 set A set B or set C is selected with the parameter t132 or T132 t133 or T133 or t134 or T134 The same rules apply as for t12 or T12 t13 or T13 or t14 or T14 Box drawing ESC i E or e E or e is a termi...

Page 250: ...PC A LPRINT CHR 27 it5r1o0x50y70b12345678901 EAN 13 LPRINT CHR 27 it5r1o0x100y70b123456789012 UPC E LPRINT CHR 27 it6r1o0x150y70b0123456 Codabar LPRINT CHR 27 it9r1s0o0x00y100bA123456A Code 128 set A LPRINT CHR 27 it12r1o0x00y120bCODE128A12345 Code 128 set B LPRINT CHR 27 it13r1o0x00y140bCODE128B12345 Code 128 set C LPRINT CHR 27 it14r1o0x00y160b CHR 1 CHR 2 ISBN EAN LPRINTCHR 27 it130r1o0x00y180b...

Page 251: ...buttons 3 2 C Call Service Messages 6 5 CD ROM for Macintosh users 1 5 CD ROM for Windows users 1 3 CompactFlash memory card 4 11 control panel 1 6 D data lamp 3 15 date and time setting 3 34 delete storage 3 26 Device Options 2 6 DOS 6 29 drum unit 5 1 duplex 2 4 duplex printing 2 4 duplex unit 4 4 E environment 1 9 EPSON FX 850 mode 3 37 Error messages 6 1 F face down output tray 1 6 face up out...

Page 252: ...k software 2 17 O option 4 1 P paper 3 38 paper jam 6 8 paper menu 3 22 paper size A 7 paper tray 1 6 PCL6 2 1 power supply 1 8 PPD Post Script printer description 2 20 Print menu 3 27 3 39 3 40 print quality 2 4 6 23 printer driver 2 1 Printer Status messages 3 19 proof data 3 8 Proprinter XL mode 3 37 public data 3 8 Q Quality menu 3 24 3 38 R RAM 4 13 USA register your printer iv Reprint button...

Page 253: ...I 3 INDEX HL7050_US_UG_FM5 5 W watermark 2 5 ...

Reviews: