Brandywine 018000001, User Manual
Looking for a User Manual for Brandywine 018000001? Look no further! You can download the manual for free from our website. This comprehensive manual provides all the information you need to get the most out of your Brandywine 018000001 product. Download now at manualshive.com.
Share
Download


Reviews:
No comments
Related manuals for 018000001
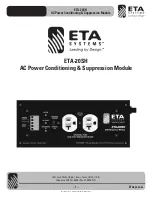
ETA-20SH
Brand: ETA Systems Pages: 16

Powerbox BO-6-S2
Brand: Botex Pages: 4

APS-7000 Series
Brand: GW Instek Pages: 193

YEWSERIES 80 SDBS (Style S)
Brand: YOKOGAWA Pages: 38

AutoSwitch
Brand: DEFA Pages: 8

ELM205
Brand: Sanus Pages: 4

Amplink PDM
Brand: Rowe Pages: 8

J85568E-1
Brand: Lucent Technologies Pages: 48


