Brandt ROB506BG, Instruction Manual
The Brandt ROB506BG is a cutting-edge robotic vacuum cleaner designed to simplify your cleaning routine. To maximize its potential, make sure to refer to the comprehensive Instruction Manual available for free download on our website. Discover all the features and functions of this product to keep your home spotless effortlessly.
Share
Download


Reviews:
No comments
Related manuals for ROB506BG

USK MCH 33526
Brand: Kalorik Pages: 28

KM2727
Brand: FAR Pages: 54
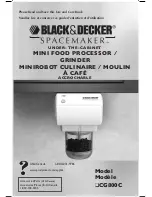
Spacemaker CG800C
Brand: Black & Decker Pages: 21

Spacemaker CG700
Brand: Black & Decker Pages: 23

SC300
Brand: Black & Decker Pages: 20

SC310-B5
Brand: Black & Decker Pages: 20

SHOGUN
Brand: Arnica Pages: 12

Cortex-R4
Brand: ARM Pages: 436

Prosys PS-8810
Brand: BSS Audio Pages: 121

VT-1606 VT
Brand: Vitek Pages: 24

Food Processor
Brand: Moulinex Pages: 20

DJ520127
Brand: Moulinex Pages: 28

DP810810
Brand: Moulinex Pages: 36

dual delay 73B
Brand: Modcan Pages: 6

UX8800
Brand: EAW Pages: 2

R301U Dice
Brand: Robot Coupe Pages: 2

R100 Plus
Brand: Robot Coupe Pages: 2

Ergo EHC650
Brand: Black & Decker Pages: 8


