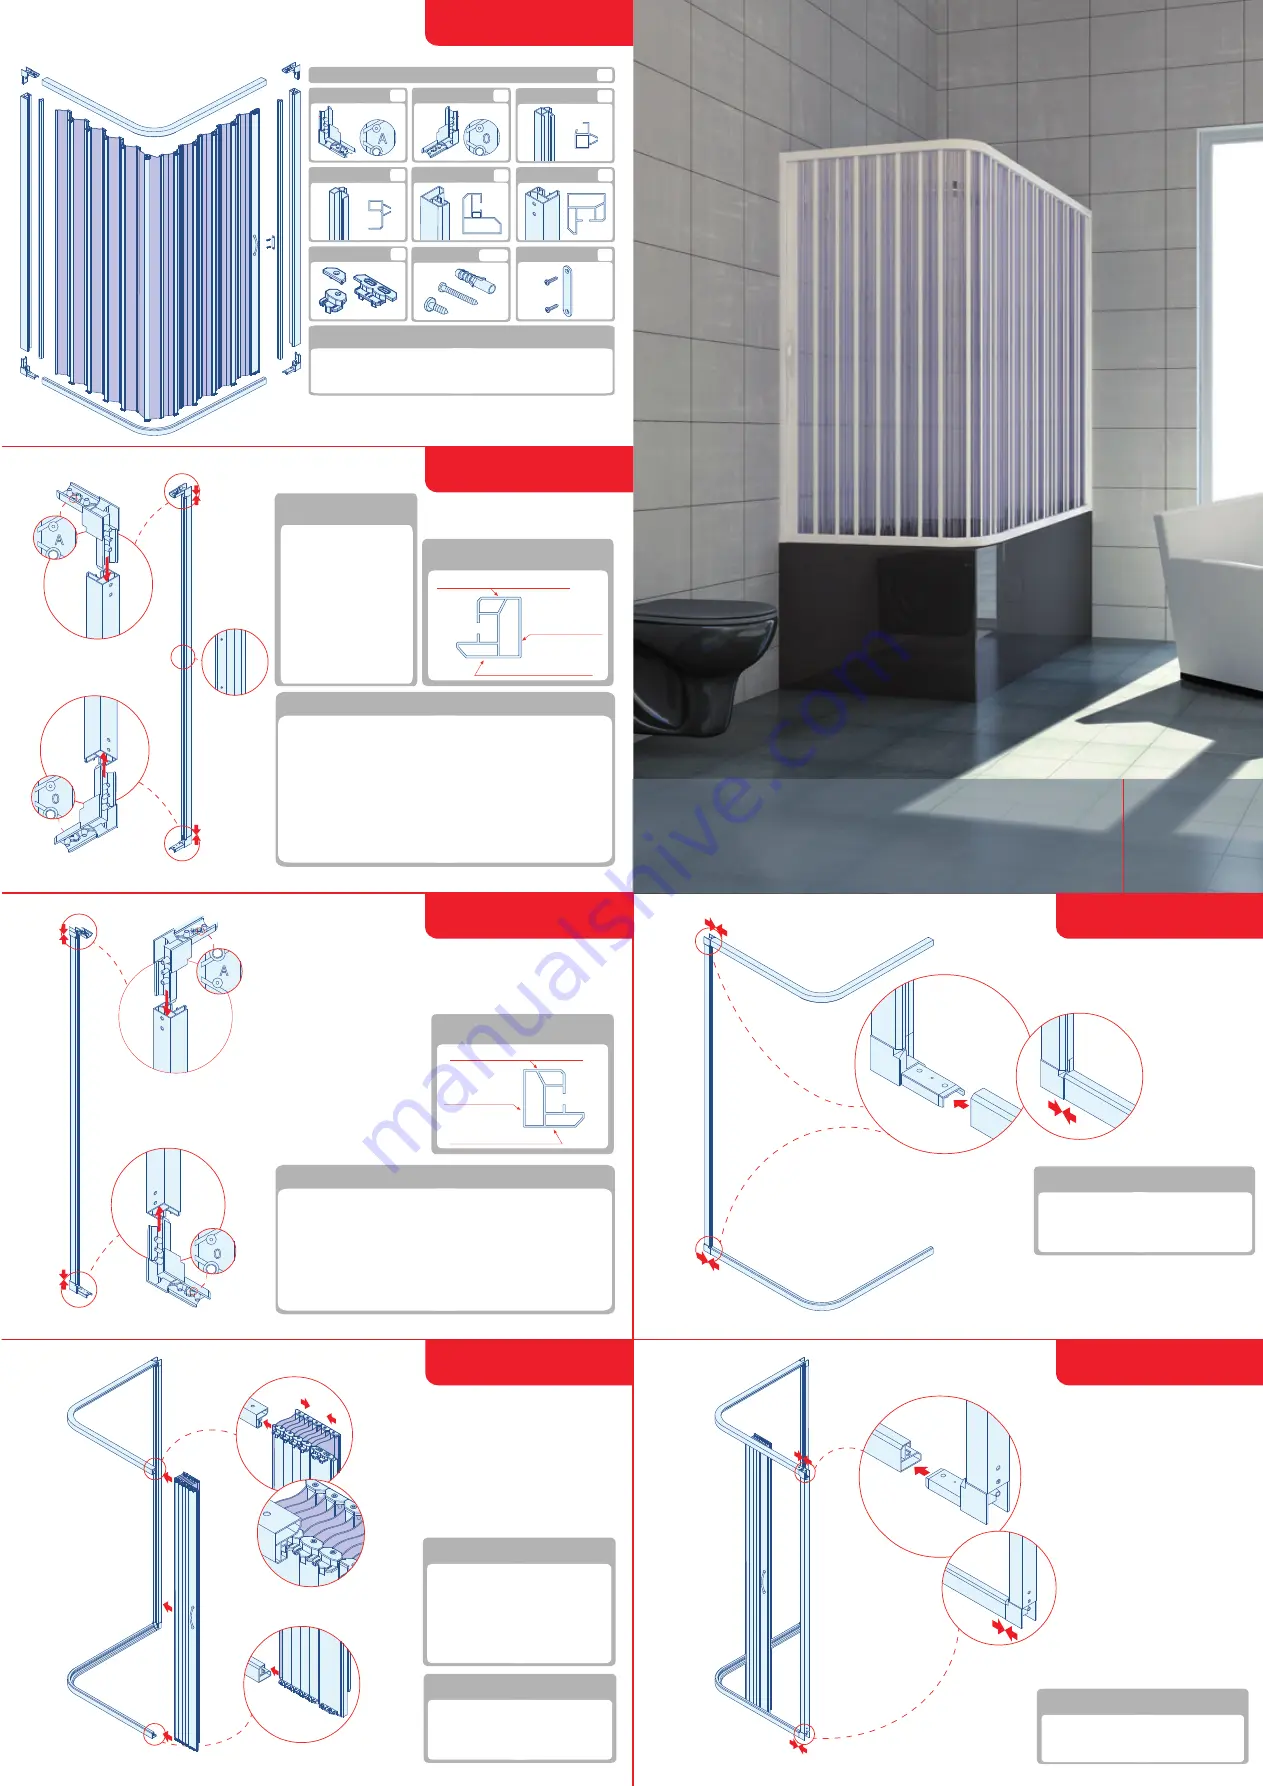
2.2
2.3
FIRST STAGE
SECOND STAGE
3.1
3.2
THIRD STAGE
Reversible enclosure
If you wish the left opening,
just slide the door in the rail
profiles, with the handle facing
towards the inside.
FOURTH STAGE
Assembly instructions
Insert the upper and lower rail profile
in the angle brackets of the
previously assembled left side profile.
FIFTH STAGE
SIXTH STAGE
2.1
Assembly instructions
Slide the folding door in both upper
and lower rail profile, as shown in
figure, making sure that all door
supports are inserted in the rail profile.
To make the operation easier cluster
the folding doors.
Assembly instructions
Insert the upper and lower rail profile
in the angle brackets of the previously
assembled right side profile.
Folding door “X”
n. 2
Folding door “1”
n. 2
n. 2
n. 1
Spare parts
n. 3
n. 1
n. 2
n. 1
Magnetic plate
n. 1
Level, pencil, awl, hammer, drill, drill bit 6 mm,
cross screwdriver, silicone caulking gun.
Assembly tools
Inner side shower compartment
Side to fix
to wall
Outer side compartment
Assembly instructions
Tale the left-side profile and place it, as shown in the figure,
with the widest part facing outward. Place an angle bracket
marked by the number "1" in the upper part (Fig. 3.1) and an
angle bracket marked by an "X" in the lower part (Fig. 3.2).
IMPORTANT: The sides of the angle bracket marked by the "X"
and "1" should not be inserted within the profile, but must
remain outside, so that symbols remain visible.
Anchors and screws
n.10+12
: Inner side shower compartment
Outer side compartment
Assemby instructions
Take the right-side profile, which has two small holes (in the
middle) for fixing the magnetic plate (Fig. 2.1) and place it,
as shown in the figure, with the widest part facing outward.
Place an angle bracket marked by the number "1" in the
upper part (Fig. 2.2) and an angle bracket marked by an "X"
in the lower part (Fig. 2.3).
IMPORTANT: The sides of the angle bracket marked by the
"X" and "1" should not be inserted within the profile,
but must remain outside, so that symbols remain visible.
Reversible enclosure
The images and assembly
are related to the enclosure
with right opening.
If you wish the left opening,
simply invert the position
of the two side profiles,
in order to have the profile
with the small holes for
fixing the magnetic plate
(Fig. 2.1) on the left side.
NADIA
SIDE OPENING
ASSEMBLY INSTRUCTIONS
Folding door
Attachment door profile
Incoming profile for door
Rail profile
Side profile
Side profile section
Side to fix
to wall
Side profile section


