Blue Rhino Endless Summer 92000, Instructions Manual
Introducing the Blue Rhino Endless Summer 92000 - your ultimate outdoor companion. Explore the endless summer vibes with this sleek and durable gas fire pit. To ensure a hassle-free and informed experience, simply visit our manualshive.com to effortlessly download the instructions manual, absolutely free.
Share
Download


Reviews:
No comments
Related manuals for Endless Summer 92000

SafeLite
Brand: Eaton Pages: 16

21 Series
Brand: Ecco Pages: 17
Slimline SL100
Brand: Hama Pages: 38

Jet Swim 2000
Brand: Pahlen Pages: 20

BeamLine VL800
Brand: Vari Lite Pages: 14

Calculite C6P38MHA
Brand: Lightolier Pages: 2

Piccoletto VW
Brand: Desisti Pages: 11

2361025
Brand: Sygonix Pages: 8
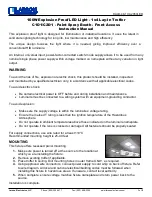
HALD-48-1X4-2X50LED
Brand: Larson Electronics Pages: 2

Lumify USB Solar Fairy Lights
Brand: solarcentre Pages: 2

CA-2405
Brand: Prolight Pages: 2

545433
Brand: HAMPTON BAY Pages: 18

CD5050VDL Series
Brand: Code 3 Pages: 24

Kaleido EQLED85
Brand: Equinox Systems Pages: 8

SL-2750
Brand: Gardenline Pages: 18

Professional CS8100-LED
Brand: P. M. Lighting Pages: 12

TILTING EAVE Series
Brand: Hunza Pages: 2

Ethan 5049-15
Brand: Adesso Pages: 2


