

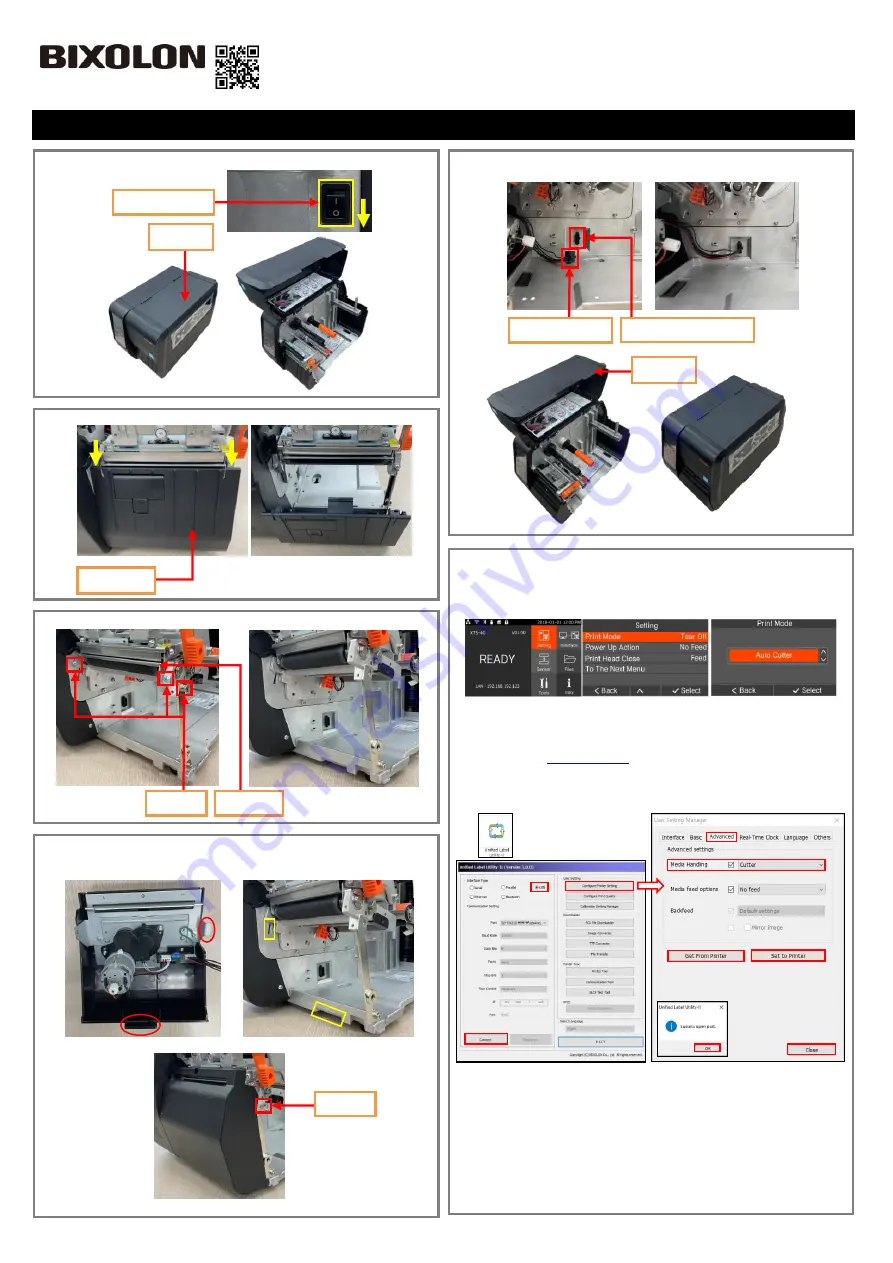
1.
Turn the Power Switch Off at the rear of the Printer and open the Cover.
2. Disassemble
the Cover STD by pressing it down (yellow arrow).
3.
Loosen 3 screws and the tear bar.
4. Insert & assemble the hook on the red circle mark into the yellow mark and tighten
the screw loosened in step 3.
※
When assembling, be careful not to pinch the wire.
5. Insert the
Auto Cutter Wire into the Auto Cutter Connector in the direction, and
the close the cover.
9. In order to operate Auto-cutter, change the printer settings.
1) By using the LCD
* Setting
→
Print Mode
→
Select the Auto Cutter
2) By using the Utility
- After downloading
“
Unified Label Utility
”
from the BIXOLON
Hompage(
), connect the Data cable(=USB) and turn on
the printer, then Change the settings in the following order.
How to Mount Auto Cutter
KN04-00220A (Ver.1.0)
XT5 Series
Cover STD
Screw
Tear Bar
Cover
Off
Power Switch
Screw
①
②
③
⑤
⑥
⑧
⑦
⑨
⑩
④
①
Launch ‘Unified Label Utility’
②
‘USB’ Click
!
③
‘Connect’ Click!
④
‘OK’ Click!
⑤
‘Configure Printer Setting’ Click
!
⑥
‘
Advanced
’
Click
!
⑦
‘Get From Printer’ Click!
⑧
Media Handling ‘Cutter’ Setting!
⑨
‘Set to Printer’ Click!
⑩
‘Close’ Click!
Cover
Auto Cutter Wire
Auto Cutter Connector


