Belling IHL603, User Manual
The Belling IHL603 induction hob user manual is available to download for free at manualshive.com. Find detailed instructions, useful tips, and safety guidelines in this comprehensive manual to make the most of your sleek and efficient induction hob. Get started today with our easy-to-use user manual.
Share
Download


Reviews:
No comments
Related manuals for IHL603

VG 231 RK
Brand: Gaggenau Pages: 8

CI 292
Brand: Gaggenau Pages: 36

CI 272
Brand: Gaggenau Pages: 60

SI5643B
Brand: Smeg Pages: 22

IA920 Series
Brand: Rubine Pages: 36

Baumatic BTC2.2
Brand: saco Pages: 4

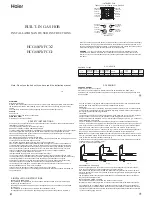
BH-04-22VC
Brand: Quadro Pages: 43

HIES55MCTT
Brand: Hoover Pages: 220

FSM 654 I B BK
Brand: Franke Pages: 100

HIC-654CF-S
Brand: Haier Pages: 18
HC-XG72D
Brand: Haier Pages: 2
HCG604WFCX2
Brand: Haier Pages: 2
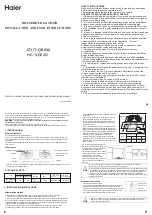
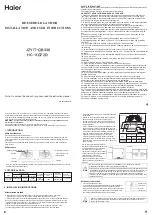
JZY/T-QB330
Brand: Haier Pages: 2

JZT-QHA9331P
Brand: Haier Pages: 25

HCI302TB3
Brand: Haier Pages: 56

HAH 64 EXCP
Brand: Haier Pages: 70

HAMTP64MC
Brand: Haier Pages: 126

HAHG6
Brand: Haier Pages: 87


