954 Glenhuntly Rd, Caulfield South VIC 3162 | Ph: +61 3 9571 5666 | Fax: +61 3 9571 1347
Email: [email protected] | Web: www.bellevuearch.com.au
Diagrams and instructions are to be used as reference only. All templates must be printed at 100% scaling. Fixing instructions must be strictly adhered
to. All parts supplied must be used; no responsibility will be taken for incorrect installation. Bellevue Architectural is not held liable for any damaged
hardware due to incorrect installation and as such, is not considered to be under warranty. Warranty is return to base and does not cover transport and
or any labour costs. Bellevue Architectural reserves the right to update and alter any information at any time. If unclear on instructions or for any further
enquiries, please contact Bellevue Architectural. (Bellevue Architectural is a trading name of Bellevue Imports Pty Ltd)
ARCHITECTURAL
EUROPEAN LONG BODY LOCK (ELB)
FITTING GUIDE
1.
Establish height that the lockset will be at on the door
and mark centre line of door thickness on the door edge.
2.
Place the template on the door and align centre line on
template with centre line on the door.
Mark and drill out the mortice to the desired backset depth.
3.
Chisel out mortice cavity where necessary.
Clean out mortice before inserting lock.
4.
Insert lock in to mortice and scribe around the front plate
for size of the recess.
5.
Remove lock from mortice and chisel recess to a depth
of 3mm to receive front plate. Front plate must be flush with
edge of door.
6.
Fold template for desired backset.
Align EDGE A with top of front plate recess.
Establish holes required to suit lock function, mark hole centres accurately.
7.
Ensure lock is removed from mortice cavity then drill and clean holes.
8.
Fit lock into mortice cavity and secure with the screws provided.
9.
Mark out the door frame for the strike plate.
Mortice door frame for the strike plate.
(Bolt recess to be 20mm depth into the door frame.)
10.
Secure strike box and strike plate to the
door frame with the screws provided.
11.
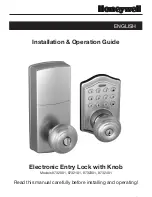
Fit door hardware as per manufacturers instructions.
Page 1 of 2
IMPORTANT:
TO PREVENT DAMAGE TO THE DOOR FACE FROM DRILL BREAKTHROUGH,
MARK BOTH SIDES OF THE DOOR AND DRILL HOLES HALFWAY THROUGH EACH SIDE.
Lock Installation
Striker Installation