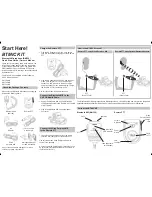
Belkin F7D4515, User Manual
The Belkin F7D4515 User Manual is your comprehensive guide to maximizing the potential of your device. This manual is available for free download at manualshive.com, ensuring you have all the necessary information at your fingertips. Discover the product's features, troubleshooting tips, and step-by-step instructions to make the most of your Belkin F7D4515.
Share
Download


Reviews:
No comments
Related manuals for F7D4515

KX-TD612NE
Brand: Panasonic Pages: 87

KX-TDA50
Brand: Panasonic Pages: 214
BM100
Brand: Uniden Pages: 2

30 Worldpatch
Brand: ZETRON Pages: 60

Impres PMLN5729
Brand: Motorola solutions Pages: 82

MM444BT
Brand: Magnavox Pages: 23

CAMMIC3.5
Brand: Speco Pages: 3

IAGP3R-BASIC
Brand: IASUS Pages: 10
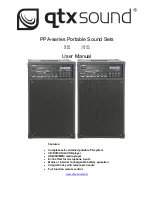
PPA72
Brand: Qtx Pages: 5

JBL QUANTUM Stream Talk
Brand: Harman Pages: 15

EMMC35881
Brand: Emerson Pages: 14

VR1
Brand: SE Electronics Pages: 24

EMU
Brand: Huawei Pages: 70

MCB146
Brand: Philips Pages: 2

DCM276
Brand: Philips Pages: 3

MCB146
Brand: Philips Pages: 20

MC235B/79
Brand: Philips Pages: 20

MCB146
Brand: Philips Pages: 24


