Bartscher SV G16L, Manual
The Bartscher SV G16L is a professional-grade kitchen appliance renowned for its reliable performance and sleek design. With our easy-to-use manual, you can effortlessly navigate every feature and maximize its potential. Download your free manual from manualshive.com to unlock the full capabilities of the Bartscher SV G16L and elevate your culinary experience.
Share
Download


Reviews:
No comments
Related manuals for SV G16L
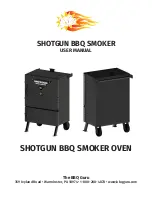
SHOTGUN BBQ SMOKER
Brand: BBQ Guru Pages: 9

SC50TCSSG
Brand: Sovereign Pages: 16

AMN855GXV
Brand: La Germania Pages: 52

CER1115AAH
Brand: Magic Chef Pages: 20

177GRC46
Brand: Galaxy Equipment Pages: 8

DGCU165
Brand: Viking Pages: 6

Infusion Classic 90 Dual Fuel
Brand: Rangemaster Pages: 40

GK45TE.1F
Brand: V-ZUG Pages: 2

BGS101 Series
Brand: Ovente Pages: 16

PRF 965 IX
Brand: M-system Pages: 112

CookSmart CET366TB
Brand: Thermador Pages: 72

H30E02M011
Brand: Simfer Pages: 24

WFG381LVS
Brand: Whirlpool Pages: 36

PU106
Brand: Smeg Pages: 11

PU106
Brand: Smeg Pages: 15

CIR66XS3
Brand: Smeg Pages: 24

TR103I
Brand: Smeg Pages: 50

SUK92CMX
Brand: Smeg Pages: 32


