Barrier Systems X-TENSION XTGTSM1, Руководство по установке и обслуживанию
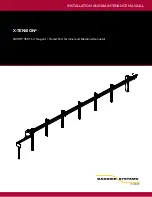
Барьерные системы X-TENSION XTGTSM1 - это надежное решение для обеспечения безопасности на дороге. Установочное и руководство по обслуживанию доступно для загрузки бесплатно на нашем сайте. Этот ручной материал поможет вам установить и поддерживать вашу систему в отличном состоянии. Скачайте его сейчас!
Поделиться
Скачать


Отзывы:
Нет отзывов
Похожие инструкции для X-TENSION XTGTSM1

AQ28 - SCHEMATICS
Бренд: Martin Audio Страницы: 1

AXC-PA422
Бренд: AMX Страницы: 1

REEF-Skim PRO 1000
Бренд: TMC Aquarium Страницы: 60

EVOLUTION EVO7006
Бренд: injen Страницы: 4

Stellar Series
Бренд: Aqua One Страницы: 4

CNPCI-8
Бренд: Crestron Страницы: 2

MS220K
Бренд: ZIEHL Страницы: 8

Light Computer
Бренд: Aqua Medic Страницы: 12

LI-19
Бренд: Leiderdorp Instruments Страницы: 12

Koi Pro
Бренд: SuperFish Страницы: 20

d-800
Бренд: B-TEC Страницы: 27

REPTILAND
Бренд: Trixie Страницы: 20

Caviblaster 3040-D
Бренд: Cavidyne, LLC Страницы: 39

Professional Foam Lance 14.0263
Бренд: MTM HYDRO Страницы: 2

AG STOP GATE
Бренд: Orbinox Страницы: 14

RB491200 - annexe 2
Бренд: Gaggenau Страницы: 26

Track Rocker series
Бренд: Painless Страницы: 24

Digitrip 3000
Бренд: Cutler-Hammer Страницы: 66


