Barracuda Link Balancer
Barracuda Link Balancer - Quick Start Guide
The Barracuda Link Balancer routes and manages traffic across multiple Internet
connections. It optimizes the use of multiple Internet links, such as T1s, T3s, DSL and
cable connections from one or more Internet service providers. The Barracuda Link
Balancer:
•
aggregates Internet connection links
•
provides automated failover in case of link failure
•
manages
bandwidth
•
performs Quality of Service (QoS) for Internet applications
•
includes DHCP server and DNS caching server
•
acts as a traditional firewall
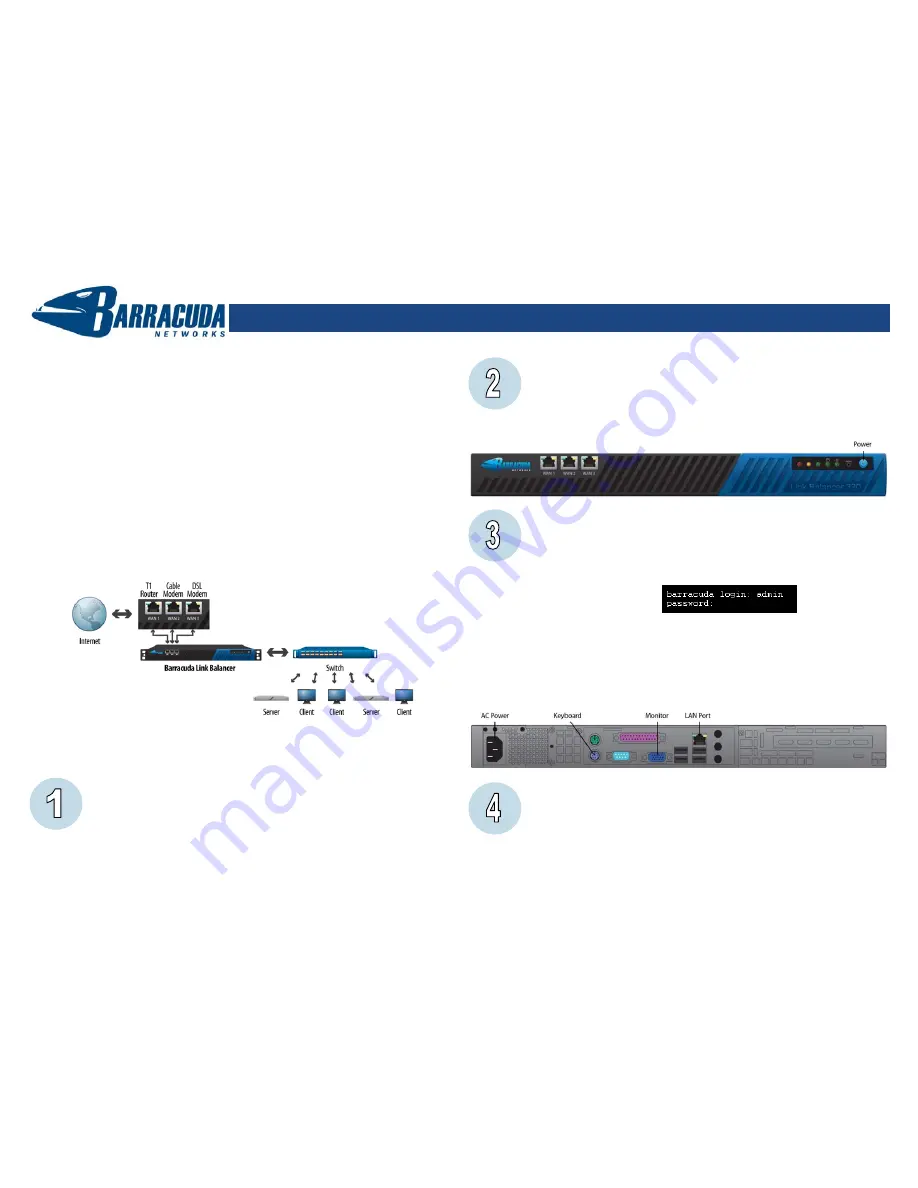
This guide describes how to deploy the Barracuda Link Balancer as the default gateway
for your network. In this configuration, the Barracuda Link Balancer sits between the
Internet and your switch, acting as both firewall and router, and replacing your existing
firewall or router. Other deployment configurations are described in the
Barracuda Link
Balancer Administrator’s Guide
.
The instructions given here provide a method to configure the Barracuda Link Balancer
completely before connecting it to the Internet. We recommend reading these steps fully
before starting the setup.
Getting Started
To set up your Barracuda Link Balancer, you need the following:
•
Barracuda Link Balancer, AC Power Cord (included)
•
Ethernet
Cables
•
VGA
Monitor
•
PS2
Keyboard
•
Computer with Web browser attached to your network
If you already have a firewall, retrieve the settings so that they can be configured
in the Barracuda Link Balancer. Record the IP Address and type of link for each
Internet connection.
Physically Connect to the Barracuda Link Balancer
To perform initial configuration of the Barracuda Link Balancer:
1. Connect a standard VGA Monitor, PS2 Keyboard, and AC power cord to the
unit.
2. Press the blue Power button on the front panel to turn the unit on.
Configure with Temporary LAN IP Address and Network Settings
If you have a monitor connected, the Barracuda Link Balancer will display the
Boot Menu initially, and the Administrative Console login prompt once fully
booted. To begin the configuration:
1. Login to the Administrative Console using the admin login:
•
Login
:
admin
•
Password
:
admin
2. Configure the LAN adapter so that the Barracuda Link Balancer can be
accessed from the computer you will use to configure it. Enter the
IP
Address, Netmask, Primary DNS Server
and
Secondary DNS Server
as
appropriate for your local area network.
3. Save your changes and exit.
4. Connect an Ethernet cable from your LAN to the LAN port on the back panel
of the Barracuda Link Balancer.
Login to the Barracuda Link Balancer Web Interface
Using a computer that is connected to the same subnet as the Barracuda Link
Balancer’s LAN adapter, follow these steps:
1. In your Web browser’s address bar, enter http:// followed by the Barracuda
Link Balancer’s LAN IP address, followed by the default Web Interface
HTTP port (:8000). For example, if you configured the Barracuda Link
Balancer with a LAN IP address of 192.168.200.200, you would type:
http://192.168.200.200:8000
2. Login to the Barracuda Link Balancer Web interface as the administrator.
Username:
admin
Password:
admin


