Axminster Trade 105644, Original Instructions Manual
"Ensure optimal performance with the Axminster Trade 105644, a versatile tool for woodworking enthusiasts. Our user-friendly manual provides Original Instructions, guiding you through assembly, operation, and maintenance. Download this essential manual for free at manualshive.com to unleash the full potential of your Axminster Trade 105644."
Share
Download


Reviews:
No comments
Related manuals for 105644
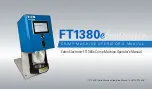
FT1380e
Brand: Eaton Pages: 34

VC
Brand: Jarvis Pages: 12

SP5
Brand: QTORQ Pages: 4

Aquajoe FIBERJACKET AJFJH50-58-PRO-RM
Brand: SNOWJOE Pages: 8

9052454
Brand: P.Lindberg Pages: 76

PDZ 25 A1
Brand: Parkside Pages: 27

XTRIC 363000 80S
Brand: GARANT Pages: 116

XT101000
Brand: Campbell Hausfeld Pages: 48

TL053700AV
Brand: Campbell Hausfeld Pages: 36

AFMM 14
Brand: Fein Pages: 25

GRR-RIPPER
Brand: microjig Pages: 22

GATOR EK06ATCL
Brand: Greenlee Pages: 12

31471
Brand: Fairmount Tools Pages: 8

TPB2507
Brand: Anova Pages: 66

P-183
Brand: Inder Pages: 2

942B
Brand: Magnetic Instrumentation Pages: 27

VNG 371
Brand: VVG Pages: 2

Toolson PRO-OF 1255
Brand: EINHELL Pages: 268


