AWA MSDV2203-F3-D0, User Manual
The AWA MSDV2203-F3-D0 user manual is a comprehensive guide that provides step-by-step instructions for operating and troubleshooting this product. Easily download the free manual from our website to enhance your experience with this innovative device.
Share
Download


Reviews:
No comments
Related manuals for MSDV2203-F3-D0

20MT4405 - 20" Real Flat Stereo Tv
Brand: Magnavox Pages: 2

X915 Series
Brand: TCL Pages: 20

UN55C5000QF
Brand: Samsung Pages: 54

LC-42HK56S
Brand: XOCECO Pages: 33

L26FE12N
Brand: Logik Pages: 7

Tru-VIEW LCD2200
Brand: Creative Pages: 23

46ME313V/F7 A
Brand: Magnavox Pages: 38

PR1916
Brand: Magnavox Pages: 8

NTS-6500K
Brand: Naxa Pages: 32

WP2213LEDVD
Brand: Walker Pages: 45

TF-LED32S31T2
Brand: Telefunken Pages: 38

LED-2468
Brand: Denver Pages: 35

SL2784BT and
Brand: Zenith Pages: 43

N2230w - LCD TV - 720p
Brand: ViewSonic Pages: 2

NS-39L400NA14
Brand: Insignia Pages: 78

NS-37LCD
Brand: Insignia Pages: 86

42PFL5603S/60
Brand: Philips Pages: 59
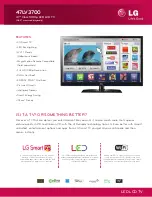
47LV3700
Brand: LG Pages: 2


