background image

deutsch / english

Stand: Juni 2017

DIRECTOR

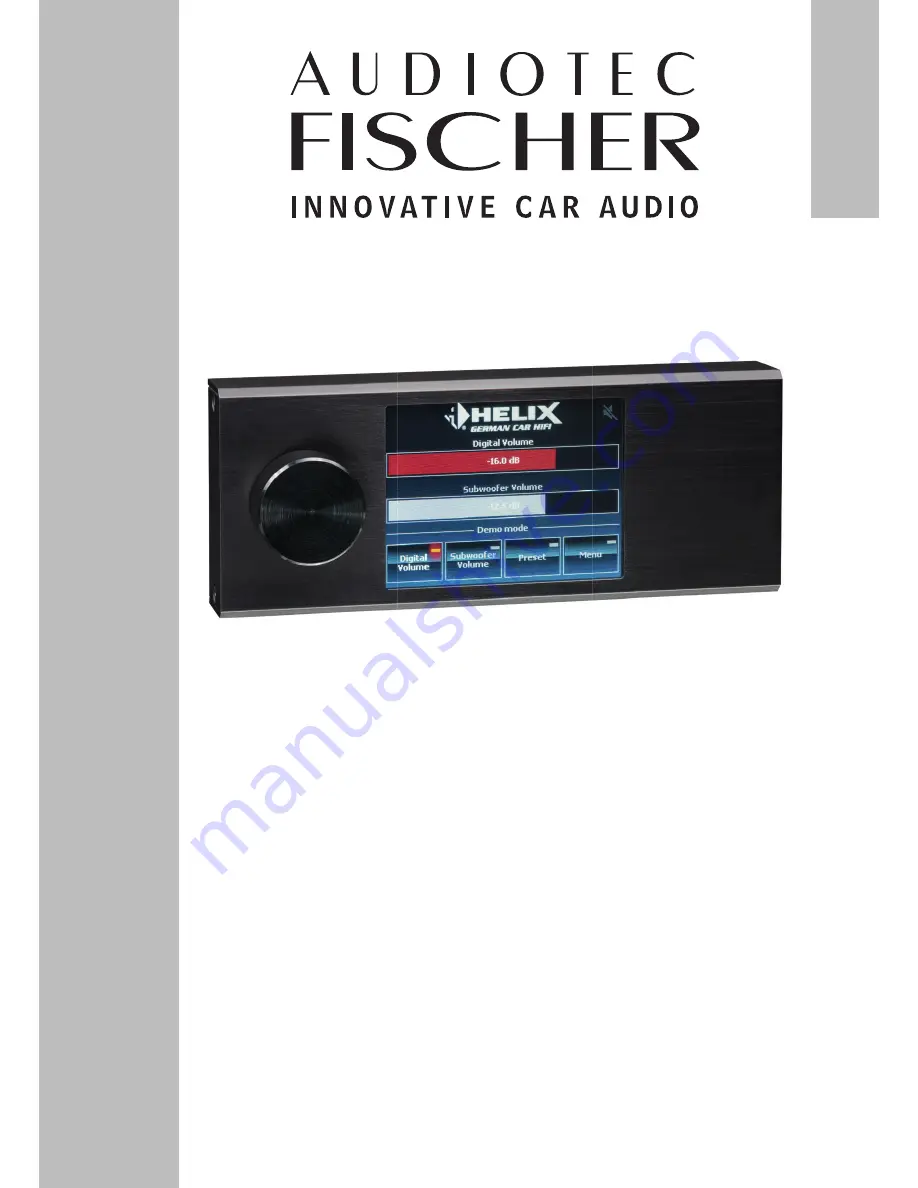
Bedieneinheit mit Touchscreen

Remote control with  Touchscreen

Benutzerhandbuch

User manual

Summary of Contents for DIRECTOR

Page 1: ...deutsch english Stand Juni 2017 DIRECTOR Bedieneinheit mit Touchscreen Remote control with Touchscreen Benutzerhandbuch User manual ...

Page 2: ...luetooth Control Menü 11 4 6 Tone Control Menü 11 4 7 Voltage Monitor 12 4 8 Bypass EQ Menü 12 5 Konfigurationsmenü 13 5 1 Display Settings 14 5 1 1 Display Rotation 14 5 1 2 Backlight Mode 15 5 1 3 Backlight Level 15 5 1 4 Screensaver 16 5 2 Usability Settings 17 5 2 1 Startup Volume 17 5 2 2 Knob Sensitivity 18 5 2 3 PS Mode 18 5 2 4 Mute ATT Function 19 5 2 5 Auto Source 19 5 3 System 20 5 3 1 ...

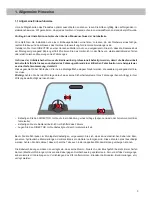
Page 3: ...er Gefahrenbremsung darstellt Dieses geschieht über Schrauben die in eine Montagefläche eingeschraubt werden die wiederum genügend Halt bie ten muss Wichtig Achten Sie bei der Montage darauf dass keine Sicherheitssysteme Ihres Fahrzeugs bspw Airbag in ihrer Wirkung beeinträchtigt werden können Befestigen Sie den DIRECTOR nicht auf einer Abdeckung eines Airbags bspw Lenkrad oder Armaturenbrett Bei ...

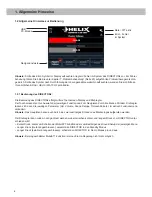
Page 4: ... Navigieren durch die Menüs Mit dem Drehregler lassen sich dann die jeweiligen Parameter z B Volume Sound Setups Timeout Zeit etc im aktiven Funktionsmenü verändern Hinweis Das Hauptmenü kann auch durch ein zwei sekündiges Drücken des Markenlogos aufgerufen werden Der Drehregler kann zudem noch gedrückt werden wobei zwischen kurzem und langem Druck vom DIRECTOR unter schieden wird Kurzer Druck die...

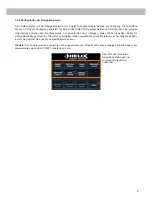
Page 5: ...ionen des DIRECTORs belegt werden und ermöglichen eine schnelle Umschaltung zwischen den Funktionsmenüs Um einen Button neu zu belegen halten Sie den jeweiligen Button für wenige Sekunden gedrückt Es öffnet sich anschließend das Auswahlmenü siehe Markierung im nachfolgenden Bild in dem die gewünschte Funktion ausgewählt werden kann Hinweis Der Funktionsumfang variiert je nach angeschlossenen Produ...

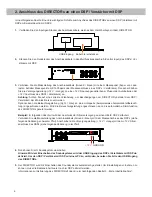
Page 6: ...e Lichtquelle beispielsweise Armaturenbrettbeleuch tung angeschlossen werden Wird die Beleuchtungsleitung angeschlossen kann die automatische Dimmfunktion des DIRECTORs genutzt werden Beispiel Im folgenden Abschnitt wird der Anschluss der Stromversorgung an einen HELIX DSP 2 erläutert Verbinden Sie die Masseleitung des Anschlusskabels Ground braun mit dem Masseanschluss des DSPs siehe folgende Abb...

Page 7: ... 3 2 Aktivierung des DIRECTORs Damit der DIRECTOR genutzt werden kann muss dieser im DSP registriert aktiviert werden Falls der DIRECTOR nach erfolgreichem Verbindungsaufbau nicht im DSP aktiviert ist wird folgende Warnung angezeigt Durch Bestätigung des Warnhinweises wird der DIRECTOR temporär aktiviert und kann nun genutzt werden Hinweis Die Aktivierung ist nur temporär gültig und muss bei jedem...

Page 8: ...mit integriertem Repeater 2 Schalten Sie Ihren DSP Verstärker mit DSP ein und starten Sie die DSP PC Tool Software Der DIRECTOR wird durch den DSP automatisch mit eingeschaltet Hinweis Sollte sich die Betriebssoftware des DSPs nicht auf dem aktuellsten Stand befinden wird diese automa tisch aktualisiert 3 Öffnen Sie das Device Configuration Menu DCM im DSP PC Tool Im Reiter Extended Features könne...

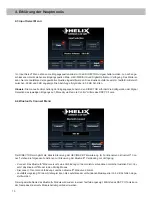
Page 9: ...altet werden Ins gesamt stehen 22 Speicherplätze bei Verwendung des DIRECTORs zur Verfügung Sound Setup 1 und 2 sind dabei intern im angeschlossenen Gerät gespeichert die restlichen 20 Setups werden im DIRECTOR gespeichert Zum Umschalten eines Sound Setups muss dieses zunächst mit Hilfe des Drehreglers ausgewählt werden Dabei wird die Nummer des Speicherslots sowie der Name des Setups auf dem Disp...

Page 10: ...mote Control mittels des DSP PC Tools 4 4 Bluetooth Connect Menü Der DIRECTOR ermöglicht die direkte Steuerung der HEC MEC BT Erweiterung Im Funktionsmenü Bluetooth Con nect stehen die folgenden Funktionen zur Steuerung der Bluetooth Verbindung zur Verfügung Connect Das Bluetooth Modul versucht eine Verbindung mit dem zuletzt verbundenen Gerät herzustellen Pair Ver setzt das Bluetooth Modul in den...

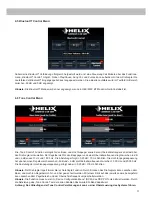
Page 11: ...enz liegt zwischen 6 dB und 6 dB sowie 10 Hz und 1 000 Hz Die Abstufung erfolgt in 0 25 dB 10 Hz Schritten Die Hochtonpegelanpassung hat ebenso einen Regelbereich zwischen 6 dB und 6 dB die Übernahmefrequenz zwischen 1 000 Hz und 20 000 Hz Die Abstufung der Hochtonpegelanpassung erfolgt dabei in 0 25 dB 100 Hz Schritten Hinweis Der Drehregler regelt immer die rot hinterlegte Funktion Durch Drücken...

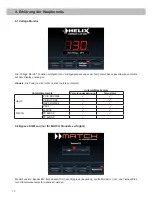
Page 12: ...räten untersützt Unterstütze Geräte Unterstütztes Feature Versorgungsspannung Temperatur HELIX P SIX DSP MK2 V EIGHT DSP DSP PRO MK2 DSP 2 MATCH M 5DSP PP 86DSP PP 62DSP 4 8 Bypass EQ Menü nur für MATCH Produkte verfügbar Mit der Funktion Bypass EQ kann das MATCH Sound Upgrade Equalizing Laufzeitkorrektur Hoch und Tiefpassfilter für Vorführzwecke temporär deaktiviert werden 4 Erklärung der Hauptme...

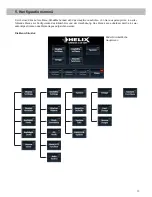
Page 13: ...st sich das Hauptmenü aufrufen Von hier aus gelangt man in weiter führende Menüs zur Konfiguration des Bildschirms und der Handhabung Das Menü kann außerdem durch ein zwei sekündiges Drücken des Markenlogos aufgerufen werden Die Menü Struktur Bildschirmoberfläche Hauptmenü ...

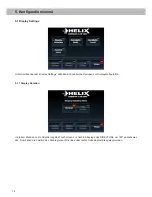
Page 14: ... Optionen zur Displaykonfiguration 5 1 1 Display Rotation In diesem Menü kann die Orientierung des Touchscreens je nach Einbaulage des DIRECTORs um 180 gedreht wer den Somit kann die Position des Drehreglers auf die linke oder rechte Seite des Gerätes gelegt werden 5 Konfigurationsmenü ...

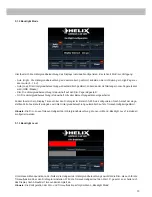
Page 15: ... Zudem lässt sich ein Display Timeout über den Drehregler im Bereich 0 60 Sek konfigurieren Nach Ablauf der einge stellten Zeit ohne Benutzereingabe wird die Hintergrundbeleuchtung automatisch auf die Timeout Helligkeit gedimmt Hinweis Die Dim sowie Timeout Helligkeit der Hintergrundbeleuchtung können im Menü Backlight Level individuell konfiguriert werden 5 1 3 Backlight Level Unter diesem Menüpu...

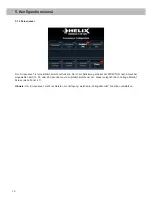
Page 16: ...urch die Aktivierung schaltet der DIRECTOR nach Ablauf der eingestellten Zeit 15 30 oder 60 Sekunden auf den Bildschirmschoner um Dieser entspricht dem Voltage Monitor Screen siehe Punkt 4 7 Hinweis Der Screensaver steht nur Geräten zur Verfügung welche die Voltage Monitor Funktion unterstützen ...

Page 17: ...ng für die Quellen HEC MEC AUX und Digital Optical zu konfigurieren Diese Limitierung des Signalpegels wird nur beim Start des DIRECTORs geprüft und ange wendet Sollte die Lautstärke der jeweiligen Signalquelle den eingestellten Wert überschreiten so wird die jeweilige Lautstärke auf den konfigurierten Wert reduziert Der Nutzer kann die Lautstärke danach wieder wie gewohnt über das jeweilige Funkt...

Page 18: ...eht sich nur auf die Funktion Sound Setups 5 2 3 PS Mode Der DIRECTOR überprüft in vordefinierten Zeitabständen den Zustand des Power Save Modus des angeschlossenen DSPs Bei eingeschalteter Funktion und aktiviertem Power Save Modus im DSP schaltet der DIRECTOR automatisch in den Standby Modus das Display wird dann ausgeschaltet Der DIRECTOR wird automatisch aus dem Standby ge weckt sobald der Powe...

Page 19: ...TT Funktion verringert nur die Master Volume um den eingestellten Wert Eine Änderung der Lautstärke bei aktivierter Mute ATT Funktion wird nicht übernommen 5 2 5 Auto Source Wird die Auto Source Funktion aktiviert wechselt der DIRECTOR automatisch auf die Quelle deren Volume Steller Master Subwoofer HEC MEC AUX oder Digital Volume ausgewählt wird Beispiel Durch einen Wechsel in das Menü Digital Vo...

Page 20: ...bar 5 3 1 Reset to Defaults Hier kann der DIRECTOR auf Werkseinstellungen zurückgesetzt werden Achtung Alle gespeicherten Einstellungen und DIRECTOR Setups werden nach einem Klick auf Yes im Gerät gelöscht Hinweis Der Reset kann einige Sekunden in Anspruch nehmen der DIRECTOR startet anschließend neu ...

Page 21: ...s mit Hilfe der PC Software DIRECTOR Updater gestartet werden Bitte beachten Sie hierzu die Anleitung siehe Kapitel 6 DIRECTOR Update und Hinweise zum Update der DIRECTOR Firmware Hinweis Dieses Menü kann nicht aufgerufen werden falls der DIRECTOR mit dem DSP PC Tool verbunden ist Wird dieses Menü angezeigt so ist eine Verbindung mit dem DSP PC Tool nicht mehr möglich ...

Page 22: ...rschiedene Einstellungen am Design der Benutzeroberfläche vornehmen 5 4 1 Font Design Unter diesem Menüpunkt kann die Schriftart und die Schriftgröße des DIRECTORs eingestellt werden Zur Auswahl stehen drei Schriftarten Tahoma SanSerif und LCD und zwei Schriftgrößen ...

Page 23: ...hie dene Farben zur Auswahl Standard Default Braun Gelb Rot Orange Grün 5 5 Unused Functions Über die Unused Functions Schaltfläche können alle nicht verwendeten Funktionen des DIRECTORs über das Menü angewählt werden Hinweis Der Funktionsumfang kann mit dem angeschlossenen Produkt und etwaigen Erweiterungen HEC MEC Mo dule variieren ...

Page 24: ...1 Installieren Sie den DIRECTOR Updater Starten Sie Ihren Computer nach der erstmaligen Installation neu 2 Schließen Sie den DIRECTOR an eine 12 Volt Stromversorgung an 3 Verbinden Sie den DIRECTOR per USB mit dem Computer und schalten Sie den DIRECTOR ein 4 Aktivieren Sie im Menü des DIRECTORs die System Update Funktion Menu System System Update Hinweis Dieses Menü kann nicht aufgerufen werden fa...

Page 25: ...ompatibel mit dem DIRECTOR Kompatibles Gerät angeschlossen aber falsche Softwareversion installiert Fall 1 Kein Gerät angeschlossen Falls kein Gerät angeschlossen oder vom DIRECTOR erkannt wurde wird die obige Meldung angezeigt In diesem Fall startet der DIRECTOR nach einem Klick auf Ok im Demo Modus Fall 2 Gerät angeschlossen aber nicht kompatibel mit dem DIRECTOR Falls ein nicht kompatibles oder...

Page 26: ...liche Ursache Lautstärke zu gering eingestellt Mute geschaltet falsche Eingangsquelle Problemlösung Lautstärkeregler überprüfen Master HEC MEC AUX Digital Optical Volume Mute deaktivieren Eingangsquelle umschalten Problem Keine Verbindung mit kompatiblen Gerät möglich Mögliche Ursache Übertragungsproblem zum DSP inkompatible Softwareversionen Problemlösung DIRECTOR Steckverbinder auf festen Sitz p...

Page 27: ...rrtümer vorbehalten Für Schäden am Fahrzeug oder Gerätedefekte hervor gerufen durch Bedienungsfehler des Gerätes können wir keine Haftung übernehmen Dieses Produkt ist mit einer CE Kennzeichnung versehen Damit ist das Gerät für den Betrieb in Fahrzeugen innerhalb der Europäischen Union EU zertifiziert Hinweis Die Bluetooth Wortmarke und die Logos sind eingetragene Warenzeichen der Bluetooth SIG In...

Page 28: ...tooth Connect menu 36 4 5 Bluetooth Control menu 37 4 6 Tone Control menu 37 4 7 Voltage Monitor 38 4 8 Bypass EQ menu 38 5 Explanation of the setup menu 39 5 1 Display Settings 40 5 1 1 Display Rotation 40 5 1 2 Backlight Mode 41 5 1 3 Backlight Level 41 5 1 4 Screensaver 42 5 2 Usability Settings 43 5 2 1 Startup Volume 43 5 2 2 Knob Sensitivity 44 5 2 3 PS Mode 44 5 2 4 Mute ATT Function 45 5 2...

Page 29: ... should be secured to a solid mounting surface using proper mounting hardware Attention During assembly make sure that the DIRECTOR cannot interfere with any safety system of the car e g airbags Do not mount the remote control on faceplates of airbags e g steering wheel or car dashboard Do not mount the DIRECTOR in the view field of the driver Do not place the remote control unsecured on top of th...

Page 30: ...used to select the different functions and navigate through the menu The control dial is used to manage parameters e g volume sound setups timeout etc in the active menu Note The main menu can also be retrieved by clicking for 2 seconds on the brand logo The control dial can also be pressed short or long to activate different functions short press activates deactivates the Mute ATT function or loa...

Page 31: ...arate function to have a fast access to the most frequently used functions in the layout you want to have To configure a soft key press the respective button for a few seconds and a new window will appear where you can select a specific function marked in the picture below Note The available functions vary depending on the connected products and their extensions e g HELIX MATCH Extension Card ...

Page 32: ...ue can be connected to an illumination wire of the car e g dashboard illumination When the illumination wire is connected it is possible to use the automatic dimming function of the DIRECTOR Example Connecting the power wires to a HELIX DSP 2 is described in the following section Connect the ground wire Ground brown of the connection cable to the ground terminal of the DSP see figure below black a...

Page 33: ...e DIRECTOR In order to use the DIRECTOR the device has to be activated registered in the DSP If the connection is successfully done and the DIRECTOR is not activated registered in the DSP the following message will appear By confirming the warning message the DIRECTOR will be temporarily activated Note The temporary activation has to be repeated after every restart For safety reasons the volumes f...

Page 34: ...ve USB cable with an integrated repeater 2 Switch on the DSP amplifier with DSP and start the DSP PC Tool software The DIRECTOR will be turned on au tomatically Note If the operating software of the DSP is not up to date it will be updated automatically 3 Go to the Device Configuration Menu in the DSP PC Tool software In the Extended Features tab you can activate the DIRECTOR as a remote control 4...

Page 35: ... menu The Sound Setup menu is used to select the different memory positions directly from the DIRECTOR In total 22 pro grammable memory positions are available Sound Setup 1 and 2 are saved in the DSP itself and the other 20 setups are saved in the DIRECTOR s memory To change the sound setup use the control dial to select a specific number name The setup can be activated by press ing the control d...

Page 36: ... needs a specific configuration in the DSP PC Tool Each source signal detection in the DCM menu has to be set to Manually via Remote Control 4 4 Bluetooth Connect menu The DIRECTOR allows the direct control of the HEC MEC BT extension module The Bluetooth Connect menu con tains the following functions to control the connection Connect The Bluetooth module tries to establish a connection to the las...

Page 37: ...om 6 dB to 6 dB and from 10 Hz to 1 000 Hz The increments are graded in 0 25 dB 10 Hz steps The control range of the treble level is as well from 6 dB to 6 dB its crossover frequency from 1 000 Hz to 20 000 Hz The increments of the treble are graded in 0 25 dB 100 Hz steps Note The control dial always adjusts the red lighted function Press the control dial in order to toggle between bass and trebl...

Page 38: ...c Fischer devices Supported devices Supported features Supply voltage Temperature HELIX P SIX DSP MK2 V EIGHT DSP DSP PRO MK2 DSP 2 MATCH M 5DSP PP 86DSP PP 62DSP 4 8 Bypass EQ menu only available for MATCH DSP products The Bypass EQ function allows to deactivate the MATCH Sound Upgrade equalizing time alignment high and low pass filter for demonstration purposes 4 Explanation of the main function...

Page 39: ... main menu appears It contains several functions and options to configure and adjust display usability and system functions as well as accessing unused functions The main menu can also be retrieved by clicking for 2 seconds on the brand logo The menu structure Main menu ...

Page 40: ...ctions for adjusting the display rotation brightness and modes as well as a screensaver function 5 1 1 Display Rotation This menu is used to rotate the display at 180 by tapping on the Flip Screen button Thus the position of the control dial can be set to the left or the right side of the display ...

Page 41: ... addition a display timeout value can be adjusted between 0 and 60 seconds by using the control dial The timeout is triggered if no user interactions are recognized for the adjusted time frame In this case the display brightness is set to the backlight timeout level Note The dim and timeout brightness of the display can be individually adjusted in the Backlight Level menu 5 1 3 Backlight Level Thi...

Page 42: ...aver function is activated the display changes to the Voltage Monitor screen see item 4 7 when the ad justed time 15 30 or 60 Seconds is expired Note The Screensaver is only supported by devices that support the Voltage Monitor function 5 Explanation of the setup menu ...

Page 43: ... 2 1 Startup Volume This menu allows the configuration of a startup volume for the HEC MEC AUX and Digital Optical sources The limita tion of the source volume is only applied after the startup If the volume exceeds the adjusted value the volume will be reduced to the set value After this startup limitation the volume can be controlled as usual within the full range ...

Page 44: ...ment is only applied for the Sound Setup menu 5 2 3 PS Mode The DIRECTOR frequently checks the status of the Power Save Mode of the connected DSP device If the auto standby option of this menu is enabled and the Power Save Mode is activated in the device the DIRECTOR will be set automat ically to standby mode and the display turned off The DIRECTOR wakes up automatically if the Power Save Mode is ...

Page 45: ...und attenuation levels Note The ATT function always reduces the master volume by the adjusted value Changing the volume while Mute ATT is activated has no effect 5 2 5 Auto Source The Auto Source function changes the input source automatically depending on the selected volume page Master Subwoofer HEC MEC AUX or Digital volume Example The Digital volume activates automatically the digital input so...

Page 46: ...is used to set the DIRECTOR back to default values Caution The saved configuration and the internal DIRECTOR Sound Setups No 3 22 will be erased after ac cepting the warning message by tapping on Yes Note The reset may take a few minutes and the DIRECTOR will be restarted after this procedure 5 Explanation of the setup menu ...

Page 47: ... activates the firmware update process of the DIRECTOR by using the DIRECTOR Updater software Please note the instructions and advises for the update of the DIRECTOR firmware see chapter 6 DIRECTOR up date Note This menu cannot be accessed during a DSP PC Tool connection If this screen is active a connection to the DSP PC Tool is not possible ...

Page 48: ...eral options for customizing the graphical user interface like font design or screen design 5 4 1 Font Design This menu allows to change the font style and font size of the DIRECTOR There are three different font styles Tahoma SanSerif and LCD and two font sizes selectable ...

Page 49: ...There are six different colors selectable Standard Default Brown Yellow Red Orange Green 5 5 Unused Functions The Unused Function menu contains all unassigned soft keys that can be accessed in this menu Note The available functions may vary on the supported products and the installed extensions e g HEC BT ...

Page 50: ...uring this procedure Do not launch the DSP PC Tool software during the update To update the device carefully perform the following steps 1 Install the DIRECTOR Updater re start your computer after its first installation 2 Connect the DIRECTOR via its USB port to your computer and turn on the device 3 Activate the System Update function in the DIRECTOR menu Menu System System Update 4 Launch the DI...

Page 51: ...nnected but not compatible Compatible device connected but wrong software version installed Case 1 No device connected The above message appears if there is no device connected or recognized by the DIRECTOR In this case you can start the Demo Mode by tapping on Ok Case 2 Device connected but not compatible with the DIRECTOR The above message appears if an unknown or not support product is connecte...

Page 52: ...ign the soft keys to access all volume screens deactivate mute check mute sym bol switch between the signal sources in the Input Select screen Issue No connection to compatible device possible Possible reason Transmission problem to DSP incompatible software version Trouble shooting Check the cable plugs for proper mounting Check for DSP PC Tool updates and install the lat est version on your DSP ...

Page 53: ...e subject to change Errors are reserved For damages on the vehicle and the device caused by handling errors of the module we can t assume liability These devices are certified for the use in vehicles within the European Community EC Note The Bluetooth word mark and logos are registered trademarks owned by Bluetooth SIG Inc and any use of such marks by Audiotec Fischer GmbH is under license Other t...

Page 54: ...Audiotec Fischer GmbH Hünegräben 26 57392 Schmallenberg Germany Tel 49 2972 9788 0 Fax 49 2972 9788 88 E mail contact audiotec fischer com Internet www audiotec fischer com ...

Reviews: