background image

EN

DISC GOLF BASKET

Assembly instructions

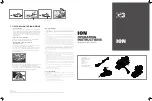
1. Place the foot on the ground.

2. Attach the lower pole to the foot by pressing the fast lock button and sliding the lower pole inside 

the center of the foot. When the fast lock button clicks and locks the pole, fasten the wing nut above it. 

Avoid using too much force.

3. Attach the basket on top of the lower pole by pressing the fast lock button on the lower pole and 

sliding the basket on top. When the fast lock button clicks and locks the pole, fasten the wing nut below 

it. Avoid using too much force.

4. Attach the upper pole on top of the basket by pressing the fast lock button and sliding the pole inside 

the center of the basket. When the fast lock button clicks and locks the pole, fasten the wing nut above 

it. Avoid using too much force.

5. Put the chain ring and the chains around the upper pole. The wide ring in the middle should go 

through first, then the rest of the chains evenly around it.

6. Attach the top frame on top of the upper pole by pressing the fast lock button on the upper pole and 

sliding the top frame on top of it. When the fast lock button clicks and locks the pole, fasten the wing nut 

below it. Avoid using too much force.

7. Attach the chains to the top frame. Find the end links furthest from the middle ring and attach them 

one by one to the top frame hooks.

8. Attach the flag on top of the top frame by sliding it to the middle plug.

9. Fix the 3 grass hooks to the ground.

Foot

Basket

Lower pole

Upper pole

Chains

Top frame

Flag

Wing nuts

Grass hooks

Info/ Tootja/ Ražotājs/ Gamintojas/ Изготовитель:

Atom Finland, PO Box 499, FI-33101 Tampere, Finland/Тампере,Финляндия

313648

ko1020

Summary of Contents for 313648

Page 1: ...he pole fasten the wing nut above it Avoid using too much force 5 Put the chain ring and the chains around the upper pole The wide ring in the middle should go through first then the rest of the chains evenly around it 6 Attach the top frame on top of the upper pole by pressing the fast lock button on the upper pole and sliding the top frame on top of it When the fast lock button clicks and locks ...

Page 2: ... lukitsee putken paikalleen kiinnitä siipimutteri painikkeen yläpuolelle Älä käytä liiallista voimaa 5 Aseta ketjurengas ja ketjut yläputken ympärille Aseta suuri keskirengas paikalleen ensin minkä jälkeen voit asetella loput ketjut tasaisesti sen ympärille 6 Kiinnitä yläkehikko yläputkeen painamalla yläputkessa olevaa pikalukituspainiketta ja liu uttamalla yläkehikko putken yläpäähän Kun pikaluki...

Page 3: ...en ska du sätta fast vingmuttern ovanför den Undvik att använda för mycket kraft 5 Trä på kedjeringen och kedjorna på den övre stången Börja med den stora ringen i mitten och fördela sedan resten av kedjorna jämnt omkring den 6 Fäst den övre ramen ovanpå den övre stången genom att trycka på snabblåsningsknappen på den övre stången och skjuta på den övre ramen När snabblåsningsknappen klickar på pl...

Page 4: ...e liblikmutri nupu ülapoolele Hoiduge liigse jõu kasutamisest 5 Paigaldage ketirõngas ja ketid läbi ülemise toru Esmalt tuleb torule paigaldada suur ketirõngas ja seejärel ülejäänud ketid võrdsete vahedega 6 Paigaldage korvipealne ülemisele torule vajutades ülemisel torul paiknevat kiirlukustusnuppu ja surudes korvipealset toru otsa Kui kiirlukustusnupp klõpsatab toru lukustades kinnitage liblikmu...

Page 5: ...elciet pārāk stipri 5 Uzlieciet riņķi ar ķēdēm un ķēdes tā lai augšējais stienis ietu tiem cauri Lielāko riņķi pa vidu uzlieciet vispirms un ķēdes pēc tam izkārtojiet vienmērīgi pa apli 6 Uzlieciet augšējo rāmi uz augšējā stieņa nospiežot augšējā stieņa fiksācijas pogu un uzbīdot augšējo rāmi uz stieņa gala Kad fiksācijas poga noklikšķ un nofiksē stieni pievelciet spārnuzgriezni zem tās Nepievelci...

Page 6: ...otąją veržlę Nenaudokite per daug jėgos 5 Užmaukite grandinės žiedą ir grandines ant viršutinio strypo Pirma reikia užmauti platų žiedą viduryje po to suverti grandines vienodais tarpais aplink jį 6 Pritvirtinkite viršutinį rėmą viršutinio strypo viršuje paspausdami sparčiojo fiksavimo mygtuką ant viršutinio strypo ir užmaudami ant jo viršutinį rėmą Sparčiojo fiksavimo mygtukui spragtelėjus ir užf...

Page 7: ...шковую гайку над кнопкой Не прикладывайте излишнюю силу 5 Наденьте кольцо цепи и цепи на верхнюю стойку Сначала идет широкое кольцо в середине остальные цепи равномерно размещаются вокруг 6 Прикрепите верхнюю раму на верхнюю стойку опустив ее в стойку при нажатой кнопке фиксации на стойке После щелчка и фиксации рамы затяните барашковую гайку под кнопкой Не прикладывайте излишнюю силу 7 Прикрепите...

Reviews: