background image

Set up BookDrive Mark 2 Lite

www.atiz.com/support

Summary of Contents for BookDrive Mark 2

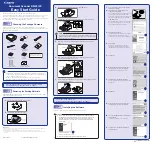
Page 1: ...Set up BookDrive Mark 2 Lite www atiz com support...

Page 2: ...e to ensure proper working condition Do not tilt the machine The machine is not designed to be lifted Do not lift or relocate the machine once it has been fully assembled To relocate the machine desir...

Page 3: ...Getting to know your BookDrive Mark ll Lite 2 Roof LED Lighting Panel Camera Mount Shade V Platen Arm Pillar V Cradle Base...

Page 4: ...How to assemble 1 2 Take the left and the right arms out then take the foam out from the arm 3 There are 3 small boxes in Mark 2 Lite s box Take 1 2 and 3 out as shown below Tips Take 1 then 2 and 3...

Page 5: ...3 4 Lay down the box and take out the machine as shown below Now put the machine back on its feet 4...

Page 6: ...6 7 5 Remove the beam removing bolts 6 by using the included Hex wench This piece is only used for support during transportation Remove bolts 7 Remove the foam 5...

Page 7: ...8 Loosen the bolts 8 and turn lever of LED 9 out then lift the LED up 9 10 Tighten the bolts Screw the bolts 10 and 11 6...

Page 8: ...Take the arm from Box 1 Connect the left and the right arm to the pillar and screw the bolts 12 11 Take V platen and cradle out 7...

Page 9: ...13 Install the roof and screw the bolts 8...

Page 10: ...14 15 Put the cradle as shown Put the v platen on the cradle and lock the v platen with knobs on each side 9...

Page 11: ...16 Put the plate to the pillar and lock it with bolts 10...

Page 12: ...17 18 Install the switching holder Lock the standby switch box with bolts 11...

Page 13: ...12 20 Collect the cable as shown below 19 Install the switching power supply...

Page 14: ...23 13 22 21 Attach the top shade as shown Connect standby switch and switching power supply to LED box Collect the cloth of shade into the inside...

Page 15: ...14 24 25 Attach the back shade as shown Attach the left shade to the left side and the rigth shade to the right side...

Page 16: ...27 Attach the inner shades to the front shade 15 26 Attach the front shade to the front...

Page 17: ...16 28 Attach the camera shades to the left and right of roof...

Page 18: ...ike A then loosen the screws 1 slightly and then adjust screws 2 to compensate until the image is properly aligned Once the camera is properly aligned then proceed to tighten screws 1 If you image loo...

Page 19: ...18 How to install camera Auto Capture Switch...

Page 20: ...How to set up the platen parallel with the cradle 1 Loosen the bolts at the position A 2 Adjust by turning the position B 3 When the position is properly then lock the bolts at the positon A 19...

Page 21: ...Copyright 2006 2017 Atiz Innovation Co Ltd All rights reserved www atiz com support...

Reviews: