

ATK-16/16HR Quickstart Guide
Thank you for purchasing the Atik ATK-16 CCD camera. This guide serves the purpose of getting
your camera up and running with minimal effort. The installation is very straightforward, with
minimal steps needed.
Your camera is supplied with a 3 meter long USB cable and a 1.8 meter power cable with a car
lighter plug. The car lighter plug will allow you to connect the camera to most of the power tanks
and emergency battery packs available on the market today, for field use. An optional mains power
supply is also available, so that you can run it from 110/220V, but any quality 12V mains adapter
capable of supplying a minimum of 1 amp will do.
Installing the camera in 3 steps:
1 - Power the camera on. The fan should start rotating immediately.
2 - Plug the USB cable on the camera, then on your computer. A “New hardware found” message
should immediately be visible
3 - When asked for the drivers, point to the \Drivers\<camera model> on your CD-ROM drive.
That’s it! The camera is now installed and ready to use.
Installing the capture application
Your camera came with a simple and easy to use image capture application called “Artemis Cap-
ture”, which allows you to capture your images and display them, control several camera options,
and help you focusing your telescope. This application doesn’t do any image processing, but it can
export to several popular formats for opening on your favorite image processing application.
To install the application, simply run the “SetupArtemisApps.exe” file in the “Artemis” folder of
your CD. Follow the prompts, and it should install effortlessly.
Using the camera and software for the first time
Although the full operation of the software is discussed in it’s user manual, the following steps will
help you get your first image without
too much hassle.
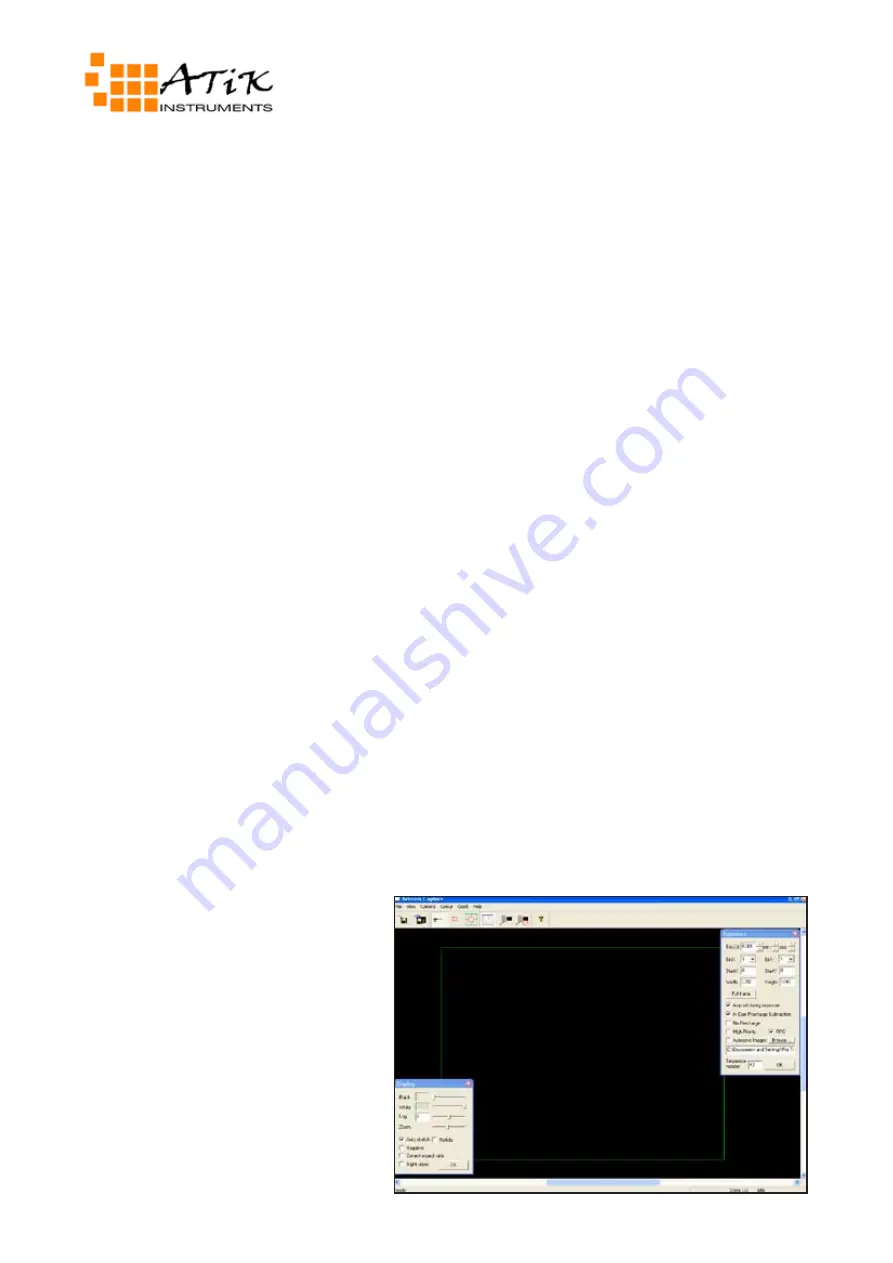
After loading Artemis Capture, you
will see a screen like the one at right.
Operation is very simple.
The right window controls exposure
duration, binning and other camera
options. You can leave most of them
at their default settings.
The left window controls the way the
image is displayed. Keep in mind that
anything that you to here is only in-
tended for display purposes only, not
affecting the image in any way.


