AT&T TL7600, User Manual
The AT&T TL7600 User Manual is a valuable resource for anyone in need of guidance and support while using this exceptional phone accessory. Easily downloadable for free from our website, feel confident exploring the product's features and functions, ensuring a seamless user experience every time.
Share
Download


Reviews:
No comments
Related manuals for TL7600
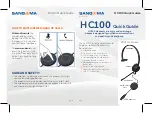
HC100
Brand: Sangoma Pages: 2

Kaliber Gaming NUKLEUS GHG601
Brand: IOGear Pages: 16

DSS 2405
Brand: Uniden Pages: 8

BIZ 2400 MS USB
Brand: Jabra Pages: 2

CBH508-OD
Brand: Craig Pages: 6

S450-XT
Brand: BlueParrott Pages: 26

RealWear HMT-1
Brand: Honeywell Pages: 56

HP43
Brand: steelplay Pages: 22

Move Style Edition
Brand: Jabra Pages: 13

Dual Mode Noise-Isolating Headset
Brand: etyBLU Pages: 20

FX30
Brand: Fonexion Pages: 6

H1-BT
Brand: EKSA Pages: 10

Elite 85h - Titanium Black
Brand: Jabra Pages: 2

BLUEMINI
Brand: HiFiMAN Pages: 6

203782
Brand: Sharper Image Pages: 7

125-60
Brand: Sandberg Pages: 2

126-18
Brand: Sandberg Pages: 28

676A2AA
Brand: Hyper Pages: 23


