background image

System Administrator’s Guide

AT&T SB67030 Deskset
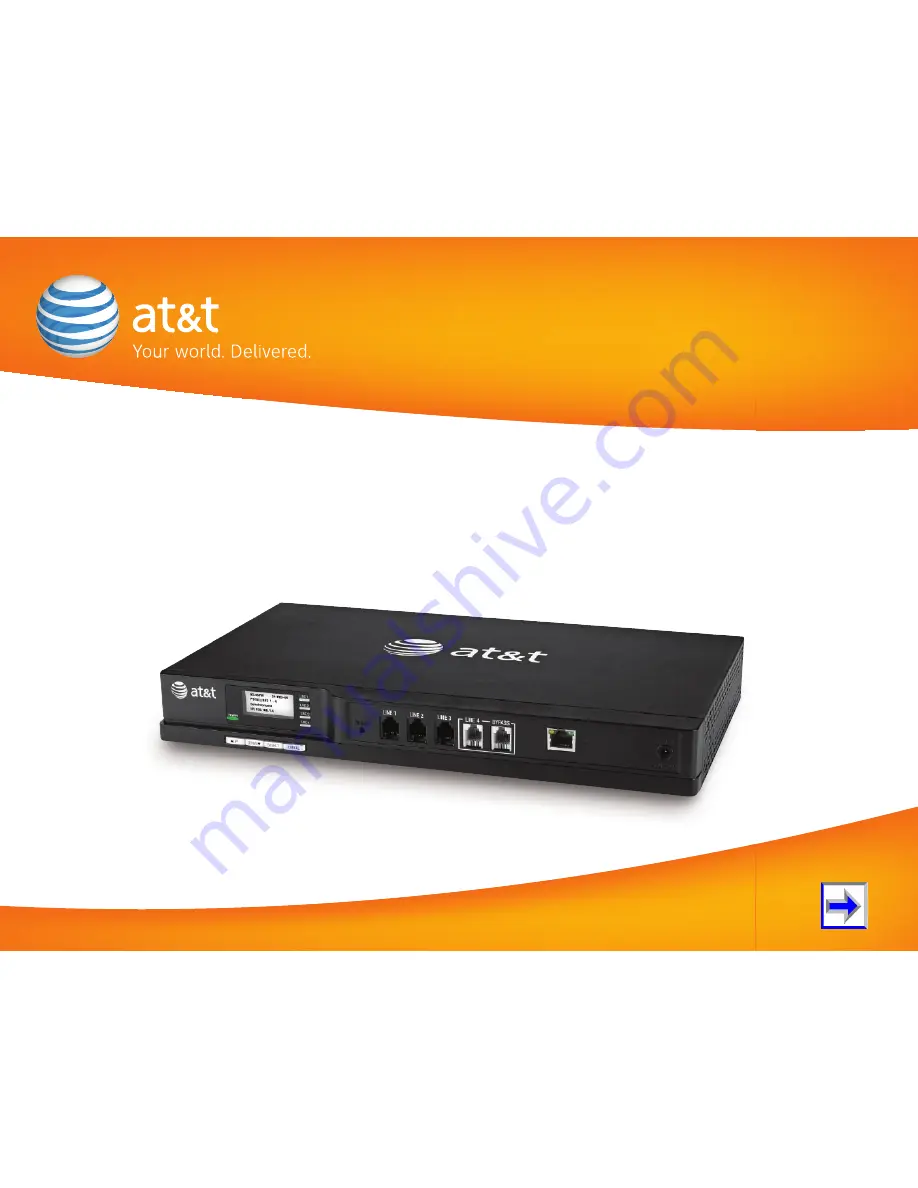
AT&T SB67010 PSTN Gateway

© 2009 Advanced American Telephones. All Rights Reserved. AT&T, the AT&T logo and the slogan “Your 

w

orld. Delivered.” are 

trademarks of AT&T Intellectual Property licensed to Advanced American Telephones, San Antonio, TX 78219. Issue 

2

.0 1

1

/09

Summary of Contents for SB67030

Page 1: ...T SB67010 PSTN Gateway 2009 Advanced American Telephones All Rights Reserved AT T the AT T logo and the slogan Your world Delivered are trademarks of AT T Intellectual Property licensed to Advanced American Telephones San Antonio TX 78219 Issue 2 0 11 09 ...

Page 2: ...cumentation 10 Installation 11 Gateway and Deskset Placement 12 Gateway and Deskset Parts List 12 System Installation Overview 14 Network Configuration 15 Deskset Installation 17 Gateway Installation 22 System Description 27 Gateway Operation 28 Recovery After Power Failure 30 Getting Started 32 Gateway Main Menu 33 Configuration 34 Upgrade Software 35 Gateway Reset 36 Deskset Admin Settings 37 Ca...

Page 3: ...s 50 Reset User Password 51 Software Upgrade 52 Deskset Reset 54 System Configuration 55 The WEBUI 56 Web User Interface WEBUI Overview 57 Error Handling 59 System Settings 60 Viewing System Information 61 Basic Settings 63 Ring Groups 66 Auto Attendant Overview 69 Auto Attendant Configuration 70 Opening Menu Selection 71 Creating Auto Attendant Menus 73 Auto Attendant Voice Prompts 76 Auto Attend...

Page 4: ...duct Registration 98 Help 99 Troubleshooting 100 Common Troubleshooting Procedures 101 Resolving Audio Echoes 101 Resolving General Audio Issues 103 Reintroducing a Deskset Into the System 104 Reintroducing a Gateway Into the System 106 Power fail Recovery Procedure 108 General Troubleshooting 109 Gateway Troubleshooting 114 Deskset Troubleshooting 118 Cordless Handset Troubleshooting 127 Cordless...

Page 5: ...skset System Administrator s Guide Technical Specifications 136 Maintenance 138 Avoid Rough Treatment 138 Avoid Water 138 Electrical Storms 138 Cleaning Your Unit 138 Important Safety Instructions 139 Limited Warranty 141 Glossary 145 ...

Page 6: ...page 139 of this manual Please read this administrator s guide thoroughly for all the information necessary to install and operate your new AT T product Using This Guide The following sections provide instructions for using this guide Topic Navigation on page 7 Text Conventions on page 8 Procedure Format on page 9 Additional Documentation on page 10 NOTE For customer service or product information...

Page 7: ...turn to your original topic Figure 1 illustrates the navigation conventions for this administrator s guide Figure 1 Administrator s Guide Navigation Task Click on this link to move to beginning of the instructions for this task Next Page First Page in Current Chapter Return to Main Menu Acrobat Navigation Click on a bookmark to go to the first page of the listed topic Back to Last Page Viewed Prev...

Page 8: ...xt that appears on the screen in a menu or prompt HARD KEY or DIAL PAD KEY Identifies a hard key including the dial pad keys Identifies a Soft key Topic Navigation on page 7 Identifies a hyperlink to a task Example of a Note Example of a Caution Example of a Warning NOTE Notes give more information usually in a procedure CAUTION A caution means that loss of data or unintended circumstances may res...

Page 9: ...e Format The procedures in this guide are each contained on a single page unless otherwise noted Each page contains the topic heading and a procedure table as shown in Figure 2 The screen images appear in clockwise order as indicated by the numbers in Figure 2 Figure 2 Sample Procedure ...

Page 10: ...tion key to highlight the function and press SELECT or press a numeric key on the dial pad The procedures in this guide use the numeric dial pad entry as the preferred method for selecting a function Additional Documentation In addition to this guide this CD contains the following documents AT T SB67030 Deskset User s Guide AT T SB67040 Cordless Accessory Handset User s Guide AT T TL7600 Cordless ...

Page 11: ...n on page 27 This chapter covers the following Gateway and Deskset Placement on page 12 Gateway and Deskset Parts List on page 12 System Installation Overview on page 14 Network Configuration on page 15 Deskset Installation on page 17 Gateway Installation on page 22 NOTE For customer service or product information contact the person who installed your system If your installer is unavailable visit ...

Page 12: ...icrowave ovens refrigerators or fluorescent lighting Excessive dust sources such as a workshop or garage Excessive moisture Extremely low temperature Mechanical vibration or shock such as on top of the washing machine or workbench Gateway and Deskset Parts List Figure 3 illustrates the Gateway parts Figure 3 Gateway Parts List Gateway Power Adapter Four Phone Cords RJ 45 Ethernet Cable Mounting br...

Page 13: ... AT T SB67010 Gateway SB67030 Deskset System Administrator s Guide Figure 4 illustrates the Deskset parts Figure 4 Deskset Parts List Deskset Base Deskset Stand Power Adapter RJ 45 Ethernet Cable Handset Handset Cord ...

Page 14: ...ponents needed to make the system work Figure 5 Simplified System NOTE The system uses a Local Area Network LAN for system communication It uses Public Switched Telephone Network PSTN phone lines for external calls NOTE You can also register AT T TL7600 Cordless Headsets and AT T SB67040 Cordless Accessory Handsets to up to five Desksets To integrate the Headset into the system use the AT T TL7600...

Page 15: ... system where all telephones connected to the same network intelligently route traffic and handle calls The System can be installed on a new Local Area Network LAN or integrated into an existing network Figure 6 System Installation Laptop Local Area Network LAN Laptop SB67010 PSTN Gateway IT Controller Router Copier FAX SB67030 Deskset SB67030 Deskset SB67030 Deskset SB67040 Cordless Accessory Han...

Page 16: ... Network PSTN lines and the internal IP based network The Gateway provides four PSTN ports for connecting up to four phone lines and one 10 100 Ethernet port for connecting to the Ethernet network Up to four SB67010 PSTN Gateways providing up to 16 PSTN lines and 50 Desksets can be connected to the network for a total of up to 54 devices The system assigns the first Deskset to join the network Ext...

Page 17: ...age 21 To attach the Deskset stand Figure 9 Deskset Stand Installation 1 Place the Deskset on a flat surface with the power and network jacks facing you as illustrated in Figure 9 2 Place the stand illustrated in Figure 10 on the base with the flexible tab side away from you 3 Insert the solid tabs into the Option 1 or Option 2 slots on the base in the direction of the arrows as shown in Figure 9 ...

Page 18: ...t The green LED is on when the Deskset is both connected to the network and has AC power The yellow LED flashes when there is network activity If a GigE network is being used a computer connected through the Deskset will be limited to 100 Mbits s If you require a GigE Ethernet rate use separate Ethernet connections for the Deskset and the computer so that the computer can take advantage of the gre...

Page 19: ... 1 Plug the power adapter into the DC Power jack on the back of the Deskset as identified in Figure 12 2 Plug the power adapter into an outlet not controlled by a wall switch The display screen illuminates within about a minute If the user s computer is plugged into a UPS consider plugging the Deskset into one too Power Jack ...

Page 20: ... then hang up Connect an optional corded Headset 1 Plug an optional corded headset into the RJ9 connector on the bottom of the Deskset as indicated in Figure 14 2 Press HEADSET shown in Figure 15 to use the corded headset The corded headset takes precedence over the cordless Headset If the user unplugs the corded headset during an Active Call Voicemail playback or while recording the audio will sw...

Page 21: ...stallation Figure 16 Handset Tab 1 Press the Switchhook and slide the Handset Tab toward the top of the base as shown in Figure 16 2 Rotate the Handset Tab 180 as shown in Figure 17 3 Replace the Handset Tab back on the base as shown in Figure 18 Figure 18 Replace Handset Tab Switchhook Handset Tab Figure 17 Handset Tab Rotation Handset Tab ...

Page 22: ...brackets and six screws from the packing tissue 2 Position the right bracket at the front of the chassis as shown in Figure 19 3 To align the screw holes place the bracket on the chassis so that the locating indent on the bracket matches the indent on the chassis 4 Insert each of the three screws into the holes illustrated in Figure 20 and tighten securely Repeat the process for the left bracket 5...

Page 23: ...ified in Figure 22 b Insert the spade fork end of the grounding cable under the grounding terminal c Tighten the screw d Connect the alligator clip end of the grounding cable to the building ground point usually located at the electrical breaker box Figure 22 Gateway Grounding WARNING If you are unsure about the location of the building ground point or how to ground the Gateway contact the facilit...

Page 24: ...d LAN Plug the other end of the RJ 45 Ethernet cable into your office LAN Figure 23 Gateway Installation CAUTION To help prevent the loss of system data during power outages plug the AC power plug into an Uninterruptible Power Supply UPS CAUTION Some DHCP servers have default settings that limit the number of IP addresses Each Deskset Gateway and personal computer needs an IP address You should lo...

Page 25: ...he system the Idle screen updates the time date and IP Address as shown in Figure 24 4 Remove the plastic covers from the PSTN telephone ports to be used marked LINE 1 through LINE 4 and BYPASS 5 Plug up to four telephone lines from the wall jacks into the Gateway The line LEDs blink up to 15 seconds during initialization NOTE The time and date may not be correct The time and date are set using th...

Page 26: ...s complete back up the Deskset and system settings See Backup Restore Settings on page 91 NOTE For customer service or product information contact the person who installed your system If your installer is unavailable visit our website at www telephones att com or call 1 888 916 2007 In Canada dial 1 888 883 2474 ...

Page 27: ...TN The Gateway controls system components and access to external communications networks AT T SB67030 Deskset In addition to being used for phone calls the Desksets can also be used to customize the system AT T SB67040 Cordless Accessory Handset Optional Duplicates many of the Deskset features and provides a high degree of mobility AT T TL7600 Cordless Headset Optional Replaces the Deskset corded ...

Page 28: ...ere is no DHCP server present the Gateway assigns itself an IP address self assigned link local address The Gateway s PSTN lines are assigned as line 1 to 4 If a second Gateway is connected to the network it is assigned lines 5 to 8 Up to four Gateways can be connected providing up to 16 PSTN lines See Front Panel Description on page 29 for more details RJ 45 Ethernet Network Port 10Base T 100Base...

Page 29: ...bar to the previous or next item in the list respectively Dual color Status LEDs indicate the status for each PSTN line Indications include Disconnected Red Connected Off In use Green steady Ringing Green flashing quickly Line LED flash red after lines are connected while matching line impedance Display the main menu when in idle mode or while in network detection mode Save current setting and ret...

Page 30: ... message displays on the screen a few seconds later b When the Gateway connects to the network the Synchronizing screen displays briefly to indicate that the Gateway is in the process of detecting and synchronizing with other devices on the network c Once the Gateway has successfully finished synchronizing with the rest of the system the Idle screen displays the time date and the IP Address as sho...

Page 31: ...teway cannot find a DHCP server on the network it will assign a link local address that begins with the number 169 169 xxx xxx The presence of computers and other devices on the same network could produce many requests for IP addresses straining the network Devices should revert to the proper IP addresses after the DHCP server resolves the request If a system device continues to use an IP address ...

Page 32: ...resses If a Deskset is disconnected for a substantial length of time a new IP address may be assigned to it when reconnected The Deskset does not lose its assigned extension Even if you unplug a unit its extension is reserved If you want to remove a Deskset from the network the extension must be deleted This ensures that the Deskset does not tie up an extension This section covers Gateway Main Men...

Page 33: ... the key The menu provides the following functions Device Information Network Status Configuration Press the key to highlight an entry then press to see information about your Gateway or your Network Select Configuration to view or modify some Gateway settings Here is the information you can see in Device Information and Network Status Device Information Model Serial Boot Version Firmware version ...

Page 34: ...tings Auto IP DHCP Is set automatically Static IP You can change the Static IP only from the Gateway Although the Gateway prompts you through the process using a static IP address can have serious effects so contact your installer if Static IP editing is required Restore Defaults Highlight Restore Defaults and press Press and hold for two seconds when prompted See Backup Restore Settings on page 9...

Page 35: ...ion issues If the host is found but there is no new software available then the No New Version message displays 3 If new software is available you are prompted to initiate the upgrade by pressing or to abort by pressing Once the downloading starts the display indicates the progress as shown by the rising percentage indicator on screen The device reboots automatically once the Flash programming is ...

Page 36: ...re unaffected Pressing the RESET button for more than five seconds resets the Gateway to factory defaults and clears the system configuration Auto Attendant settings Ring Groups Hold message and System Directory Figure 30 Gateway Reset Button If you are concerned about accidentally erasing all data simply unplugging the power cord then plugging it back in will also power cycle and reboot the unit ...

Page 37: ...screen shown in Figure 31 2 Press 3 on the dial pad to display the Admin Settings screen shown in Figure 33 on page 38 3 Enter the Admin password as shown in Figure 32 and press SELECT Figure 32 Admin Password Menu Quick Dial 1 Deskset Settings 2 User Settings 3 Admin Settings 4 Deskset Information Use or to scroll then press SELECT or press 1 4 NOTE The operator s Deskset has a fifth choice Auto ...

Page 38: ...0 45 2 Fwd Trans to line on page 43 3 Restore Default Settings on page 44 4 IP Settings on page 46 1 IP Configuration Auto Static 2 Set Edit Static IP 3 IP Status 5 Reset User Password on page 51 6 Software Upgrade on page 52 Software upgrade screen 1 Call Fwd NA 2 Fwd Trans to line 3 Restore Default Settings 4 IP Settings Admin Settings VM Enabled 5 Reset User Password Auto Quick Dial 6 Software ...

Page 39: ...Fwd NA Settings 1 Perform the To display the Admin Settings menu procedure on page 37 2 Press 1 on the dial pad to display the Call Fwd NA Settings screen shown in Figure 34 3 Press the or navigation key to toggle the setting to one of the following destinations Call Forward No Answer to Voicemail on page 40 Call Forward No Answer to an Extension on page 41 Call Forward No Answer to an Outside Lin...

Page 40: ...NA Settings screen shown in Figure 35 with the current Call Forward target in the top field 3 Press the or navigation key until is highlighted as shown in Figure 35 4 Press the navigation key to highlight Call Fwd NA Delay 5 Press the or navigation key to adjust the delay in five second increments 6 Press to accept the change and display the Admin Settings screen NOTE The minimum delay is five sec...

Page 41: ...Forward target in the top field 3 Press the or navigation key until is highlighted as shown in Figure 37 4 Press the navigation key to move to the to Ext editable field A blinking cursor appears in the number field 5 Enter in a valid extension 6 Press the navigation key to highlight Call Fwd NA Delay 7 Press the or navigation key to adjust the delay in five second increments 8 Press to accept the ...

Page 42: ...ess 1 on the dial pad to display the Call Fwd NA Settings screen shown in Figure 39 with the current Call Forward target in the top field 3 Press the or navigation key until is highlighted as shown in Figure 39 4 Press the navigation key to move to the to Line editable field A blinking cursor appears in the number field 5 Enter in a valid phone number For outside calls first dial 9 6 Press the nav...

Page 43: ...sending a call to an external line via the Gateway To toggle the Forward Transfer to an external line Figure 41 Fwd Trans to Line 1 Perform the To display the Admin Settings menu procedure on page 37 2 Press 2 on the dial pad to display the Fwd Trans to line screen shown in Figure 41 with the current setting in the top field 3 Press the or navigation key to toggle the setting from Enabled to Disab...

Page 44: ...iew affected settings see Table 2 See Backup Restore Settings on page 91 before restoring factory defaults To restore the default settings Figure 43 Restore Default 1 Perform the To display the Admin Settings menu procedure on page 37 2 Press 3 on the dial pad to display the Restore Default screen shown in Figure 43 3 Press to confirm Table 2 System Default Settings Parameter Selection Default Con...

Page 45: ...all Forward No Answer Target VM Ext Line OFF VM Call Forward No Answer Delay 5 45 in 5 second increments 15 Current Name Personal Pre Set Pre Set Voicemail Enabled Disabled Enabled IP Auto Static Auto IP Auto Static Auto Auto Directory List All Personal System Extension All First Name Last Name toggle First Name Last Name First Name Admin Password XXXXXX 12345 Table 2 System Default Settings Conti...

Page 46: ...nu procedure on page 37 2 Press 4 on the dial pad to display the IP Settings screen shown in Figure 44 3 Perform one of the following a Press 1 to select IP Configuration See To set the IP Configuration or edit the IP Address on page 48 b Press 2 to select Set Edit Static IP See To set and edit static IP Address on page 49 c Press 3 to select IP Status See To view the IP status on page 50 ...

Page 47: ...and does not change If you use a static IP address you tie up that address It cannot be used by other devices Using a DHCP assigned address is highly recommended If a Deskset cannot find a DHCP server on the network then it assigns itself an IP address This is called a self assigned link local address and begins with the number 169 169 xxx xxx Each Deskset can temporarily assign itself a 169 IP ad...

Page 48: ...m the To display the Admin Settings menu procedure on page 37 2 Press 4 on the dial pad to display the IP Settings menu shown in Figure 44 on page 46 3 Press 1 to select IP Configuration 4 Press the or navigation key to toggle between Auto and Static as shown in Figure 45 5 Press to accept the changes and return to the Admin Settings screen shown in Figure 33 on page 38 ...

Page 49: ...is a 12 digit limit on the number field not including dots Pressing the pound key inserts a dot Pressing when the cursor is positioned next to a dot deletes the dot and the digit to the left of the dot 5 Press the or navigation key to cycle through the four different fields 6 Press to accept the changes and return to the Admin Settings screen shown in Figure 33 on page 38 Figure 47 Set Edit Static...

Page 50: ... 2 Press 4 on the dial pad to display the screen shown in Figure 44 on page 46 3 Press 3 to display the IP Status screen shown in Figure 48 4 Press the or navigation key to view status entries that are not shown on screen 5 Press when your review is complete NOTE The list is not circular so when you reach the end of the available text pressing the navigation key has no effect If you are at the top...

Page 51: ... reset the user password To reset the user password Figure 49 Reset User Password 1 Perform the To display the Admin Settings menu procedure on page 37 2 Press 5 to begin the password reset process The confirmation screen shown in Figure 49 displays 3 Press to confirm password reset The screen shown in Figure 50 appears informing you that the password has been reset Figure 50 User Password Cleared...

Page 52: ... Software entry it is necessary to press the navigation key To access the Software upgrade feature Figure 51 Software Upgrade 1 Perform the To display the Admin Settings menu procedure on page 37 2 Press 6 to display the screen shown in Figure 51 The system scans for an upgrade If an upgrade is available the screen shown in Figure 52 displays Figure 52 Upgrade Available ...

Page 53: ...ing that PC will halt until the Deskset has resumed operation Avoid updating the Deskset when the user is likely to be at the workstation To access the Software upgrade feature Continued Figure 53 No New Version If no upgrade is available the screen shown in Figure 53 displays 3 Press to install the upgrade The screen shown in Figure 54 displays 4 Press when the upgrade is complete to return to th...

Page 54: ...gs are unaffected Pressing the RESET button for more than five seconds resets the Deskset to factory defaults and clears the system configuration your user settings Personal directory list and the extension number This is a complete reset unlike the Restore Default Settings option in Admin Settings on the Deskset Figure 55 Deskset Reset Button If you are concerned about accidentally erasing all da...

Page 55: ...e settings on one page Changing a setting does not instantly apply the new value Click on the WEBUI to save all changes on that page CAUTION Only one person at a time should log in as the System Administrator to prevent unintentional overwriting of changes NOTE Changes made on the WEBUI are transmitted to all Desksets when applied If changes are being made at the Deskset and WEBUI simultaneously a...

Page 56: ...BUI Overview on page 57 System Settings on page 60 Viewing System Information on page 61 Basic Settings on page 63 Ring Groups on page 66 Auto Attendant Overview on page 69 Hold Message on page 81 System Directory on page 83 Phone Settings on page 84 Basic Settings on page 85 Station Directory on page 87 Quick Dial Keys on page 89 Device Management on page 90 Backup Restore Settings on page 91 Upg...

Page 57: ...Guide To access the browser interface Figure 56 Deskset Information Screen Figure 57 Browser Entry 1 Press MENU on the Deskset 2 Press 4 on the dial pad to display the Deskset Information screen shown in Figure 56 3 Find your IP Address on the Deskset Information screen 4 Open a browser AT T recommends Internet Explorer 6 or higher for best performance The PC must be on the same subnet as the Desk...

Page 58: ...e navigation list on the left side of the WEBUI to see them You view and change settings in two different types of fields drop down menus and entry fields into which you type information For your security the WEBUI times out after 10 minutes so if it is idle for that time you must log in again CAUTION Only one person at a time should log in as the System Administrator to prevent unintentional over...

Page 59: ...ror Handling If you type an invalid value into one of the WEBUI fields and click the page is not saved The WEBUI displays an error message at the top of the page The field with the incorrect value is highlighted as shown in Figure 59 Figure 59 WEBUI Error Indication Error Message Invalid Entry ...

Page 60: ...verview on page 69 Hold Message on page 81 System Directory on page 83 Basic Settings on page 85 Station Directory on page 87 Quick Dial Keys on page 89 Device Management on page 90 Backup Restore Settings on page 91 CAUTION When making changes to the System Settings through the WEBUI ensure that no one is using an extension It is a good idea to block off a time period for system configuration and...

Page 61: ...in Figure 60 displays 2 Click System Settings in the left navigation menu to see the screen at any time from within the WEBUI 3 Click System Information to display the Desk Phones Gateways and Lines 4 Click so you can see the MAC addresses and other information specific to each device as shown in Figure 61 on page 62 There may be a delay as the system gathers information Figure 60 Menu System Info...

Page 62: ...System Configuration 62 AT T SB67010 Gateway SB67030 Deskset System Administrator s Guide Figure 61 Expanded System Information ...

Page 63: ...ssword The Administrator User ID and or Administrator Password is limited to four to six digits Values outside this range generate an error message 3 Although the default extension for the operator is 200 any Deskset can be designated as the operator station Incoming calls are forwarded to the operator station if the caller presses 0 zero while in the Auto Attendant a Click the drop down list unde...

Page 64: ...ge is from 15 to 120 minutes 5 The time can be automatically set from the online NTP Server recommended or you can set it from the WEBUI The time defaults to Daylight Savings Time set by the NTP Server but you can specify another server If you have the time set by another server enter whether your area observes Daylight Savings Time Locate System Time Date Options as shown in Figure 63 Click the S...

Page 65: ...sic Settings System Time Date c Select your time zone from the Time Zone drop down menu d Click the Yes or No button for Daylight Savings Time OR Click the Manual button a Enter the current time and date information to set your own time b Select your time zone from the Time Zone drop down menu c Click the Yes or No button for Daylight Savings Time 6 Click ...

Page 66: ... command entered by an external caller The user cannot call a ring group internally You can designate one extension for forwarding when no one answers a ring group call so its voicemail can record a message To change the Ring Group settings Figure 65 Ring Group Menu 1 Log in as administrator The System Information screen shown in Figure 62 on page 63 displays 2 Click System Settings in the left na...

Page 67: ... the target extension does not ring after the Seconds before Forwarding The call goes directly to Voicemail Select Extension to forward the call to the Target Extension entered in the text box after the number of seconds you choose for Seconds before Forwarding 3 Select the extensions that should be in the ring group from the Available Extensions drop down menu and click See Ring Groups on page 66...

Page 68: ... Group Menu 1 Verify that the desired ring group name displays See Ring Groups on page 66 for more information on ring groups 2 Select an Available Extension Then click to add a ring group from this page OR Select a Ring Group Member Then click to delete a ring group from this page 3 Click to save these settings when you are done ...

Page 69: ...opening menu providing instructions that allow them to use a touch tone telephone to reach the appropriate person ring group Company Directory or operator This menu can be different at different times of the day day night and lunch If you disable the Auto Attendant all incoming calls ring only at the operator extension which defaults to Extension 200 Figure 68 shows the Auto Attendant submenus Fig...

Page 70: ...rs locate Enable Auto Attendant shown in Figure 69 3 Click one of the Enable Auto Attendant buttons Click the Scheduled button to automatically change the message with the time of day You cannot automatically set or schedule Lunch mode OR Click the Manual button to immediately change to a different time mode a To choose a mode click on the drop down list beside this option and select Day Menu Nigh...

Page 71: ...e default menu as shown in Figure 70 The default prompt is Enter the extension number or enter 0 for the operator 1 Once an opening menu has been created go to Opening Menu Selection and choose the menu for that time from the drop down box 2 A custom menu can be selected regardless of the intended mode day lunch or night You can also create other menus that callers can choose by pressing dial keys...

Page 72: ...on page 71 is shown in Figure 71 Use it to set the start times for day and night modes for each day of the week or you can accept the default times Click on the drop down boxes to adjust the time Minutes are set in five minute increments The three dots as shown in the hour drop down box for Sunday in Figure 71 extend the previous mode In this case all of Saturday and Sunday operate in night mode t...

Page 73: ...our callers with choices by creating menus To create or edit a menu Figure 72 Auto Attendant Menu Editor 1 Click Auto Attendant in the left navigation menu to access the sub menus 2 Click Menus in the left navigation menu to display the menu shown in Figure 72 3 You can add or edit a menu To add a new menu you can define up to 20 menus a Click on the drop down box and select Create New Menu as sho...

Page 74: ...y dial users extensions Callers cannot press 2 for other actions Enable the operator Click the Enable Operator On button shown in Figure 72 on page 73 to allow callers to press zero 0 to reach the operator defaulting to Extension 200 Callers cannot press 0 for other actions Set the numeric key values z Program an action for digits 1 3 4 5 6 7 8 and 9 and star and pound as needed See Auto Attendant...

Page 75: ...030 Deskset System Administrator s Guide To delete a current menu 1 Select the menu name from the drop down list 2 The selected menu name appears in the Menu Name dialog box as shown in Figure 73 3 Click Figure 73 Auto Attendant Delete Menu Test Test ...

Page 76: ...g instructions 2 Press when you are done You return to the Auto Attendant Menu Editor so that you can add actions to the menu Here is an example of an opening daytime script which could be part of the Opening Day Menu This is the Widget Company If you know your party s extension dial it now For a list of salespeople press 1 For customer service press 3 To hear a recording of our hours press 9 To h...

Page 77: ... Replay Replays the current message Directory Accesses the Company Directory See Name Recording for Auto Attendant Company Directory on page 78 and Basic Settings on page 85 Previous Menu Plays the previous menu Opening Menu Plays the opening menu Default Menu Plays the assigned default menu Menu Name Accesses other menus that you have created and named Select any Menu that you have created to est...

Page 78: ...s To record a personal name Figure 75 Menu 1 Press MENU to display the Menu screen shown in Figure 75 2 Press 2 to display the User Settings menu shown in Figure 76 If you have set a user password the Enter User Password screen shown in Figure 77 displays Enter your password and press SELECT 3 Press 4 to display the Name Recording menu shown in Figure 78 Figure 78 Name Recording Figure 76 User Set...

Page 79: ...it 6 When you are finished recording press The screen changes to display and as shown in Figure 81 7 Press to review the name recording 8 To return to the User Settings screen shown in Figure 76 on page 78 press Figure 81 Recording Complete Quick Dial Personal Name Play Rec Name NO NAME RECORDED Record Press Record to record name Exit Quick Dial Personal Name RECORDING Play Rec Name Duration 2s Ma...

Page 80: ...Name Recording menu shown in Figure 82 The Extension number will play to callers when they look up your name in the Company Directory Figure 84 Personal Name Deleted Quick Dial 1 Play Rec Personal Name 2 Delete Personal Name Name Recording Use or to scroll then press SELECT or press 1 2 Press Yes to delete or No to cancel Yes No Are you sure you want to delete your recorded name Name Recording Fig...

Page 81: ...t the System extension number you will use to record the prompt 4 Optional Type in the script you will narrate in the Script Editor text box 5 Follow the procedure on the screen to record a prompt 6 Press 2 to play the current recorded hold prompt 7 Click when you are ready to record 8 Record your message hang up the phone and click when you are finished To delete an existing on hold announcement ...

Page 82: ...System Configuration 82 AT T SB67010 Gateway SB67030 Deskset System Administrator s Guide Figure 85 On Hold Announcement ...

Page 83: ...y Figure 86 System Directory Figure 87 Edit System Directory 1 Click System Directory in the left navigation menu to display the menu shown in Figure 86 2 Click 3 Complete the form shown in Figure 87 with the information indicated For external phone numbers enter a 9 first 4 Click to save the entry The System Directory menu appears with the entry added NOTE To edit an entry on the right side of Fi...

Page 84: ...ttings on page 85 Station Directory on page 87 Quick Dial Keys on page 89 CAUTION Change Phone Settings on only one Deskset at a time CAUTION When making configuration changes to a device using the IP address of another Deskset ensure that no major changes occur on the Deskset whose IP address is being used Disruption may cause the configuration changes to fail ...

Page 85: ... for the current extension Callers spell the Display Name using their touch tone phone when they search for extensions in the Company Directory Enter a new name into the First Name and Last Name fields and select 4 If you want to change an extension number arrange for the extension to be idle and enter the new number into the Change Extension Number to box 5 Select Call Forward Transfer to Line to...

Page 86: ...elect Off the extension rings until the call is answered or the caller hangs up b Select either Voicemail Extension or Telephone Line as the Target Type c Enter the external phone number if Telephone Line has been selected as the Target Type Enter the extension number if Extension Number has been selected as the Target Type d Enter a delay in seconds 7 Optional Enter four to six digits to create a...

Page 87: ... log in as a user then proceed with step 3 2 Click Phone Settings in the left navigation menu to display the menu shown in Figure 88 on page 85 3 Click Station Directory in the left navigation menu to display the menu shown in Figure 89 The default extension displays in the Station Directory for Extension dialog box 4 To change the target extension select the extension number from the drop down me...

Page 88: ...y last name The button changes to The button toggles between first and last name directory sort 9 To delete Directory entries a Mark the entries to delete by selecting the checkbox to the left of each entry b Click All of the selected entries are removed 10 Click 11 Press DIRECTORY at the selected extension to verify that the entries have been changed as desired Figure 92 Station Directory List ...

Page 89: ...en shown in Figure 60 on page 61 displays You can also log in as a user then proceed with step 3 2 Click Phone Settings in the left navigation menu to display the menu shown in Figure 88 on page 85 3 Click Quick Dial Keys in the left navigation menu to display the menu shown in Figure 93 4 Select the Extension number from the Quick Dial Keys for Extension drop down menu 5 Enter a name and number f...

Page 90: ...drop down and click z Disconnect the Deskset from the network before deleting the extension If the Deskset is not disconnected an error message displays z When a station is deleted the extension is removed from the system database and will not appear in the Extension list All local settings remains intact z To remove the personal Station Directory and local settings the Deskset must be restored to...

Page 91: ...back up an extension less than one minute after creating another backup for that extension you may overwrite the earlier one since the names may be identical NOTE Backup files are automatically saved on your computer using the following naming convention backup_ device _ extension number _ year _ month _ day _ time cfg The device will be either ds for a Deskset or system for a System backup The ba...

Page 92: ...ore Deskset Settings screen shown in Figure 95 appears 3 To backup Deskset settings choose the extension from the top drop down menu and click 4 Your web browser opens a window asking you if you would like to save the backup file Click CAUTION If you back up an extension less than one minute after creating another backup for that extension you may overwrite the earlier one since the names may be i...

Page 93: ...ppears 3 Choose the extension from the bottom drop down menu of the Restore deskset user settings shown in Figure 96 Select whether you want to overwrite voicemail and call logs 4 Enter the file name or click and select a file Make sure you select the right file to restore The restore file name will include your extension number and the date and time 5 Click Deskset settings are restored and the D...

Page 94: ...e Management in the left navigation menu and then Backup Restore 3 Click System Settings in the left navigation menu The screen shown in Figure 97 appears 4 Click Your web browser opens a window asking you if you would like to save the backup file Save the file to a location on your computer so that you can restore your settings later CAUTION If you are performing a system restore ensure that ther...

Page 95: ...lls If you have more than one Gateway you do not need to unplug all of the other PSTN lines from the other Gateways just the one that you are logged onto 3 To restore the system settings under Restore System Settings choose the system settings you wish to restore as shown in Figure 98 4 Click and select the file which you saved earlier to a specified location on your computer 5 Click System settin...

Page 96: ...at allows your System to request the latest upgrade from our server If a path to the Internet is not available the System Administrator must download the upgrade file to a computer and use the WEBUI on that computer to install the software 1 Log in as administrator The System Information screen shown in Figure 60 on page 61 displays 2 Click Upgrade Device in the left navigation menu to display the...

Page 97: ...vigation menu to display the menu shown in Figure 100 3 Select the desired device from the drop down menu and click Figure 100 Device Log 4 It takes a minute for the file to generate and a pop up box that asks you where to save the file on your computer 5 After the download is complete you should provide the file to the installer or customer service NOTE For customer service repair replacement or ...

Page 98: ... http telephones att com sb67030 To obtain the MAC address and register your product Figure 101 Site Information 1 Perform To access the browser interface on page 57 2 Click to display the MAC address table shown in Figure 101 3 Open a new tab in the browser and navigate to the http telephones att com sb67030 website 4 Complete the form To enter the MAC address copy the information from the System...

Page 99: ...lp To display the Help menu Figure 102 Help Menu 1 Log in as administrator The System Information screen shown in Figure 60 on page 61 displays 2 Click Help in the left navigation menu to display the menu shown in Figure 102 3 Select the desired topic The subject screen for that topic displays ...

Page 100: ...bleshooting on page 114 Deskset Troubleshooting on page 118 Cordless Handset Troubleshooting on page 127 Cordless Headset Troubleshooting on page 132 Technical Specifications on page 136 Maintenance on page 138 Important Safety Instructions on page 139 Limited Warranty on page 141 NOTE For customer service or product information contact the person who installed your system If your installer is una...

Page 101: ...hoes The SB67010 PSTN Gateway uses automatic telephone line calibration to ensure optimal audio performance on external calls If excessive echo occurs on external calls observe the status of the Gateway line calibration data to understand any telephone line issues To resolve audio echo issues 1 Log on to the WEBUI as an administrator and under Device Management click on Device Log 2 Select the Gat...

Page 102: ...n to recalibrate 5 If the recalibration has no effect a parallel device such as a Fax Adapter Alarm System DSL modem or DSL Splitter Filter may be connected to the system Parallel external devices may effect line calibration Temporarily disconnect these devices from the wall jacks that are for the same telephone lines as follows a Unplug the non system devices from the wall jacks that are for tele...

Page 103: ...t5 wiring b Do not connect a network server PC to the PC port on the Deskset If you have Digital Subscriber Line DSL service you may be experiencing telephone line problems a Make sure you have a DSL filter plugged in between each DSL line and the wall jack b You may need a higher quality DSL filter than you are using You can also try plugging in the multiple DSL filters in sequence to decrease th...

Page 104: ...is problem Deskset back up the Deskset a Log onto the Deskset WEBUI as the System Administrator Use the Deskset s IP address shown in the Deskset Information Menu b Click Device Management then click Backup Restore c Under Backup Deskset User Settings select the extension to back up from the drop down list Again make sure you are logged in using that extension s IP address d Click Backup Extension...

Page 105: ...re your settings a Log onto the WEBUI as the Administrator at the PC where you stored the backup file b Click Device Management then click Backup Restore c Under Restore Deskset Settings select the extension that you backed up from the drop down list d Select the backup file e Click Restore Extension 5 The Extension number may now be different Refer to Phone Settings on page 84 to change the Exten...

Page 106: ...s that are synchronized this step is not necessary a Log onto the System WEBUI as the System Administrator using the Gateway IP Address shown on the Gateway display b Click Device Management then click Backup Restore c Click System Settings d Click Backup System Settings and save the file to a specified location on your computer You will need to locate and retrieve this file later so make sure you...

Page 107: ...introduce a Gateway into the system Continued 6 Restore your settings a Log onto the WEBUI as the Administrator at the PC where you stored the backup file b Click Device Management then click Backup Restore c Under Restore System Settings click and select the correct backup file 7 Click Restore System Settings ...

Page 108: ...In a large installation the DHCP server may take several minutes to respond because there are so many other devices on the same network producing many requests for IP addresses Devices should revert to proper IP addresses after the DHCP server resolves the request but if a system device continues to use an IP address that starts with 169 then it cannot communicate with other devices on the network...

Page 109: ...puter and your Deskset are on the same subnet so that they can talk to each other Check that the first three sections of each IP address are the same If they are not they are not connected to the same subnet WEBUI reverts to Login page after clicking a navigation link The browser is not checking for newer version of pages Ensure that your Internet browser is working normally It may not be automati...

Page 110: ...he user for that Deskset has not recorded his or her name To record a name see Basic Settings on page 85 You hear static sudden silences gaps in speech or garbled speech You may be experiencing network problems Your LAN administrator should ensure the following minimum guidelines are met z A switched network topology is recommended using standard 10 100 Ethernet switches that carry traffic at a no...

Page 111: ...ve any parallel systems from the PSTN line connected through a splitter for example such as an analog phone fax machine or alarm system The Gateway did not recognize new PSTN line being plugged in so line calibration which allows the Gateway to adjust its performance depending on the phone lines characteristics did not occur Confirm an Ethernet cable is plugged into the Deskset port marked Ensure ...

Page 112: ...on before saving recording After recording a prompt for an Auto Attendant menu hang up the extension before pressing in the WEBUI Internet connection or access to the local network on my computer does not work after installing the Deskset The Ethernet cords are not installed correctly Check that the Ethernet cord from the computer is plugged into the Deskset jack labeled A second Ethernet cord sho...

Page 113: ...ings when user is at the workstation If the PC is connected to the Deskset and if the PC is connected to an Uninterruptible Power Supply UPS plug the Deskset into an UPS Use separate Ethernet connections for the Deskset and the computer Device does not connect with other devices on the same subnet There is an IP address conflict The Gateway and Deskset do not accept IP addresses that have already ...

Page 114: ...d that the other end is plugged into your office LAN Confirm that the Ethernet port light next to the Ethernet jack on the Gateway turns green If it does not unplug the cable and plug it in again There may be a problem with the office network Check if other network devices such as computers are communicating with the network If not then contact your IT administrator Gateway screen displays Synch F...

Page 115: ...r receive phone calls and the Gateway screen displays Synchronizing The Gateway cannot locate the DHCP server or the Gateway cannot obtain an IP address from the DHCP server or is the only device on the subnet The Gateway may temporarily display Synchronizing for a few seconds This is normal and does not indicate a problem If this Gateway is the first device on the network Synchronizing displays c...

Page 116: ...m Check the IP address If the first two octets read 169 254 x x then the Deskset cannot find a DHCP server Disconnect the device from the network and reconnect it Check the new IP address If the proceeding conditions are met but the problem persists z Power cycle the Deskset by unplugging the power cord and plugging it back in z If power cycling does not work backup your Deskset and reset to facto...

Page 117: ...ular line cord Red line lights do not flash when the telephone line cords are plugged into the Gateway after power is switched on Line calibration allows the Gateway to adjust its performance depending on the phone lines characteristics The Gateway may not have performed calibration Make sure an Ethernet cable is plugged into the port marked LAN Unplug the telephone line and wait two full seconds ...

Page 118: ... Deskset labeled Deskset screen displays Network Down The Ethernet cable is unplugged Ensure that one end of the Ethernet cable is plugged into the Ethernet port beneath your Deskset labeled Check that the other end is plugged into your office LAN Confirm that the Ethernet port light next to the Ethernet jack on the bottom of the Deskset turns green If it does not unplug the cable and plug it in a...

Page 119: ...on before the third dot match those of the other Desksets IP addresses Press MENU and then 4 at a Deskset to find the IP address If the other Desksets have been assigned static IP addresses you may have to assign your Deskset a static IP address to match the other Desksets Deskset cannot make or receive phone calls and the Deskset screen displays Synchronizing The Deskset cannot locate the DHCP se...

Page 120: ...n the network If not then the problem may lie with the DHCP server having this much additional equipment added at one time Contact your IT administrator or the person who installed your system Check the IP address If the first two octets read 169 254 x x then the Deskset cannot find a DHCP server Disconnect the device from the network and reconnect it Check the new IP address If the above conditio...

Page 121: ...s Incoming call notifications have been suppressed or are unable to reach the Deskset Ensure that the Ethernet cable is securely plugged into the network port beneath your Deskset and that the other end is plugged into your office LAN Ensure that Do Not Disturb DND is not on Ensure that Call Forward All FWD ON is not on If the Deskset does not ring on an incoming call press the VOL key to increase...

Page 122: ... not on Check the Call Forward No Answer setting in Admin Settings Calls may be forwarding to another phone number instead of Voicemail Check your available Voicemail memory You may need to delete some messages to create space Deskset does not automatically forward a call to another extension The Call Forward All settings are incorrect Check that Call Forward All is on FWD ON should appear in top ...

Page 123: ... necessary Confirm that Call Forward All target is set to Cannot manually forward a call to Voicemail Cannot forward a ring group call Ring group calls cannot be forwarded However the System Administrator can designate a Deskset as a forwarding destination if the call is unanswered If that Deskset does not answer the forwarded call the call will be forwarded again according to that Deskset s setti...

Page 124: ...ion does not subscribe to Caller ID service or you have DSL phone lines without filters installed Caller ID is a subscription service You must subscribe to this service from your local telephone service provider for this feature to work on your phone The caller must be calling from an area that supports Caller ID Both you and your caller s telephone service providers must use Caller ID compatible ...

Page 125: ...t may stop recording and disconnect the call System does not respond to remote Voicemail commands The system cannot detect DTMF tones Confirm you have entered star star before entering your remote access code user password If you have no password press star star then Confirm you are calling from a touch tone phone When you dial a number you should hear tones If you hear clicks the phone is not a t...

Page 126: ...I You cannot delete Quick Dial entries If you wish to replace an entry edit the entry and replace the details see Quick Dial Keys on page 89 Caller hears That key is not recognized or pressing an invalid digit key triggers the The key you have pressed is not recognized voice announcement The caller pressed invalid key when interacting with the Auto Attendant Confirm your opening menu presents the ...

Page 127: ...charged correctly Place the Handset into the accessory Charger Ensure the Charger is securely plugged into an outlet not controlled by a wall switch If the battery is completely depleted it can take up to 10 minutes to charge the battery before the low battery icon displays on screen Extension number does not match the Deskset The Handset has been registered to another Deskset 1 Check the Deskset ...

Page 128: ...skset does not De register the Handset On the Handset press OPTIONS Settings Deregister Then register the Handset to the Deskset On the Deskset press MENU User Settings Cordless Settings Handset Cannot make external calls The Handset cannot communicate with the Deskset First check if the Deskset can make external calls If not then consult Deskset Troubleshooting on page 118 Confirm that your Hands...

Page 129: ...consult Deskset Troubleshooting on page 118 Confirm that your Handset is registered to your Deskset On the Deskset press MENU User Settings Cordless Settings If the Handset is registered then screen indicates 1 Handset Registered You can also verify registration on the Handset On the Handset press OPTIONS Settings Product ID and check that status reads Registered YES You might be out of range of t...

Page 130: ...sks if you wish to switch the current active call to the Handset Press on the Handset to take the call on the Handset Continue the call or end it to make a new call Handset continuously displays Searching for Deskset The Handset is out of range or not registered Check if the Deskset is powered and fully functional If the Deskset is not on the Handset will not work You may be out of range of the De...

Page 131: ...t Try installing the Deskset far away from devices such as TVs microwaves or other cordless devices including other Handsets If the problem persists check audio quality on the Deskset If the Deskset audio quality is poor refer to Deskset Troubleshooting on page 118 or General Troubleshooting on page 109 for solutions My Handset does not receive a global page This feature is not supported on the Ha...

Page 132: ...et into the accessory Charger Ensure the Charger is securely plugged into an outlet not controlled by a wall switch If the battery is completely depleted it can take up to 10 minutes to charge the battery In this case the ON OFF LED will remain off and you will not be able to use the device After 10 minutes of charging try pressing the ON OFF key on the Headset or the HEADSET key on the Deskset to...

Page 133: ...ucts can cause interference with your Headset Try installing the Deskset far away from devices such as TVs microwaves or other cordless devices If the problem persists check audio quality on the Deskset If the Deskset audio quality is poor refer to Resolving Audio Echoes on page 101 for solutions HEADSET key on the Deskset does not work The Headset is in cradle or powered down Confirm that the Hea...

Page 134: ...ser Deskset shows no indication that Headset is on a call The Headset is registered to another Deskset If another person is using a Headset in your vicinity they may have accidentally registered your Headset to their Deskset a Check if a Headset is registered to your Deskset On the Deskset press MENU User Settings Cordless Settings b If a headset is registered it may not be yours c Ask all users i...

Page 135: ...kset is unavailable Deregister the Headset at the Deskset If the Deskset is unavailable powered off out of range or no longer in the office or you do not know what Deskset it is registered to you can deregister the Headset by pressing a special Headset key sequence VOL MUTE VOL MUTE VOL VOL MUTE Symptom Probable Cause Corrective Action ...

Page 136: ...HZ Deskset 1921 536 1928 448 MHZ Channels 5 Nominal Effective Range Maximum power allowed by FCC and IC Actual operating range might vary according to environmental conditions at the time of use Size Cordless Handset 1 77 X 1 30 X 6 97 in 45 X 33 X 177 mm Charger 3 15 X 4 13 X 2 36 in 80 X105 X 60 mm Deskset 8 86 X 6 89 X 7 87 in 225 X 175 X 47 mm Gateway 13 4 X 8 07 X 1 85 in 340 X 205 X 47 mm We...

Page 137: ...rator s Guide Charger 6V DC 200mA Deskset 5 1V DC 1700mA Gateway 5 1V DC 1700mA RJ 45 Ethernet Network Port 10Base T 100Base Tx with auto MDI MDI X switching PSTN jacks 1 4 FXO ports use traditional 2 conductor wiring Table 4 Technical Specifications Continued Feature Specification ...

Page 138: ...et Do not use the equipment outdoors in the rain or handle it with wet hands Do not install the equipment near a sink bathtub or shower Electrical Storms Electrical storms can sometimes cause power surges harmful to electronic equipment For your own safety exercise caution when using electrical appliances during storms Cleaning Your Unit Your unit has a durable plastic casing that should retain it...

Page 139: ... you are not sure of the type of power supply in your home or office consult your dealer or local power company Do not allow anything to rest on the power cord Do not install this product where the cord may be walked on Never push objects of any kind into this product through the slots in the unit because it may touch dangerous voltage points or create a short circuit Never spill liquid of any kin...

Page 140: ...hen following the operating instructions Adjust only those controls that are covered by the operating instructions Improper adjustment of other controls may result in damage and often requires extensive work by an authorized technician to restore the product to normal operation If the product has been dropped and the unit has been damaged If the product exhibits a distinct change in performance Th...

Page 141: ...od materially defective PRODUCT During the Limited Warranty period the manufacturer s authorized service representative will repair or replace at the manufacturer s option without charge a materially defective PRODUCT If the manufacturer repairs the PRODUCT they may use new or refurbished replacement parts If the manufacturer chooses to replace the PRODUCT they may replace it with a new or refurbi...

Page 142: ...removed altered or rendered illegible or PRODUCT purchased used serviced or shipped for repair from outside the United States of America or Canada or used for commercial or institutional purposes including but not limited to products used for rental purposes or PRODUCT returned without a valid proof of purchase see item 6 on next page or Charges for installation or setup adjustment of customer con...

Page 143: ... your name complete and correct mailing address and telephone number 7 Other limitations This warranty is the complete and exclusive agreement between you and the manufacturer of this AT T branded PRODUCT It supersedes all other written or oral communications related to this PRODUCT The manufacturer provides no other warranties for this PRODUCT The warranty exclusively describes all of the manufac...

Page 144: ...uipment the cost of substitute equipment and claims by third parties resulting from the use of this PRODUCT Some states provinces do not allow the exclusion or limitation of incidental or consequential damages so the above limitation or exclusion may not apply to you Please retain your original sales receipt as proof of purchase ...

Page 145: ...r A computer networking technology that automatically detects the required cable connection type straight through or crossover and configures the connection appropriately Available A screen icon that indicates that there is a Call Appearance key that is not busy with predialing dialing ringing or an active or held call Call Appearance The five icons on the right side of the Deskset display and the...

Page 146: ...t illuminates when you turn on the Do Not Disturb feature DNS Domain Name System name server A server that stores the Domain Name System records such as address name server and mail exchanger records for a domain name and responds with answers to queries against its database Do Not Disturb DND A feature that suppresses audible ringing and pages at the Deskset DSL Digital Subscriber Line High speed...

Page 147: ... equipment damage due to lightning eliminates electrostatic buildup and helps protect people who service the equipment hard key Any physical key on the Deskset Handset or Gateway Examples include MENU and 1 on the Deskset PHONE and 1 on the Handset and SELECT and CANCEL on the Gateway hard reset An action that restores factory default settings hub A network hub or repeater hub is a device for conn...

Page 148: ...avigation link A phrase on a computer screen that when clicked produces a different screen NTP Network Time Protocol An Internet standard protocol that assures time synchronization in a computer network octet Octets are used in Internet Protocol computer network addresses These consist of a series of four octets usually shown in decimal and separated by dots off hook Indicates that you have lifted...

Page 149: ...l list A private list of names and phone numbers available to only a single extension referred to as Station Directory on the WEBUI predial Enter digits before going off hook to place a call PSTN Public Switched Telephone Network The world s telephone network Quick Dial Provides two touch dialing for frequently called phone numbers reboot Restart a device Redial Accesses the log of outgoing calls ...

Page 150: ...list This list of names and phone numbers is created and maintained by the System Administrator All system users can sort and view this list unhold Removes a call from hold status Uninterruptible Power Supply UPS A battery powered emergency power supply device unsupervised transfer Occurs when you do not communicate with the transfer recipient when transferring calls The transfer recipient does no...

Reviews: