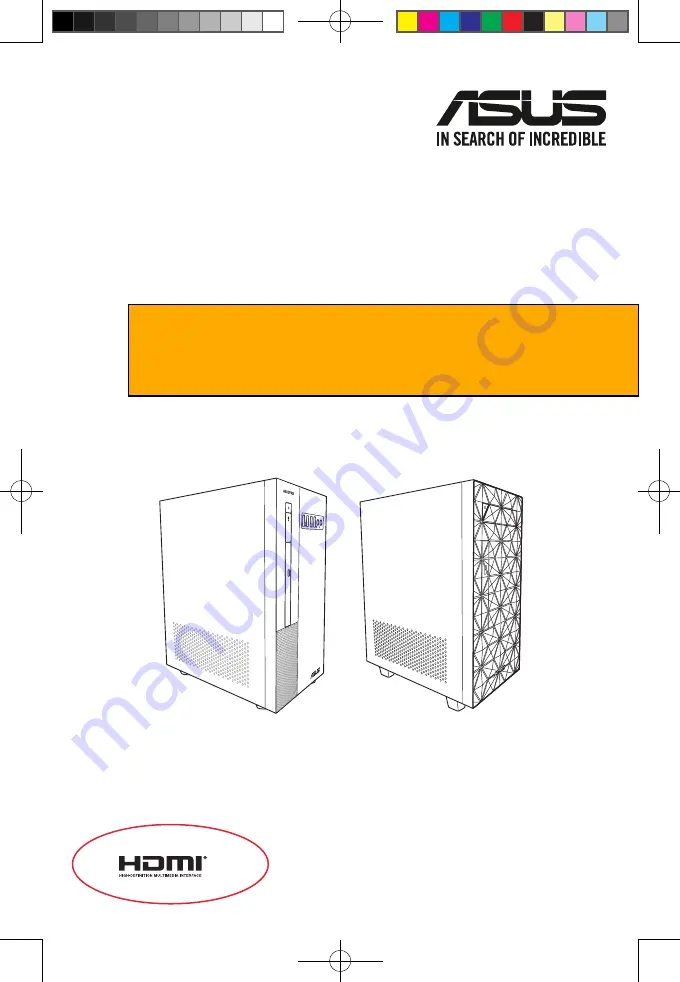
background image

ASUS Desktop PC

X500MA / DX500MA /  

U500MA / DU500MA

User Guide

X500MA / DX500MA

U500MA / DU500MA

E19426_X500MA_DX500MA_U500MA_DU500MA_UM_V3.indd   1

E19426_X500MA_DX500MA_U500MA_DU500MA_UM_V3.indd   1

2021/11/12   15:51:27

2021/11/12   15:51:27

Based on: 

18412_X500MA_DX500MA_U500MA_DU500MA_Win10_UM_v2 

Source file: 

19425_D500SC_S500SC_M500SC_D500SCES_UM_V3

Summary of Contents for DU500MA

Page 1: ...0MA U500MA DU500MA E19426_X500MA_DX500MA_U500MA_DU500MA_UM_V3 indd 1 E19426_X500MA_DX500MA_U500MA_DU500MA_UM_V3 indd 1 2021 11 12 15 51 27 2021 11 12 15 51 27 Based on 18412_X500MA_DX500MA_U500MA_DU500MA_Win10_UM_v2 Source file 19425_D500SC_S500SC_M500SC_D500SCES_UM_V3 ...

Page 2: ...AGENTS BE LIABLE FOR ANY INDIRECT SPECIAL INCIDENTAL OR CONSEQUENTIAL DAMAGES INCLUDING DAMAGES FOR LOSS OF PROFITS LOSS OF BUSINESS LOSS OF USE OR DATA INTERRUPTION OF BUSINESS AND THE LIKE EVEN IF ASUS HAS BEEN ADVISED OF THE POSSIBILITY OF SUCH DAMAGES ARISING FROM ANY DEFECT OR ERROR IN THIS MANUAL OR PRODUCT SPECIFICATIONS AND INFORMATION CONTAINED IN THIS MANUAL ARE FURNISHED FOR INFORMATION...

Page 3: ...Desktop PC 27 Using the optical drive on selected models only 28 Configuring the USB ports using the BIOS 29 Configuring the HDD security setting using the BIOS 30 Chapter 4 Connecting to the Internet Wired connection 31 Chapter 5 Using ASUS Business Manager ASUS Business Manager 35 Chapter 6 Troubleshooting Troubleshooting 45 Appendix Working withWindows Starting for the first time 53 Start menu ...

Page 4: ...es and can radiate radio frequency energy and if not installed and used in accordance with manufacturer s instructions may cause harmful interference to radio communications However there is no guarantee that interference will not occur in a particular installation If this equipment does cause harmful interference to radio or television reception which can be determined by turning the equipment of...

Page 5: ...ire les risques de brouillage préjudiciable aux systèmes de satellites mobiles utilisant les mêmes canaux CAN ICES 003 B NMB 003 B IC Canadian Compliance Statement Complies with the Canadian ICES 003 Class B specifications This device complies with RSS 210 of Industry Canada This Class B device meets all the requirements of the Canadian interference causing equipment regulations This device compli...

Page 6: ...ncil Recommendation of 12 July 1999 on the limitation of exposure of the general public to electromagnetic fields 0 300 GHz Wireless Radio Use This device is restricted to indoor use when operating in the 5 15 to 5 25 GHz frequency band For the standard EN 300 440 V2 1 1 the device operating in 802 11a n ac mode is considered as a receiver category 2 Exposure to Radio Frequency Energy The radiated...

Page 7: ...is in compliance with the essential requirements and other relevant provisions of Directive 2014 53 EU Full text of EU declaration of conformity is available at https www asus com support The Wi Fi operating in the band 5150 5350MHz shall be restricted to indoor use for countries listed in the table below AT BE BG CZ DK EE FR DE IS IE IT EL ES CY LV LI LT LU HU MT NL NO PL PT RO SI SK TR FI SE CH ...

Page 8: ...e Safety Information Laser Safety Information Safety information Disconnect the AC power and peripherals before cleaning Wipe the Desktop PC using a clean cellulose sponge or chamois cloth dampened with solution of nonabrasive detergent and a few drops of warm water then remove any extra moisture with a dry cloth DO NOT place on uneven or unstable work surfaces Seek servicing if the casing has bee...

Page 9: ... Replacing fan components should only be attempted by qualified service personnel Conventions used in this guide To ensure that you perform certain tasks properly take note of the following symbols used throughout this manual Where to find more information Refer to the following sources for additional information and for product and software updates ASUS websites The ASUS website provides updated ...

Page 10: ...duct specifications may vary with different models or ASUS Desktop PC x1 Keyboard x1 Optional Installation Guide Mouse x1 Optional Power cord x1 Installation Guide x1 Warranty card x1 ASUS mouse pad x 1 Optional E19426_X500MA_DX500MA_U500MA_DU500MA_UM_V3 indd 10 E19426_X500MA_DX500MA_U500MA_DU500MA_UM_V3 indd 10 2021 11 12 15 51 28 2021 11 12 15 51 28 ...

Page 11: ...PC Getting to know your computer Illustrations are for reference only The ports and their locations and the chassis color vary with different models IMPORTANT Do not use this Desktop PC for cryptocurrency mining consuming a vast amount of electricity and time to gain convertible virtual currency and or related activities ASUS Desktop PC 11 Chapter 1 Getting started E19426_X500MA_DX500MA_U500MA_DU5...

Page 12: ...one or speaker Supported by ASUS Audio Wizard Optical disk drive bay There is an optical disk drive in this bay Optical disk drive eject button Press this button to eject the optical disk drive tray a b c d a b c d X500MA DX500MA U500MA DU500MA 12 Chapter 1 Getting started ENGLISH E19426_X500MA_DX500MA_U500MA_DU500MA_UM_V3 indd 12 E19426_X500MA_DX500MA_U500MA_DU500MA_UM_V3 indd 12 2021 11 12 15 51...

Page 13: ...for data transfer only c d USB 2 0 ports Option A a b USB 3 2 Gen 1 Type A ports c d USB 2 0 ports ASUS Desktop PC 13 ENGLISH E19426_X500MA_DX500MA_U500MA_DU500MA_UM_V3 indd 13 E19426_X500MA_DX500MA_U500MA_DU500MA_UM_V3 indd 13 2021 11 12 15 51 29 2021 11 12 15 51 29 ...

Page 14: ... output from RGB Signal to CRT and is not compatible with DVI I VGA port This port is for VGA compatible devices such as a VGA monitor Power connector Plug the power cord to this connector RATING 115 230Vac 6A 3A 50 60Hz WW 115Vac 6A 60Hz TW 220Vac 3A 50Hz China Rear panel 14 Chapter 1 Getting started ENGLISH E19426_X500MA_DX500MA_U500MA_DU500MA_UM_V3 indd 14 E19426_X500MA_DX500MA_U500MA_DU500MA_U...

Page 15: ...e the expansion slot bracket when installing an expansion card Serial port optional This 9 pin COM port is for pointing devices or other serial devices LAN RJ 45 port This port allows Gigabit connection to a Local Area Network LAN through a network hub LAN port LED indications Activity Link LED LEDSpeed LED Status Description Status Description OFF No link OFF 10Mbps connection ORANGE Linked ORANG...

Page 16: ...r comes with an ASUS Graphics Card the graphics card is set as the primary display device in the BIOS Hence connect your monitor to a display output port on the graphics card To connect multiple external monitors to your computer refer to Connecting multiple external displays in Chapter 2 of this guide for details 16 Chapter 1 Getting started ENGLISH E19426_X500MA_DX500MA_U500MA_DU500MA_UM_V3 indd...

Page 17: ...puter Connecting the power cord Connect one end of the power cord to the power connector on the rear panel of your computer and the other end to a power source ASUS Desktop PC 17 ENGLISH E19426_X500MA_DX500MA_U500MA_DU500MA_UM_V3 indd 17 E19426_X500MA_DX500MA_U500MA_DU500MA_UM_V3 indd 17 2021 11 12 15 51 33 2021 11 12 15 51 33 ...

Page 18: ...mputer ON 1 Turn your monitor ON 2 Press the power button on your computer 3 Wait until the operating system loads automatically Power button X500MA DX500MA U500MA DU500MA 18 Chapter 1 Getting started ENGLISH E19426_X500MA_DX500MA_U500MA_DU500MA_UM_V3 indd 18 E19426_X500MA_DX500MA_U500MA_DU500MA_UM_V3 indd 18 2021 11 12 15 51 33 2021 11 12 15 51 33 ...

Page 19: ...el You can enable or disable the front and rear USB 2 0 USB 3 2 Gen 1 and USB 3 2 Gen 2 ports individually from the BIOS Setup Refer to the Configuring the USB ports using the BIOS section in Chapter 3 of this user manual for details X500MA DX500MA U500MA DU500MA ASUS Desktop PC 19 ENGLISH Chapter 2 Connecting devices to your computer Rear panel E19426_X500MA_DX500MA_U500MA_DU500MA_UM_V3 indd 19 E...

Page 20: ... from the internal speaker When you connect an external audio device such as earphone or speaker you need to enable the audio device output For details refer to the section Changing to the external audio output When you disconnect the audio device you need to manually change the audio output to the internal speaker from the Control Panel X500MA DX500MA U500MA DU500MA 20 Chapter 2 Connecting device...

Page 21: ... Connecting 5 1 channel Speakers LINE OUT ASUS Desktop PC 21 ENGLISH E19426_X500MA_DX500MA_U500MA_DU500MA_UM_V3 indd 21 E19426_X500MA_DX500MA_U500MA_DU500MA_UM_V3 indd 21 2021 11 12 15 51 35 2021 11 12 15 51 35 pls refer to latest InDesign file pls refer to latest InDesign file ...

Page 22: ...UT LINE OUT X500MA DX500MA U500MA DU500MA 22 Chapter 2 Connecting devices to your computer ENGLISH E19426_X500MA_DX500MA_U500MA_DU500MA_UM_V3 indd 22 E19426_X500MA_DX500MA_U500MA_DU500MA_UM_V3 indd 22 2021 11 12 15 51 35 2021 11 12 15 51 35 ...

Page 23: ...e Audio Manager screen automatically pops up For the location of the rear Line Out port refer to the section Getting to know your computer 2 Tick Front Speaker Out then click OK 3 Tick Line In then click OK The audio output will now be from the external audio device The Audio Manager screenshots above are for reference only ASUS Desktop PC 23 ENGLISH E19426_X500MA_DX500MA_U500MA_DU500MA_UM_V3 indd...

Page 24: ... and connect the power cords to the monitors Refer to Setting up your computer section in Chapter 1 for details on how to connect a monitor to your computer 3 Turn on your computer 4 From the Start menu click Settings System Display 5 Configure the settings for your displays For some graphic cards only the monitor that is set to be the primary display has display during POST The dual display funct...

Page 25: ...he computer The HDMI cable is purchased separately To get the best display performance ensure that your HDMI cable is less than 15 meters X500MA DX500MA U500MA DU500MA ASUS Desktop PC 25 ENGLISH E19426_X500MA_DX500MA_U500MA_DU500MA_UM_V3 indd 25 E19426_X500MA_DX500MA_U500MA_DU500MA_UM_V3 indd 25 2021 11 12 15 51 36 2021 11 12 15 51 36 ...

Page 26: ...26 Chapter 2 Connecting devices to your computer ENGLISH E19426_X500MA_DX500MA_U500MA_DU500MA_UM_V3 indd 26 E19426_X500MA_DX500MA_U500MA_DU500MA_UM_V3 indd 26 2021 11 12 15 51 36 2021 11 12 15 51 36 ...

Page 27: ...relax the backs of your thighs If necessary use a footrest to raise the level of your knees Adjust the back of your chair so that the base of your spine is firmly supported and angled slightly backward Sit upright with your knees elbows and hips at an approximately 90º angle when you are at the PC Place the monitor directly in front of you and turn the top of the monitor screen even with your eye ...

Page 28: ...ng an optical disc To remove an optical disc 1 While the system is on do either of the following to eject the tray Press the eject button below the drive bay cover From the Start menu click File Explorer right click the CD DVD drive icon and click Eject 2 Remove the disc from the disc tray If AutoPlay is NOT enabled in your computer to access the data on an optical disc Click File Explorer from th...

Page 29: ...dvanced USB Configuration USB Single Port Control 3 Select the USB port that you want to enable or disable 4 Press Enter to enable or disable the selected USB port 5 Click Exit and select Save Changes Reset to save the changes made Refer to Chapter 1 for the location of the USB ports ASUS Desktop PC 29 ENGLISH E19426_X500MA_DX500MA_U500MA_DU500MA_UM_V3 indd 29 E19426_X500MA_DX500MA_U500MA_DU500MA_...

Page 30: ...hange the password for your HDD from the BIOS Setup 1 Follow steps 1 and 2 of the previous section to open the HDD Password screen 2 Select the Set User Password item and press Enter 3 From the Enter Current Password box key in the current password then press Enter 4 From the Create New Password box key in a new password then press Enter 5 Confirm the password when prompted 6 Click Exit and select...

Page 31: ... a DSL cable modem Modem RJ 45 cable 3 Turn on the DSL cable modem and your computer 4 Configure the necessary Internet connection settings Contact your network administrator for details or assistance in setting up your Internet connection For more details refer to the sections Configuring a dynamic IP PPPoE network connection or Configuring a static IP network connection ASUS Desktop PC 31 ENGLIS...

Page 32: ...twork connection or Configuring a static IP network connection Connecting via a local area network LAN To connect via a LAN 1 Connect one end of an RJ 45 cable to the LAN RJ 45 port on the rear panel of your computer and the other end to your LAN LAN RJ 45 cable 32 Chapter 4 Connecting to the Internet ENGLISH E19426_X500MA_DX500MA_U500MA_DU500MA_UM_V3 indd 32 E19426_X500MA_DX500MA_U500MA_DU500MA_U...

Page 33: ...etwork and Sharing Center 2 From the Open Network and Sharing Center screen click Change Adapter settings 3 Right click on your LAN and select Properties 4 Click Internet ProtocolVersion 4 TCP IPv4 and click Properties 5 Click Obtain an IP address automatically and click OK Continue to the next steps if you are using PPPoE connection ASUS Desktop PC 33 ENGLISH E19426_X500MA_DX500MA_U500MA_DU500MA_...

Page 34: ... To configure a static IP network connection 1 Repeat steps 1 to 4 of the previous section 2 Click Use the following IP address 3 Enter the IP address Subnet mask and Gateway from your service provider 4 If needed enter the preferred DNS Server address and alternative address 5 When done click OK 34 Chapter 4 Connecting to the Internet ENGLISH E19426_X500MA_DX500MA_U500MA_DU500MA_UM_V3 indd 34 E19...

Page 35: ...set of tools for customizing and maintaining your ASUS computer Installing ASUS Business Manager 1 Insert your ASUS support DVD into your optical drive 2 On the support CD window click Utilities ASUS Business Manager ASUS Desktop PC 35 ENGLISH Chapter 5 Using ASUS Business Manager E19426_X500MA_DX500MA_U500MA_DU500MA_UM_V3 indd 35 E19426_X500MA_DX500MA_U500MA_DU500MA_UM_V3 indd 35 2021 11 12 15 51...

Page 36: ...ager has an Icon View and List View Click the ListView icon to display a list of tools available for your system IconView ListView ListView 36 Chapter 5 Using ASUS Business Manager ENGLISH E19426_X500MA_DX500MA_U500MA_DU500MA_UM_V3 indd 36 E19426_X500MA_DX500MA_U500MA_DU500MA_UM_V3 indd 36 2021 11 12 15 51 39 2021 11 12 15 51 39 ...

Page 37: ...e Click Update on the main ASUS Manager screen to download and install hardware drivers the latest BIOS and updated ASUS applications ASUS Desktop PC 37 ENGLISH E19426_X500MA_DX500MA_U500MA_DU500MA_UM_V3 indd 37 E19426_X500MA_DX500MA_U500MA_DU500MA_UM_V3 indd 37 2021 11 12 15 51 40 2021 11 12 15 51 40 ...

Page 38: ...om your computer to free up hard drive space ASUS Secure Delete ASUS Secure Delete keeps your files secure by making deleted files completely irrecoverable using a simple drag and drop interface 38 Chapter 5 Using ASUS Business Manager ENGLISH E19426_X500MA_DX500MA_U500MA_DU500MA_UM_V3 indd 38 E19426_X500MA_DX500MA_U500MA_DU500MA_UM_V3 indd 38 2021 11 12 15 51 40 2021 11 12 15 51 40 ...

Page 39: ...ASUS Secure Delete 3 Tick Delete the files listed in the recycle bin if you want to permanently delete all the files in the recycle bin 4 Click Clear and then click OK on the confirmation message to permanently delete all the files listed in the deletion box and the recycle bin if selected in step 3 ASUS Desktop PC 39 ENGLISH E19426_X500MA_DX500MA_U500MA_DU500MA_UM_V3 indd 39 E19426_X500MA_DX500MA...

Page 40: ...repairing Windows with a recovery disk USB Lock The USB Lock feature secures your USB ports card reader and optical drive from unwanted access by setting up a password 40 Chapter 5 Using ASUS Business Manager ENGLISH E19426_X500MA_DX500MA_U500MA_DU500MA_UM_V3 indd 40 E19426_X500MA_DX500MA_U500MA_DU500MA_UM_V3 indd 40 2021 11 12 15 51 41 2021 11 12 15 51 41 ...

Page 41: ...and hard drive activity Tool Click Tool on the main ASUS Manager screen to access the Support screen Ai Booting or MyLogo Support Support lists links to ASUS support web sites and contact information ASUS Desktop PC 41 ENGLISH E19426_X500MA_DX500MA_U500MA_DU500MA_UM_V3 indd 41 E19426_X500MA_DX500MA_U500MA_DU500MA_UM_V3 indd 41 2021 11 12 15 51 41 2021 11 12 15 51 41 ...

Page 42: ...uence MyLogo ASUS MyLogo allows you to customize the boot logo The boot logo is the image that appears on screen during the Power On Self Tests POST 42 Chapter 5 Using ASUS Business Manager ENGLISH E19426_X500MA_DX500MA_U500MA_DU500MA_UM_V3 indd 42 E19426_X500MA_DX500MA_U500MA_DU500MA_UM_V3 indd 42 2021 11 12 15 51 42 2021 11 12 15 51 42 ...

Page 43: ...file to your computer using ASUS Update 2 Click Browse to locate the picture file that you want to use as the boot logo and the downloaded BIOS if required and then click Run 3 Follow the onscreen instructions to complete the process ASUS Desktop PC 43 ENGLISH E19426_X500MA_DX500MA_U500MA_DU500MA_UM_V3 indd 43 E19426_X500MA_DX500MA_U500MA_DU500MA_UM_V3 indd 43 2021 11 12 15 51 42 2021 11 12 15 51 ...

Page 44: ...44 Chapter 5 Using ASUS Business Manager ENGLISH E19426_X500MA_DX500MA_U500MA_DU500MA_UM_V3 indd 44 E19426_X500MA_DX500MA_U500MA_DU500MA_UM_V3 indd 44 2021 11 12 15 51 42 2021 11 12 15 51 42 ...

Page 45: ...eyboard then click Task Manager 2 Select the program that is not responding then click EndTask If the keyboard is not responding press and hold the Power button on your chassis until the computer shuts down Then press the Power button to turn it on I cannot connect to a wireless network using the ASUSWLAN Card on selected models only Ensure that you enter the correct network security key for the w...

Page 46: ...t came with your monitor for more troubleshooting information When using multiple monitors only one monitor has display Ensure that the both monitors are powered on During POST only the monitor connected to the VGA port has display The dual display function works only under Windows When a graphics card is installed on your computer ensure that you connect the monitors to the output port on the gra...

Page 47: ... lime on the front panel or the rear panel Check if your speak is connected to an electrical source and turned on Adjust your speakers volume Ensure that your computer s system sounds are not Muted If it is muted the volume icon is displayed as To enable the system sounds click from the Windows notification area then click If it is not muted click and drag the slider to adjust the volume Connect y...

Page 48: ...wer cord PSU Power supply unit problems Contact the ASUS Service Center about installing another PSU on your computer Display Problem Possible Cause Action No display output after turning the computer on Black screen The signal cable is not connected to the correct VGA port on your computer Connect the signal cable to the correct display port onboard VGA or discrete VGA port If you are using a dis...

Page 49: ...ftware Close the anti virus software Driver problems Reinstall the LAN driver Audio Problem Possible Cause Action No Audio Speaker or headphone is connected to the wrong port Refer to your computer s User Guide for the correct port Disconnect and reconnect the speaker to your computer Speaker or headphone does not work Try using another speaker or headphone The front and back audio ports do not wo...

Page 50: ... Service Center for servicing Replace with a new hard disk drive Memory module problems Replace with compatible memory modules Remove the extra memory modules that you have installed then try again Contact the ASUS Service Center for assistance There is not enough air ventilation for your computer Move your computer to an area with better air flow Incompatible softwares are installed Reinstall the...

Page 51: ... been replaced Ensure that you are using a compatible or ASUS recommended CPU fan There is not enough air ventilation for the computer Ensure that your computer is working in an area with good air flow The system temperature is too high Update the BIOS If you know how to reinstall the motherboard try to clean the inner space of the chassis Contact the ASUS Service Center for assistance If the prob...

Page 52: ...52 Chapter 6 Troubleshooting ENGLISH E19426_X500MA_DX500MA_U500MA_DU500MA_UM_V3 indd 52 E19426_X500MA_DX500MA_U500MA_DU500MA_UM_V3 indd 52 2021 11 12 15 51 43 2021 11 12 15 51 43 ...

Page 53: ...in this chapter are for reference only Start menu The Start menu is the main gateway to your computer s programs Windows apps folders and settings You can use the Start menu to do these common activities Start programs or Windows apps Open commonly used programs or Windows apps Adjust computer settings Get help with the Windows operating system Turn off your computer Log off from Windows or switch...

Page 54: ...ter s Wi Fi connection ConnectingWi Fi Connect your computer to a Wi Fi network by using the following steps 1 Click Tap the Wi Fi icon from the taskbar to enable Wi Fi 2 Select an access point from the list of available Wi Fi connections 3 Select Connect to start the network connection You may be prompted to enter a security key to activate the Wi Fi connection Bluetooth Use Bluetooth to facilita...

Page 55: ... down to do a normal shutdown From the log in screen select the power icon then select Shut down Press to launch Shut Down Windows Select Shut down from the drop down list then select OK If your computer is unresponsive press and hold the power button for at least four 4 seconds until your computer turns off Putting your computer to sleep You can put your computer to Sleep mode in two ways Launch ...

Reviews: