background image

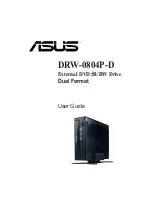
DRW-0804P-D

External DVD

±

R/RW Drive

Dual Format

User Guide

Summary of Contents for DRW-0804P-D

Page 1: ...DRW 0804P D External DVD R RW Drive Dual Format User Guide ...

Page 2: ...OR FITNESS FOR A PARTICULAR PURPOSE IN NO EVENT SHALL ASUS ITS DIRECTORS OFFICERS EMPLOYEES OR AGENTS BE LIABLE FOR ANY INDIRECT SPECIAL INCIDENTAL OR CONSEQUENTIAL DAMAGES INCLUDING DAMAGES FOR LOSS OF PROFITS LOSS OF BUSINESS LOSS OF USE OR DATA INTERRUPTION OF BUSINESS AND THE LIKE EVEN IF ASUS HAS BEEN ADVISED OF THE POSSIBILITY OF SUCH DAMAGES ARISING FROM ANY DEFECT OR ERROR IN THIS MANUAL O...

Page 3: ... System requirements 16 Drive placement 16 Connecting the drive cables 17 Installing the device driver 18 Checking the drive in the System Properties 20 Unplugging the device properly 21 External optical drive basics 22 Placing a disc into the drive 22 Ejecting a disc from the drive 23 Using the emergency eject pinhole 24 Using compact discs 25 Cleaning a disc 25 Handling a disc 25 Technical infor...

Page 4: ...cluding interference that may cause undesired operation This equipment has been tested and found to comply with the limits for a Class B digital device pursuant to Part 15 of the FCC Rules These limits are designed to provide reasonable protection against harmful interference in a residential installation This equipment generates uses and can radiate radio frequency energy and if not installed and...

Page 5: ...ax 1 510 608 4555 E mail tmd1 asus com Web site usa asus com Technical Support Telephone General 1 502 995 0883 Notebook 1 510 739 3777 Support fax 1 502 933 8713 Support e mail tsd asus com ASUS COMPUTER GmbH Germany and Austria Address Harkort Str 25 D 40880 Ratingen Germany Telephone 49 2102 95990 Fax 49 2102 959911 Online contact www asuscom de sales Technical Support Telephone 49 2102 95990 F...

Page 6: ...pair the drive Opening the drive can result to exposure to laser radiation Do not use or place this device near magnetic fields televisions or radios where there is interference that can affect the performance of the drive Do not place this device in areas where there is direct sunlight high humidity or damp condition Do not place this device in an unstable position or in one that vibrates ...

Page 7: ...ean the device If you accidentally sprayed any solvent on the device use a clean cloth to wipe it You can also use a neutral cleaner to dilute the solvent to easily wipe it from the device Try not to interrupt the supply of power while the device is in reading or writing mode Do not place discs into the device immediately if they came from a cold environment specially during cold seasons Wait unti...

Page 8: ...ged or missing contact your retailer immediately ASUS DRW 0804P D external drive ASUS external drive stand USB 2 0 cable and IEEE 1394 cable Power cable and adapter Emergency eject pin and instruction User guide Multi language quick installation poster Extra front bezel 1 pc and instruction Software CD includes Windows 98SE USB 2 0 driver Fashionable travel bag The above items are available in ret...

Page 9: ...D ROM 40X on CD ROM Interface USB 2 0 and IEEE1394 Data Buffer Size 2MB Random Access Time DVD ROM 140 ms CD ROM 130 ms Application discs DVD Single Dual layer discs DVD R DVD RW DVD R DVD RW CD ROM Mode 1 CD ROM XA Mode 2 form 1 form 2 Photo CD single and multiple session CD DA CD Extra CD Text CD R CD RW DVD RAM Recording Format DVD R DAO Incremental Multi Border Recording DVD RW Restricted Over...

Page 10: ...mploys this technology that allows automatic recording speed adjustment based on the recording media In addition to the fact that there are low and high quality recording media various other factors such as dye layer temperature humidity dust fingerprints etc affect the recording characteristics of recordable and rewritable discs Due to these factors some discs might not be able to stand the high ...

Page 11: ...ositioned to link the new data with the data already written FlextraLink uses minimal system resources so that your PC remains fully operational throughout the writing process and available for other applications The diagram below shows the advantage of the FlextraLink recording technology FlextraLink Technology Solution Data transfer slows down Buffer Memory Write process continues Write Data Dat...

Page 12: ...he new 50X drives In addition the DDSS II stabilizes the pick up head of the drive in both horizontal and vertical directions making tracking and focusing even more precise Like the DDSS the DDSS II vibration absorption structure contains a dynamic mass that can absorb the vibration caused by high revolution of spindle motor However the DDSS II moves the dynamic mass to be suspended to the chassis...

Page 13: ...a higher transfer rate when writing data to the outer tracks of the disc than to the inner tracks as the head traverses a longer linear path on the outer than the inner part of the disc Although the transfer rates vary and may not be at maximum depending on the part of the disc being written to the CAV method allows faster recording speed because the rotation speed does not have to change when the...

Page 14: ...the disc Refer to page 20 for details 2 READ WRITE indicator This LED is lit Green when data is being read or written on the disc 3 Disc loading tray This tray holds the disc Open the loading tray by pressing the Eject Button Place a CD or DVD on the tray with the label side up Press the Eject Button or push the front part of the tray to load the disc 4 Eject button Press this button to eject the ...

Page 15: ...o video devices storage peripherals other PCs and or portable devices 6 USB port A standard Universal Serial Bus USB 2 0 plug and play interface 7 Power switch Turns the power supply ON or OFF Switching to icon means ON and switching to O side means OFF 8 Power connector This connector is for the power adapter cable 6 5 7 8 ...

Page 16: ...rped disc in the drive The disc might break apart during use and cause potential body injury or damage to your drive Drive placement 1 Remove the external drive and all the package contents from the box Place them next to your computer 2 Place the external drive stand on a stable surface 5 Make sure that the drive is securely in place 3 Slide the drive into the stand aligning the side groove to th...

Page 17: ...he power adapter cable to the DC IN power connector 4 Connect the AC power cable to the power adapter 5 Connect the AC power cable to a power source All the cable plugs are slotted so that they fit in only one orientation If a plug does not fit in completely try reversing it DO NOT use too much force when fitting the cable plugs Power plug types may vary in different countries or regions around th...

Page 18: ...Follow these steps to install the driver 1 Make sure all cable connections to the drive and the PC are properly connected 2 Boot the PC 3 Insert the bundled software CD in the drive 4 Turn on the drive 5 After booting the OS detects the new hardware Follow the wizard to copy the driver files to your system Click Next 7 Specify the location of the driver INF file then click Browse 6 Windows 98SE ME...

Page 19: ...8 Locate the folder USB_RW_DRIVER in the CD Click OK 9 The specific location of the drive appears on the combo list box Click Next 10 After searching the location of the driver appears Click Next 11 Click Finish to start using your external drive ...

Page 20: ...ese steps to check the system properties 1 Right click My Computer icon on your desktop 2 On the pop up menu click Properties 3 Click the Device Manager tab on the system properties dialog box 4 Click the name of the optical drive from the list to display the device that you installed Screen display might vary depending on the operating system OS version ...

Page 21: ...he computer to avoid computer crash or possible data loss Follow these steps to safely unplug the drive 1 Locate the Unplug or Eject Hardware icon found in the taskbar Left click the icon 2 Click the name of the hardware device to unplug 4 You can now safely unplug the device from the system Click OK 3 Click Safely Remove to stop the device ...

Page 22: ...cal drive basics Placing a disc into the drive 1 Press the eject button on the front of the drive to eject the tray 2 When the drive tray ejects out of the drive place the disc on the tray with the label side facing up HORIZONTAL VERTICAL VERTICAL HORIZONTAL ...

Page 23: ...sc from the tray 3 Press the drive eject button or lightly push the center of the drive tray to load the tray back into the drive HORIZONTAL If you are using a 12 cm disc place it on the tray making sure that it fits the outer circular border This border helps hold the disc in place If you are using an 8 cm disc place it on the inner circular border on the tray However you may use 8 cm discs only ...

Page 24: ...steps to eject the drive tray using the emergency pinhole 1 Insert the eject pin that came with the drive package You can also use a paper clip or any pointed rod small enough to fit into the emergency pinhole Use the manual method only as a last resort when the eject button does not work Make sure that you have turned off your optical drive before ejecting the drive tray Locate the power switch b...

Page 25: ...in this section when using compact discs These instructions will help you avoid damaging discs and your optical drive Cleaning a disc Spray the disc with compressed air for about five seconds to get rid of the dust on a disc Handling a disc Hold a disc by the edges Do not touch the disc surface ...

Page 26: ...tion Less than 50G no damage at 11ms half sine wave 3 shock each side Packaged 60 cm high no damage 1 corner 3 edges 6 surfaces Acoustic Sound power Less than 52 dB A Reliability MTBF 60 000 power on hours ODC Read 20 of power on time ODC Write 2 of power on time Mean Time To Repair MTTR 30 minutes ODC Operating Duty Cycle Electrical specifications Power source Input linear voltage 100 240 V AC In...

Reviews: