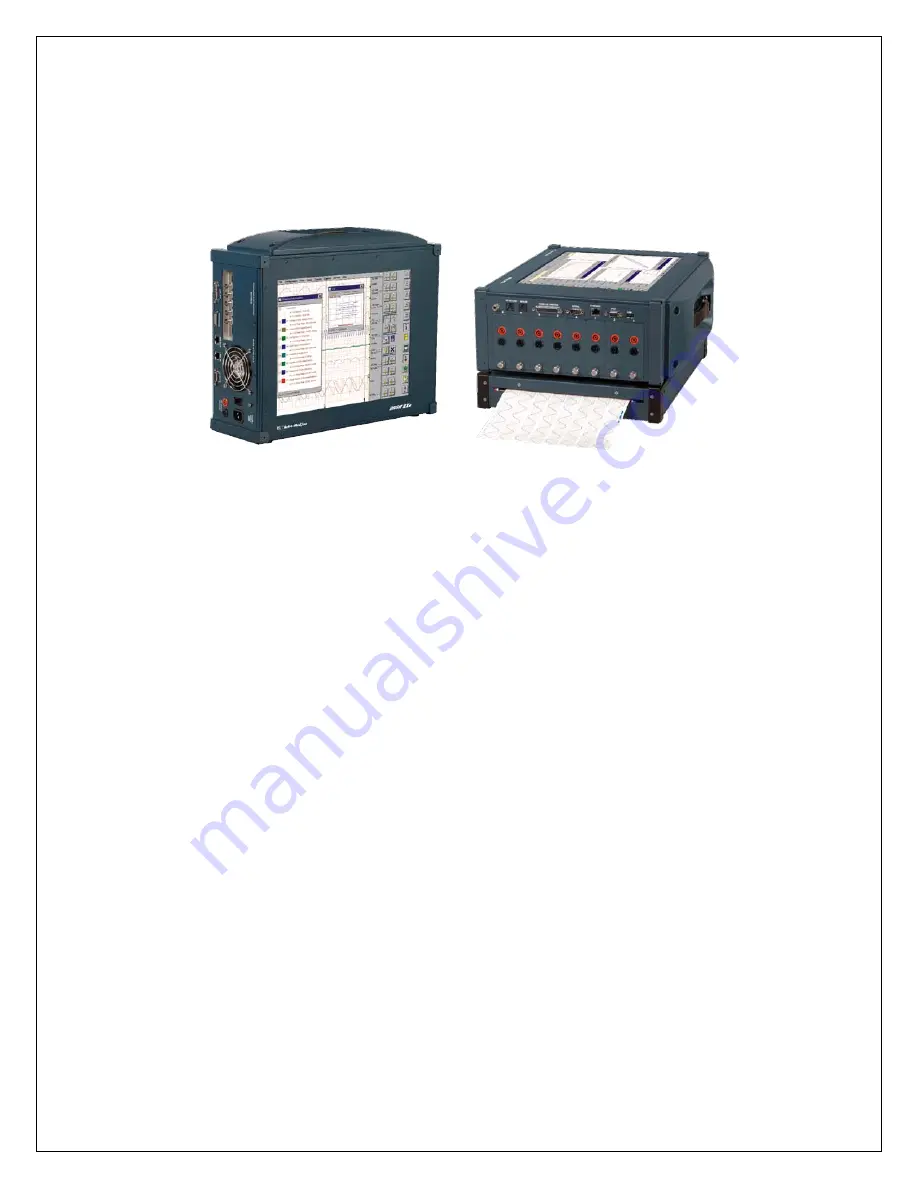
background image


Dash 8Xe / Dash 8X 

 Data Acquisition Recorder 


QUICK START GUIDE 


(1) Introduction 


(2) Getting 

Started 


(3) Hardware 

Overview 


(4) Menus 

Icons 


(5)  Using the Dash 8Xe / Dash 8X 


(6)  Setting Up the Display Appearance 


(7) Amplifier 

Settings 


(8) Sample 

Exercises 


(9)  Archiving Data Records 


(10)  Entering Engineering Units 


(11) Powering Down 


Astro-Med, Incorporated: Test & Measurement Product Group 

Astro-Med Industrial Park, 600 East Greenwich Ave., West Warwick, RI 02893 

Toll-Free Phone:  877-867-9783  Phone:  Fax:  401-822-2430 

email:  [email protected]


Part # 22834518 Version 1.1 

Summary of Contents for Dash 8X

Page 1: ...Up the Display Appearance 7 Amplifier Settings 8 Sample Exercises 9 Archiving Data Records 10 Entering Engineering Units 11 Powering Down Astro Med Incorporated Test Measurement Product Group Astro Me...

Page 2: ...ity to modify the display based on the needs of the user or application 2 2 G GE ET TT TI IN NG G S ST TA AR RT TE ED D Voltage Verification The Dash 8Xe Dash 8X has an auto sensing power supply that...

Page 3: ...Setup The Setup menu is used to configure the Dash 8Xe Dash 8X Cursors The Cursors menu is used for time and amplitude measurements Capture The Capture menu is used to setup arm manual trigger and ab...

Page 4: ...pply saves the information you modified in a window without closing the window Select All selects highlights all items in a list box Clear Selection removes the selections highlights from all items in...

Page 5: ...ANCE SETTING UP THE DISPLAY APPEARANCE The Dash 8Xe Dash 8X gives you total control over chart layout You can set individual channel widths channel location grids ON OFF and major minor division sizin...

Page 6: ...teps to take using the pull down menus of the Menu Bar I Real time Monitoring Monitor the voltage of a 9 Volt battery Set up the channel so that when there is no signal the waveform trace will be at t...

Page 7: ...ss OK Input battery voltage into Channel 1 Use the banana jack input connection located on the side of the Dash 8Xe Dash 8X and input the battery voltage into Channel 1 Measure the battery voltage usi...

Page 8: ...00 Set capture for 10 seconds In the Storage Allocation box press the units pull down box and select Seconds Other choices are minutes hours and Ksamples Press the value box to open the Seconds Window...

Page 9: ...trigger when 9 Volts is applied Press the Trigger Level icon 1ST icon in the row of icons at the bottom In the Trigger Level window highlight Waveform 1 Press Level Then press New Value Press the digi...

Page 10: ...to enter the Review Mode Select file to be reviewed Click on the top most file name to highlight the capture Press OK Data Capture Review of 9 Volt battery data capture Show entire capture Choose Dis...

Page 11: ...the A cursor icon Slide the cursor just to the left of the trigger point Press the B cursor icon Slide the cursor just to the right of the trigger point Time measurements using cursors Choose View Sta...

Page 12: ...e Files on data capture drive not Windows system drive Select to review or archive Selected file will be highlighted Archived Data Captures Lists archived data capture files on Windows system or exter...

Page 13: ...ile Select the Archive File icon to archive the selected file A status pop up will appear showing the percentage completed Once the file has completed archiving select OK to exit the Review mode scree...

Page 14: ...example we will assume we are entering the engineering units for a current probe that provides a 10mV A voltage output to the Dash 8Xe Dash 8X Dash 8Xe Dash 8X Amplifier Channel Settings Analog Chann...

Page 15: ...G D DO OW WN N When the power switch is set to the off position or if AC power is lost or removed the Dash 8Xe Dash 8X begins the power down sequence This is indicated by the green LED next to the pow...

Reviews: