artisan AAE, Care And Use Manual
Our "Artisan AAE" Care And Use Manual is a comprehensive guide designed to optimize your experience with our product. Available for free download from manualshive.com, this manual provides step-by-step instructions, ensuring you get the most out of your Artisan AAE, enhancing its longevity and performance.
Share
Download


Reviews:
No comments
Related manuals for AAE

25331
Brand: Hamilton Beach Pages: 32

RH 6-35 MX PRO
Brand: F.F. Group Pages: 44
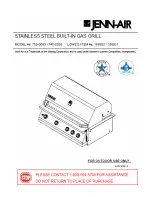
750-0593
Brand: Jenn-Air Pages: 35

HRG1026
Brand: N8WERK Pages: 44

CHARCOAL DELUXE
Brand: Tucker Barbecues Pages: 19

GR-500-A
Brand: Grilla Pages: 16

GEORGE FOREMAN GR19
Brand: Salton Pages: 32

EGG1000AS
Brand: Even Embers Pages: 29

CBC1465WB-U
Brand: Uniflame Pages: 12

Gourmet RAC 500
Brand: EFBE-SCHOTT Pages: 30

IVACCT20
Brand: Ivation Pages: 3

LANDMAN 11811
Brand: Landmann Pages: 16

43217
Brand: san ignacio Pages: 17

ID502AC
Brand: VONROC Pages: 76

M8301DWE
Brand: Makita Pages: 56

Dometic 2 COOK 3
Brand: Cadac Pages: 13

643-052
Brand: Melissa Pages: 17

FTB-13
Brand: Ferm Pages: 6


