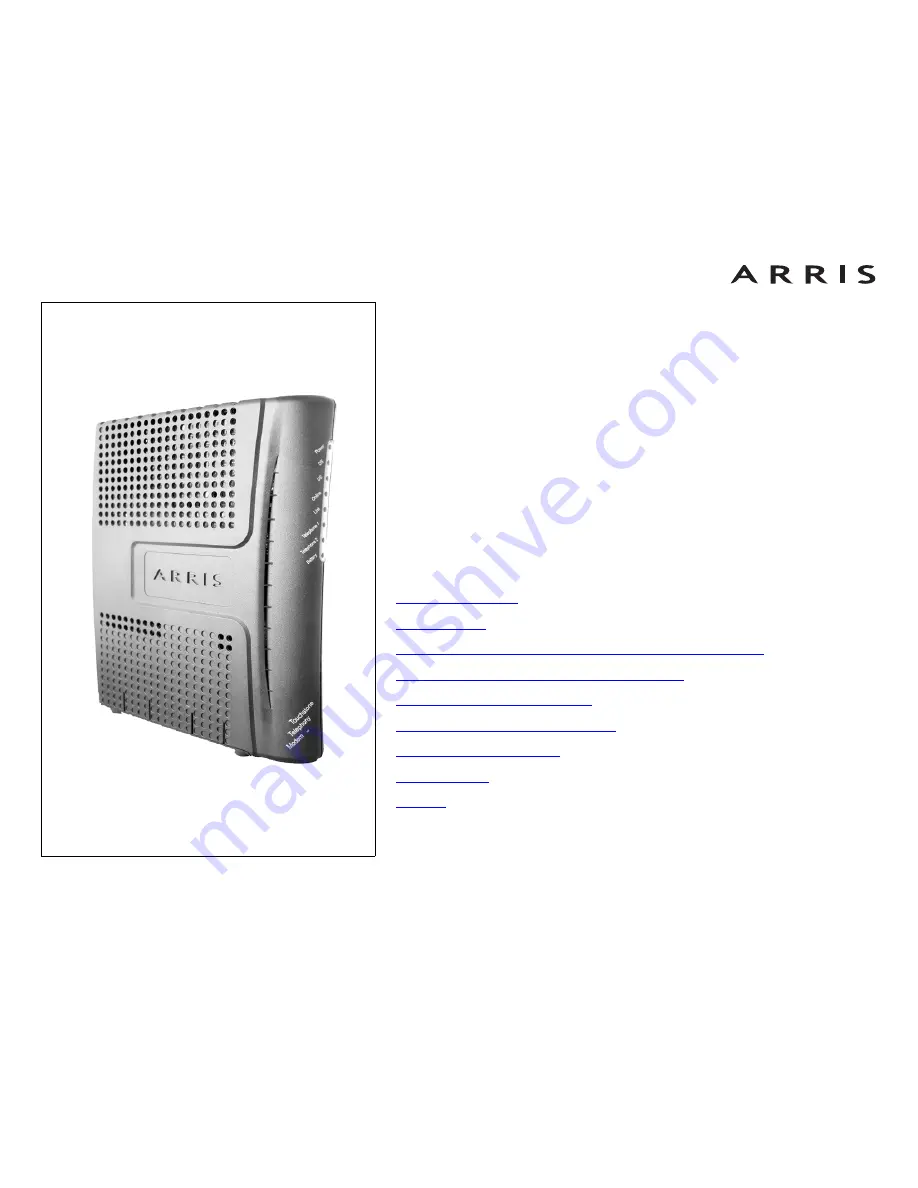
background image

Touchstone

®

 TM602 Telephony Modem

User’s Guide

Get ready to experience the Internet’s express lane! Whether you’re checking out

streaming media, downloading new software, checking your email, or talking with

friends on the phone, the Touchstone TM602 Telephony Modem brings it all to you

faster and more reliably. All while providing toll quality Voice over IP telephone ser-

vice. Some models even provide a Lithium-Ion battery backup to provide continued

telephone service during power outages. 

The Touchstone Telephony Modem provides an Ethernet connection for use with ei-

ther a single computer or home/office Local Area Network (LAN). Some Telephony

Modems also provide a USB connection. You can connect two separate computers

at the same time using both of these connections. In addition, the Touchstone Te-

lephony Modem provides for up to two separate lines of telephone service.

Installation is simple and your cable company will provide assistance to you for any

special requirements. The links below provide more detailed instructions.

Safety Requirements


Getting Started


Battery Installation and Replacement (TM602G/H Models Only)


Installing and Connecting Your Telephony Modem


Installing USB Drivers on Your PC


Configuring Your Ethernet Connection

Using the Telephony Modem


Troubleshooting


Glossary


Summary of Contents for TM602

Page 1: ...ction for use with ei ther a single computer or home office Local Area Network LAN Some Telephony Modems also provide a USB connection You can connect two separate computers at the same time using both of these connections In addition the Touchstone Te lephony Modem provides for up to two separate lines of telephone service Installation is simple and your cable company will provide assistance to y...

Page 2: ... information in this document is subject to change without notice The statements configurations technical data and recommendations in this document are believed to be accurate and reliable but are presented without express or implied warranty Users must take full responsi bility for their applications of any products specified in this document The information in this document is proprietary to ARR...

Page 3: ...nion and in certain other countries CATV instal lation equipotential bonding requirements are specified in IEC 60728 11 Cable networks for television signals sound signals and interactive services Part 11 Safety This equipment is in tended to be installed in accordance with the requirements of IEC 60728 11 for safe operation If the equipment is to be installed in an area serviced by an IT power li...

Page 4: ...m ARRIS International Inc 3871 Lakefield Drive Suite 300 Suwanee GA 30024 As indicated by this symbol disposal of this prod uct or battery is governed by Directive 2002 96 EC of the European Parliament and of the Council on waste electrical and electronic equipment WEEE WEEE could potentially prove harmful to the environment as such upon disposal of the Te lephony Modem the Directive requires that...

Page 5: ... can be used simultaneously Flexibility provides two independent lines of telephone service as well as high speed data Compatibility supports tiered data services if offered by your cable company What s in the Box Make sure you have the following items before proceeding Call your cable company for assistance if anything is missing Telephony Modem Power Cord Quick Installation Guide USB Cable Ether...

Page 6: ...Phone Cable as shown in the image to the left this is a standard phone cable with standard phone connectors RJ11 type on both ends You can buy phone cables from any electronics retailer and many discount stores Splitter optional provides an extra cable connection by splitting a single outlet into two You may need a splitter if you have a TV already connected to the cable outlet that you want to us...

Page 7: ...tion ready the Telephony Modem serial number and MAC addresses of the unit printed on a sticker on the bottom of the Telephony Modem the model number of the Telephony Modem Save this information for future use In addition you should ask your cable com pany the following questions Do you have any special system requirements or files that I need to down load after I am connected When can I start usi...

Page 8: ...le company Windows Ethernet connection Windows 98 Windows 98 SE Second Edition Windows ME Windows 2000 Windows XP or Windows Vista USB connection Windows 2000 Windows XP or Windows Vista MacOS Ethernet connection only System 7 5 to MacOS 9 2 Open Transport recommend ed or MacOS X Linux other Unix Ethernet connection only Hardware drivers TCP IP and DHCP must be enabled in the kernel About this Man...

Page 9: ... you are connecting the Telephony Modem di rectly to a computer or to an Ethernet hub or broadband router with a cross over switch ask for Category 5 CAT5 straight through cable If you are connecting the Telephony Modem to an Ethernet hub or broadband router without a crossover switch ask for a Category 5 crossover cable USB USB Universal Serial Bus is meant for connecting a variety of accessories...

Page 10: ...stall a virus checker and keep it updated Avoid providing web or file sharing services over your Telephony Modem Besides certain vulnerability problems most cable companies prohibit run ning servers on consumer level accounts and may suspend your account for violating your terms of service Use the cable company s mail servers for sending email Avoid using proxy software unless you are certain that...

Page 11: ...atteries are shipped outside of the Telephony Modem and must be installed Identify the battery type using the photos to the left and use the proper installation procedure TM602G H 2 cell Battery Installation and Replacement Note The 2 cell battery may be light grey or black TM602G H 4 cell Battery Installation and Replacement Note The 4 cell battery is longer than the 2 cell battery and has a stra...

Page 12: ...p batteries Action 1 Insert a finger into the latch opening press down and pull back on the latch holding the battery door on the bottom of the Telephony Modem Pull the door toward you Set the door aside in a safe place 2 Hold the battery pack so that the guides on the battery align with the slots on the Telephony Modem and slide the battery into the bay The diagram on the left shows the proper or...

Page 13: ... opening area and use leverage to dislodge the battery while pulling it straight back Note The Telephony Modem will not begin operating until you apply AC power 4 Replace the door To do so place the hinge tabs of the battery door into the receiver slots inside the Telephony Modem battery compartment on the op posite end of the battery opening slot Rotate the door toward the unit until the latch sn...

Page 14: ...lephony Modem Pull the door toward you Set the door aside in a safe place 2 Hold the battery pack so that the guides on the battery align with the slots on the Telephony Modem and slide the battery into the bay The diagram on the left shows the proper orientation Note Batteries will not insert completely into the Telephony Modem if not oriented correctly The battery should slide into the bay witho...

Page 15: ...e Telephony Modem use the bat tery pull strap to dislodge the battery Note The Telephony Modem will not begin operating until you apply AC power 4 Replace the door To do so place the tabs of the battery door into the slot on the Telephony Modem battery compartment Rotate the door toward the front of the Telephony Modem until the latch snaps back into place Note Some Telephony Modem models use a Li...

Page 16: ...e backup battery Action 1 If the Telephony Modem is wall mounted lift the Telephony Modem off the screws and place it on a firm horizontal surface for battery installation 2 Insert a finger into the latch opening press down and pull back on the latch holding the battery door on the bottom of the Telephony Modem Pull the door toward you Note The 8 cell battery replaces the battery door Store the do...

Page 17: ...ne up the slots on the battery bay with the tabs on the battery Push straight down on the Telephony Modem until the battery latch clicks into place Note You may need to push down gently on the front of the Telephony Mo dem to latch the battery into place 6 If the Telephony Modem is wall mounted replace it on the mounting screws Note When replacing a battery please recycle or dispose of the battery...

Page 18: ...l the Items You Need Cable phone and power outlets are available near the computer If a cable outlet is not conveniently located your cable company can install a new one If you have ordered service your cable company should configure the Telephony Modem automatically You need only follow the instructions in this section to install and connect the Telephony Modem CAUTION Risk of equipment damage On...

Page 19: ...transmission status E US indicates upstream connectivity F DS indicates downstream connectivity G Power indicates whether AC power is available to the unit Front Panel TM602G H The front of the Telephony Modem has the following indicators A Battery indicates status of the battery in the Telephony Modem B Telephone 2 indicates status of line 2 C Telephone 1 indicates status of line 1 D Link indicat...

Page 20: ...dem as if you power cycled the unit Use a pointed non metallic object to press this button F Cable connector for the coax cable G Power connector for the power cord TM602G H Rear Panel A Tel 1 2 TM602G only connector for the first phone line or both lines of a 2 line phone Tel 1 TM602H only connector for the first phone line B Tel 2 connector for the second phone line C Ethernet connector for use ...

Page 21: ...1 4 6mm drywall anchors and a drill with 1 4 6mm bit not included for mounting on plywood or studs two 6 x 1 5 38 1 mm self tapping screws included screwdriver flat blade or Phillips depending on what kind of screws you use wall mount template included with the Telephony Modem Quick Installation Guide transparent tape for temporarily securing the mounting template to the wall Location Always posit...

Page 22: ...ll anchors set them into the wall Then drive the screws into the wall leaving a gap of about 1 8 3 mm between the screw head and the wall If not using anchors just drive the screws 4 Orient the Telephony Modem with the indicator lights facing up or right as desired Slip both mounting slots in the back of the Telephony Modem over the screws then slide the case down until the narrow end of the keyho...

Page 23: ... with a wrench Note For best performance use high quality RG 6 coax cable and minimize or eliminate splitters between the cable jack and the Telephony Modem 2 Insert the plug from the power cord into the Power connector on the Tele phony Modem G and insert the power cord into a convenient AC outlet The Power light on the front of the Telephony Modem lights up then flashes once refer to the LED tab...

Page 24: ... on the back of the Telephony Modem D Your computer should detect the Telephony Modem and begin installing the drivers See Installing USB Drivers on Your PC for driver installation details Making Telephone Connections 6 Connect one end of the telephone cable to the telephone port on the back of the Telephony Modem A or B Connect the other end to the telephone Note If you have a TM602G Telephony Mo...

Page 25: ...available on line at http www arrisi com support usb index asp Requirements Make sure you have the following before attempting to install the USB drivers PC with CD ROM drive at least one free USB port one of Windows 2000 Windows XP or Windows Vista Windows 95 Windows 98 and Windows NT are not supported ARRIS USB Driver CD USB A B Cable of appropriate length a cable is included in your Telephony M...

Page 26: ...Modem is on the Power light should be on If not connect the AC adapter as described in Connecting the Telephony Mo dem 2 Insert the CD that came with the Telephony Modem package into the CD ROM drive 3 Plug the appropriate end of the USB cable into the Telephony Modem and the other end into the computer s USB port The following window appears indicating that the PC has detected a new USB device 4 ...

Page 27: ... Installation Installation Drivers Configuration Usage Troubleshooting Glossary 5 Click the Next button The wizard prompts you for the location of the drivers Note The dialog indicates that the wizard is looking for the ARRIS RNDIS Remote Network Device Interface Specification driver for the Telephony Modem ...

Page 28: ...net Safety Started Installation Installation Drivers Configuration Usage Troubleshooting Glossary 6 Select Search for a suitable driver for my device unless you want to use the second option to choose a specific driver then click the Next button The wizard displays a list of search options ...

Page 29: ...ote If the wizard can not find the CD drive and the CD is inserted prop erly follow these steps a On the Windows desktop open My Computer and note the letter of the Compact Disc or CD ROM drive on most systems the CD drive is at D or E b Return to the Found New Hardware Wizard and click the Back button The wizard displays the previous screen shown in step 6 c Select Specify a Location then choose ...

Page 30: ...ting Battery USB Ethernet Safety Started Installation Installation Drivers Configuration Usage Troubleshooting Glossary 8 Click the Next button The wizard installs the drivers then displays a window indicating that the installation is complete 9 Click the Finish button ...

Page 31: ...ll USB drivers on Windows XP 1 Make sure the Telephony Modem is on the Power light should be on If not connect the AC adapter as described in Connecting the Telephony Mo dem 2 Insert the CD that came with the Telephony Modem package into the CD ROM drive 3 Plug the appropriate end of the USB cable into the Telephony Modem and the other end into the computer s USB port The following window appears ...

Page 32: ...SB Ethernet Safety Started Installation Installation Drivers Configuration Usage Troubleshooting Glossary 4 Click the Next button The wizard begins searching for and installing the drivers then displays a window indicating that the installation is complete 5 Click the Finish button ...

Page 33: ...g Touchstone USB Drivers on Vista in 64 bit Mode When running Vista in 64 bit mode you must install an updated Vista USB 1 1 driv er Follow these steps to obtain and install the driver 1 Download the zipped Vista USB driver from the ARRIS website at the follow ing link http www arrisi com support usb index asp 2 Unzip the files to a directory that can be referenced later Step 8 during the installa...

Page 34: ...Installation Drivers Configuration Usage Troubleshooting Glossary 6 Vista tries to locate the new USB driver and displays a Installing device driver software at the bottom right of the screen Vista will not find the driv er and displays the following window At the prompt select I don t have the disc Show me other options ...

Page 35: ...tone TM602 Telephony Modem User s Guide 35 Getting Battery USB Ethernet Safety Started Installation Installation Drivers Configuration Usage Troubleshooting Glossary 7 Select Browse my computer for driver software advanced ...

Page 36: ...e TM602 Telephony Modem User s Guide 36 Getting Battery USB Ethernet Safety Started Installation Installation Drivers Configuration Usage Troubleshooting Glossary 8 Browse to the directory that you set up in step 2 Select Next ...

Page 37: ... s Guide 37 Getting Battery USB Ethernet Safety Started Installation Installation Drivers Configuration Usage Troubleshooting Glossary 9 Once Vista finds the driver software in the directory specified in step 8 in stallation is in progress as shown below ...

Page 38: ...e 38 Getting Battery USB Ethernet Safety Started Installation Installation Drivers Configuration Usage Troubleshooting Glossary 10 The Found New Hardware wizard should display the following screen when the USB driver has been successfully installed Select Close ...

Page 39: ...Safety Started Installation Installation Drivers Configuration Usage Troubleshooting Glossary 11 Once the installation is completed successfully Vista displays an icon with the message ARRIS TOUCHSTONE DEVICE Device driver software installed successfully at the bottom right corner of the screen ...

Page 40: ...Vista If you connect the Telephony Modem USB to your computer before inserting the ARRIS driver installation CD Windows may install a composite USB driver that does not properly support the Telephony Modem To correct this problem you must first remove the composite driver using the Remove utility on the ARRIS driver in stallation CD Follow these steps to use the Remove utility 1 Insert the ARRIS d...

Page 41: ...ving USB Drivers 64 bit Vista Follow these steps to uninstall the 64 bit USB driver if necessary 1 If you no longer have the USB driver download the zipped Vista USB driver from the ARRIS website at the following link http www arrisi com support usb index asp 2 If necessary unzip the files to a directory that can be accessed for the un installation 3 Connect the USB cable between the Touchstone Ca...

Page 42: ...t Safety Started Installation Installation Drivers Configuration Usage Troubleshooting Glossary 6 Right click on the remove exe file and select Run as administrator from the drop down menu Enter the administrator password if prompted 7 Follow the instructions as prompted to remove the driver ...

Page 43: ...puter with one of Windows 98SE Windows 2000 Windows ME Windows XP or Windows Vista Ethernet interface Ethernet cable supplied IP address subnet gateway and DNS information for installations not using DHCP How to use this chapter The following list shows the procedures for modifying the TCP IP settings on the computer The procedure is slightly different depending on the operating system that you ar...

Page 44: ...on for Windows 98SE Follow these steps to configure the TCP IP settings on a Windows 98SE operating system Note Dialog boxes shown on your computer may differ slightly from those shown in this procedure 1 From the computer select Start Settings Control Panel 2 Double click on the Network icon in the Control Panel 3 Click the Configuration tab in the Network window to display the list of Network Ad...

Page 45: ...ng Battery USB Ethernet Safety Started Installation Installation Drivers Configuration Usage Troubleshooting Glossary 4 Highlight TCP IP by clicking on it one time then click on Properties 5 Click the IP Address tab click Obtain an IP address automatically then click OK ...

Page 46: ...Safety Started Installation Installation Drivers Configuration Usage Troubleshooting Glossary 6 Click OK to accept the new settings and OK again to close the Configura tion window 7 You may have to restart your computer in order for your computer to obtain a new IP address from the network end ...

Page 47: ...ng system Note Dialog boxes shown on your computer may differ slightly from those shown in this procedure 1 From the computer select Start Settings Network and Dial up Con nections Local Area Connection 2 In the Local Area Connections Properties window highlight TCP IP by click ing on it one time then click on Properties Note If your computer has more than one Ethernet card you may have to select ...

Page 48: ...nfiguration Usage Troubleshooting Glossary 3 Click Obtain an IP address automatically and Obtain DNS server ad dress automatically then click OK 4 Click OK to accept the new settings and OK again to close the Configura tion window 5 You may have to restart your computer in order for your computer to obtain a new IP address from the network end ...

Page 49: ...tion for Windows ME Follow these steps to configure the TCP IP settings on a Windows ME operating sys tem Note Dialog boxes shown on your computer may differ slightly from those shown in this procedure 1 From the computer select Start Settings Control Panel 2 Double click on the Network icon in the Control Panel 3 Click the Configuration tab in the Network window to display the list of Network Ada...

Page 50: ...User s Guide 50 Getting Battery USB Ethernet Safety Started Installation Installation Drivers Configuration Usage Troubleshooting Glossary 4 Highlight TCP IP by clicking on it one time then click on Properties 5 Click the IP Address tab then click OK ...

Page 51: ...Safety Started Installation Installation Drivers Configuration Usage Troubleshooting Glossary 6 Click OK to accept the new settings and OK again to close the Configura tion window 7 You may have to restart your computer in order for your computer to obtain a new IP address from the network end ...

Page 52: ...r Windows XP Follow these steps to configure the TCP IP settings on a Windows XP operating sys tem Note Dialog boxes shown on your computer may differ slightly from those shown in this procedure 1 From the computer select Start Settings Control Panel and double click on the Network Connections icon in the Control Panel 2 Click the Configuration tab in the Network window to display the list of Netw...

Page 53: ...ng Battery USB Ethernet Safety Started Installation Installation Drivers Configuration Usage Troubleshooting Glossary 3 Highlight TCP IP by clicking on it one time then click on Properties 4 Click the IP Address tab click Obtain an IP address automatically then click OK ...

Page 54: ...t Safety Started Installation Installation Drivers Configuration Usage Troubleshooting Glossary 5 Click OK to accept the new settings and OK again to close the Configura tion window 6 You may have to restart your computer in order for your computer to obtain a new IP address from the network ...

Page 55: ...Battery USB Ethernet Safety Started Installation Installation Drivers Configuration Usage Troubleshooting Glossary TCP IP Configuration for Windows Vista Follow these steps to configure the Ethernet interface for use with Touchstone prod ucts 1 Open the Vista Control Panel ...

Page 56: ...t Touchstone TM602 Telephony Modem User s Guide 56 Getting Battery USB Ethernet Safety Started Installation Installation Drivers Configuration Usage Troubleshooting Glossary 2 Double click Network and Sharing Center ...

Page 57: ...ny Modem User s Guide 57 Getting Battery USB Ethernet Safety Started Installation Installation Drivers Configuration Usage Troubleshooting Glossary 3 Click Manage network connections If prompted for a connection choose Local Area Connection ...

Page 58: ...etting Battery USB Ethernet Safety Started Installation Installation Drivers Configuration Usage Troubleshooting Glossary 4 Double click the Local Area Connection to open the Status window 5 If Windows requests permission to continue click Continue 6 Click Properties ...

Page 59: ...stallation Installation Drivers Configuration Usage Troubleshooting Glossary 7 Double click Internet Protocol Version 4 TCP IPv4 8 Select Obtain an IP address automatically and Obtain DNS server ad dress automatically unless instructed otherwise by your cable provider 9 Click OK to close the Properties windows ...

Page 60: ...eatures available on the Touchstone Tele phony Modem and covers basic troubleshooting procedures Setting up Your Computer to Use the Telephony Modem Indicator Lights for the TM602A B Models Indicator Lights for the TM602G H Models Using the Reset Button Setting up Your Computer to Use the Telephony Modem Follow the instructions in the information packet supplied by your cable company Contact your ...

Page 61: ...esired voltage on the lines If this pattern persists for more than 10 seconds disconnect the telephone lines from the Telephony Modem then call a wiring technician for assistance Patterns Normal Operation The following table shows light patterns during normal operation Mode Power DS US Online Link Tel 1 Tel 2 AC Power On On Connected to the Internet Flash Not connected to the Internet On Connected...

Page 62: ... shorted touching or there may be undesired voltage on the lines If this pattern persists for more than 10 seconds disconnect the telephone lines from the Telephony Modem then call a wiring technician for assistance Indicator Lights Normal Operation The following table shows light patterns during normal operation Mode Power DS US Online Link Tel 1 Tel 2 Battery AC Power Good On On Connected to the...

Page 63: ...ence Power DS US Online Link Telephone Battery Description 1 2 Off Off Off Off Off No power to Cable Modem Flash Flash Flash Flash Flash Power on Self Test See Cable Modem Start Up Sequence Below On On Flash Off Off Retrieving telephone network information On On Off Flash Off Retrieving telephone line information On On Flash Flash Off Activating telephone service Normal Operation Battery LEDs only...

Page 64: ... button on the back of the Telephony Modem to reset the modem as if you power cycled the unit You may need to reset the Telephony Modem if you are having problems connecting to the Internet Using this button will be rare Use a pointed non metallic object to press this button The photo to the left shows the location of the Reset button The Reset button is recessed to prevent accidental resets TM602...

Page 65: ... take over 30 minutes to establish a connection the first time you power up your Telephony Modem especially when many people are online Always leave your Telephony Modem plugged into AC power and connected to the cable system Check the front panel lights The Power and Online lights should be on The Link light should be either on or blinking If the Power light blinks for more than 30 minutes call y...

Page 66: ...ect the USB cable Restart the computer Press the Reset button on the back of the Telephony Modem I can get on the Internet but everything is slow If the Web site you are visiting is very popular that site may be having trou ble servicing all the requests If other sites download quickly wait for a few minutes and try again Usage during peak hours may also affect the con nection speed If your Teleph...

Page 67: ...Ensure they are connected and tight If they are and you do not have dial tone contact your service provider If the Online LED is lit go to the next step Is the Telephone Telephone 1 or Telephone 2 LED lit If not phone service has not been provisioned on that line Contact your service provider If it is blinking there is a phone off hook somewhere in the house Find that phone and hang it up If it is...

Page 68: ...iguration Usage Troubleshooting Glossary If so unplug the RJ 11 connector at the back of the Telephony Port and plug in a known working phone If you now have dial tone the problem is with the house wiring Contact your MSO or a qualified wiring technician to correct the house wiring If you still do not have dial tone contact your service provider ...

Page 69: ...tructions 1 Be sure that your computer is running either Windows 2000 Windows XP or Windows Vista Windows 95 Windows 98 and Windows NT are not sup ported 2 Be sure the Telephony Modem has power The Power light should be on 3 Push the Reset button on the back panel of the Telephony Modem using a pen tip or other sharp non metallic object 4 Disconnect the USB cable from the computer and reconnect it...

Page 70: ...A thin wire used to connect your television and Telephony Modem to the cable TV system You can buy coax from any electronics retailer and many discount stores CPE Customer Premise Equipment This is the equipment that is plugged in to the telephony modem typically a computer hub or router Cross over An Ethernet cable used to connect two hubs or a hub and a cable modem together Also some Ethernet hu...

Page 71: ...rated with a cable modem Ethernet A standard method of connecting two or more computers into a Local Area Network LAN Euro DOCSIS The European version of DOCSIS Event An informational message used for monitoring network status F connector The type of connector used on coax cable There are two common types of F connector slip on and screw on Use coax with screw on connectors for connecting your Tel...

Page 72: ...ngle location such as a building to communicate with one another LED Light Emitting Diode A semi conductor diode that emits light when current is passed through it MAC address A number that uniquely identifies any device connected to a network Your cable company uses your Telephony Modem s MAC address to authorize access to the Internet The MAC address is printed on a label on the bottom of your T...

Page 73: ...use for your Telephony Modem You can buy a splitter from any electronics retailer and most discount stores Switched outlet A power outlet that may be turned on and off using a wall switch Usually intended for lamps Avoid plugging your computer or Telephony Modem into a switched outlet to avoid disruptions TCP IP Transmission Control Protocol Internet Protocol The protocols used to facilitate commu...

Page 74: ...reserves the right to make changes to equipment design or program components as progress in engineering manufacturing methods or other circumstances may warrant ARRIS Touchstone and the ARRIS logo are trademarks or registered trademarks of ARRIS Group All other trademarks and registered trademarks are the property of their respective holders Release 6 Standard 1 0 August 2007 ...

Reviews: