Ariston ALTEAS ONE Net 30, Installation And Servicing Instructions
The Ariston ALTEAS ONE Net 30 is a cutting-edge heating system. Ensure a hassle-free setup with our step-by-step Installation and Servicing Instructions manual. You can easily download this comprehensive manual for free from manualshive.com, offering detailed guidance on installation and servicing for optimal performance.
Share
Download


Reviews:
No comments
Related manuals for ALTEAS ONE Net 30

Legend series
Brand: MONTAGUE Pages: 15

Kalvis-2-30U
Brand: Kalvis Pages: 16

K2FT-085
Brand: U.S. Boiler Company Pages: 176

ecoMAX pro 18 E
Brand: Vaillant Pages: 36

VICTRIX ZEUS SUPERIOR 32 2 ERP
Brand: Immergas Pages: 48

PROBOIL.4E
Brand: PROBOIL Pages: 44

106
Brand: Knight Pages: 48
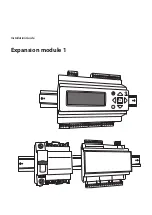
Expansion module 1
Brand: Thermia Pages: 28

VITORONDENS 200-T
Brand: Viessmann Pages: 32

Vitorond 200 Series
Brand: Viessmann Pages: 28

VITOPLEX 300
Brand: Viessmann Pages: 32

VITORADIAL 300-T
Brand: Viessmann Pages: 48

VITOLIGNO 300-P
Brand: Viessmann Pages: 60

VITODENS 200 WB2B
Brand: Viessmann Pages: 4

VITODENS 200
Brand: Viessmann Pages: 4

Vitodens 100 WB1A
Brand: Viessmann Pages: 4

VITODENS
Brand: Viessmann Pages: 56

Vitocell 100-E
Brand: Viessmann Pages: 32


