DO NOT RETURN THIS PRODUCT TO RETAILER
Should you have any technical issues with this product you must first contact the manufacturer to obtain a
Return Merchandise Authorization Number (RMA#).
To obtain RMA#, Technical Support or to review Troubleshooting Videos and Step-By-Step
Troubleshooting Procedures, please visit www.AquaProducts.com/Service.
IN GROUND
ROBOTIC SWIMMING POOL CLEANER
OPERATOR’S MANUAL &
TROUBLESHOOTING GUIDE
Read and Follow All Instructions Before Using Your Pool Cleaner
This manual is for use with a variety of Aqua Products robotic pool cleaners
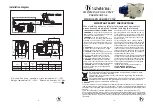
IMPORTANT SAFETY INSTRUCTIONS
SAVE THESE INSTRUCTIONS