Aqua Lung Enforcer, Owner'S Manual
Discover how to set up and customize your Pyronix Enforcer alarm system effortlessly with our comprehensive user manual. Download it for free from manualshive.com, and gain valuable insights on maximizing the security features of this cutting-edge product. Empower yourself with the knowledge to protect what matters most.
Share
Download


Reviews:
No comments
Related manuals for Enforcer

E 140.30
Brand: GMP Pages: 28

GEFT200
Brand: Goldair Pages: 5

MT-2232
Brand: Marta Pages: 8

NA8550
Brand: LG Pages: 2

PEDESTAL WDPS1 Series
Brand: LG Pages: 8
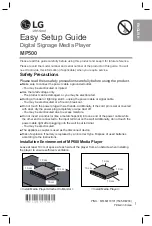
MP500
Brand: LG Pages: 100

PV150G
Brand: LG Pages: 191

WSA350EU
Brand: Weller Pages: 24

95761
Brand: Sears Pages: 16

GRGR200
Brand: Greenway Home Products Pages: 2

Multi-Port PowerNode
Brand: GreenWave Reality Pages: 22


