background image

For Research Use Only. Not for use in diagnostic procedures.

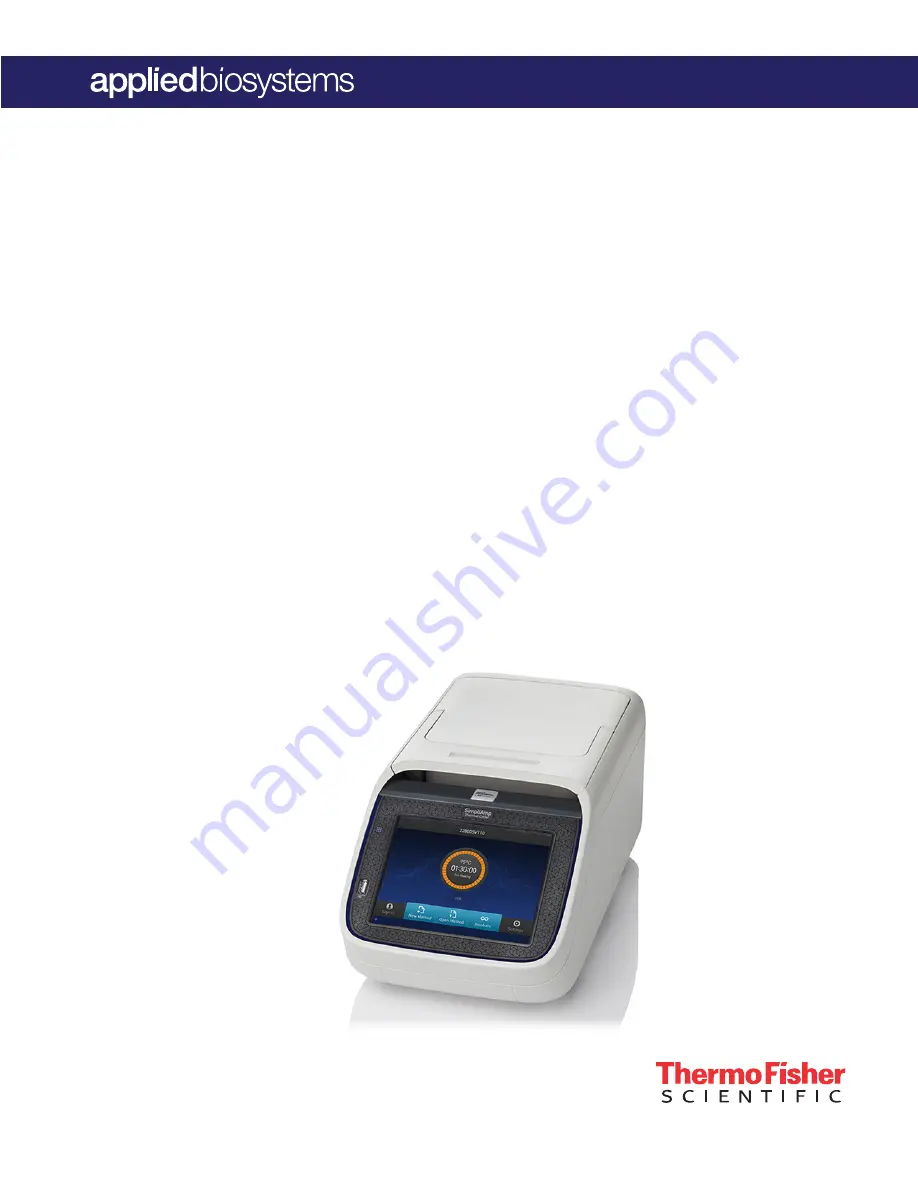
SimpliAmp

 Thermal Cycler

USER GUIDE

Installation, Use, and Maintenance

for use with:
Invitrogen

 and Applied Biosystems

 PCR reagents

Catalog Number  

A24811

Publication Number  

 MAN0009889

Revision  

 C.0

Summary of Contents for SimpliAmp Thermal Cycler

Page 1: ... for use in diagnostic procedures SimpliAmp Thermal Cycler USER GUIDE Installation Use and Maintenance for use with Invitrogen and Applied Biosystems PCR reagents Catalog Number A24811 Publication Number MAN0009889 Revision C 0 ...

Page 2: ...t may be covered by one or more Limited Use Label Licenses By use of this product you accept the terms and conditions of all applicable Limited Use Label Licenses Corporate entity Life Technologies Corporation Carlsbad CA 92008 USA Toll Free in USA 1 800 955 6288 TRADEMARKS All trademarks are the property of Thermo Fisher Scientific and its subsidiaries unless otherwise specified AmpliTaq and Ampl...

Page 3: ... the sample tray or plate onto the sample block s 22 Perform a run 22 Perform a run on multiple instruments 23 Monitor a run 25 Monitor via the Home screen 25 Monitor via the run monitor screen 26 If the power fails 28 View and export the run report 28 Remove the samples from the instrument 28 Manage methods and folders 29 CHAPTER 4 Maintain the instrument 32 As needed maintenance 32 Clean the ins...

Page 4: ...t and your mobile device 45 Link instrument profile to your Thermo Fisher Connect account 46 Recommended instrument settings 48 APPENDIX B Parts and materials 58 Instrument part numbers 58 Consumables 58 APPENDIX C Troubleshooting 61 Troubleshooting 61 Return an instrument for service 62 APPENDIX D Instrument specification and layout 63 Site requirements 63 Environmental requirements 63 Temperatur...

Page 5: ...ermo Fisher Scientific 85 Instrument safety 85 General 85 Physical injury 85 Electrical 85 Cleaning and decontamination 86 Safety and electromagnetic compatibility EMC standards 86 Safety 86 EMC 86 Environmental design 87 Chemical safety 87 Biological hazard safety 88 Documentation and support 89 Related documentation 89 Customer and technical support 89 Limited product warranty 90 Contents Simpli...

Page 6: ...ay screen Instrument overview The SimpliAmp Thermal Cycler Cat no A24811 allows you to Optimize your PCR with the help of the Veriflex blocks Program the instrument from the touchscreen interface Access the system remotely through a mobile application Simulate other PCR instruments with Thermal Simulation modes Figure 1 SimpliAmp Thermal Cycler This user guide provides information on how to maximi...

Page 7: ...reen menu overview On powering on the instrument you will first see the following Splash screen Figure 2 SimpliAmp Thermal Cycler Splash screen After the Splash screen the Home screen appears Figure 3 Home screen 2 SimpliAmp Thermal Cycler User Guide 7 ...

Page 8: ...ays Set Up Run For instructions on starting a run by this method see Perform a run on page 22 2 Sign In Touch Sign In to create an account or to enter information to sign in to your account To create a new account a In the Sign In screen touch Sign Up b In the Create An Account screen enter your personal information create a user name and password and enter a name for the default folder that will ...

Page 9: ...you to create a new run method by using the default templates or existing methods You can also create a run method for incubation from the Setup Run screen 4 Open Method Touch Open Method to select an existing run method to start a run Touching Open Method takes you to the Select Method screen that displays the existing run methods The run methods are sorted and stored in various folders Select a ...

Page 10: ...emperature 2 Time remaining 3 Status of the block pre heating running and so on 4 Username Scrolls up and down through a list of items and buttons View other stages Closes the current modal window Indicates whether the Wi Fi is on or off Indicates whether a USB is inserted into the instrument Indicates whether the instrument is connected to the network Chapter 2 Start sign on and configure the ins...

Page 11: ...rcase letter A letter button Enter an uppercase letter then the letter s When you are done touch again Enter punctuation or other symbols then the symbol s When you are done touch again Delete the last letter Close the editor and save any changes to accept the entry and close the editor Close the editor and discard any changes Enter text Chapter 2 Start sign on and configure the instrument Use the...

Page 12: ...ns while entering numbers Table 4 Functions performed by entering numbers To Touch Enter a number A number button Enter decimal colon or infinity symbol the button with the respective symbol Delete the last number Close the editor and save any changes Enter numerals Chapter 2 Start sign on and configure the instrument Use the Touchscreen 2 12 SimpliAmp Thermal Cycler User Guide ...

Page 13: ...q Create a new run method q Edit a run method q Load the plate in the instrument q Perform a run or Perform a run on multiple instruments q Optional Monitor the run q View and export the run report q Unload the plate from the instrument 3 SimpliAmp Thermal Cycler User Guide 13 ...

Page 14: ... Create a new run method 1 In the Home screen touch New Method Figure 4 Touchscreen Home The Setup Run screen opens up Chapter 3 Create and run experiments on the instrument Create a new run method 3 14 SimpliAmp Thermal Cycler User Guide ...

Page 15: ...creen Figure 6 Select Method Template screen b Touch Open Method to create a new method using an existing run method Select from the methods listed in the Select Method screen Note The Select Method screen opens up if you touch Open Method in the Home screen or in the Setup Run screen Figure 7 Select Method screen Chapter 3 Create and run experiments on the instrument Create a new run method 3 Sim...

Page 16: ...hing Next 1 In the Edit Method screen for the run method that you have selected touch Edit or anywhere on the graphical temperature profile to start editing the parameters Figure 9 Options available in the Run Method preview screen You will see that each of the numbers are surrounded by black fields indicating that they are editable At this point you can edit any of the temperatures times heated c...

Page 17: ...ions to modify the advanced parameters 3 Touch Advanced Options to edit the VeriFlex blocks AutoDelta Ramp Rates and Simulation Mode parameters Figure 11 Advanced Options screen Touch Simulation Mode to set the simulation mode The simulation modes include the following No Simulation Applied Biosystems 2720 Bio Rad T100 Bio Rad MyCycler MJ Research PTC 200 Eppendorf Mastercycler gradient Chapter 3 ...

Page 18: ... exit the screen c Use the button in the top right corner of the screen to return to the Advanced Options screen Touch Ramp Rates to edit the ramp rate of the individual steps Figure 13 Advanced Options Ramp Rates a Touch a particular ramp rate to open the editor to edit the ramp rate b Touch Done to save the selection or Cancel to exit the screen c Use the button in the top right corner of the sc...

Page 19: ...he block for the selected steps Figure 15 Edit VeriFlex Touch Remove VeriFlex to remove the VeriFlex blocks setting Note Remove VeriFlex is visible only if there is an existing VeriFlex blocks setting Touch Done when finished or Cancel to exit the screen Chapter 3 Create and run experiments on the instrument Edit a run method 3 SimpliAmp Thermal Cycler User Guide 19 ...

Page 20: ...and toggle button to set the DELTA values to be either negative or positive respectively c Touch Remove AutoDelta to remove the AutoDelta setting Note Remove AutoDelta is visible only if there is an existing AutoDelta setting d Touch Done when finished or Cancel to exit the screen Figure 17 Edit AutoDelta c Touch Done to return to the Edit Method screen Once you have edited a run method you can sa...

Page 21: ...ny of the following characters tab Spaces underscores and dashes are allowed b Touch a folder for example to select a destination folder where you want to save the run method Note The Save As button turns to Save in the Edit Method screen once you have saved the template as a new method 5 Touch Save when you are done Chapter 3 Create and run experiments on the instrument Edit a run method 3 Simpli...

Page 22: ...1 is at the upper left corner of the tray as shown in the following figure Figure 19 MicroAmp Optical 96 Well Reaction Plate 0 2 mL 3 Close the heated cover Perform a run Prepare your samples and load the sample block s as described in Load samples into the instrument on page 22 1 Close the cover 2 Start a run from the Home screen in one of the following ways Touch New Method Open Method Incubate ...

Page 23: ...Status Dial on the Home screen displays Done and Remove Samples 7 Touch Done once you have removed the samples The Status Dial is now ready for another run and displays Set Up Run Use the Multi Instrument Setup feature to perform runs on multiple instruments 1 In the Multi Instrument Setup screen touch the Off and On toggle button to make the instrument on which you are running an experiment visib...

Page 24: ...Make Visible setting enabled All available instruments are displayed in a table in the Multi Instrument Run screen 5 Select one or more instruments from the table to enable the Start Run button 6 Touch Start Run Once a run starts and completes successfully on a remote instrument a pop up message saying that the workflow has ended appears Note You cannot monitor a run taking place remotely Chapter ...

Page 25: ...n information Current block temperature Time remaining since the run started Run status To monitor the run progress touch the dial that is running to go the Run Monitoring screen Figure 21 SimpliAmp Thermal Cycler Home screen Monitor via the Home screen Chapter 3 Create and run experiments on the instrument Monitor a run 3 SimpliAmp Thermal Cycler User Guide 25 ...

Page 26: ...on that does not appear in the Dial on the Home screen Table 5 Elements of the Run Monitor screen Element Description Start Time Displays the time a run started Time Remaining Displays the time remaining for a run End Time Displays the approximate time at which the run will end Monitor via the run monitor screen Chapter 3 Create and run experiments on the instrument Monitor a run 3 26 SimpliAmp Th...

Page 27: ...Volume Helps edit run parameters like temperature time and cycles Helps skip the current holding step However if the run is currently ramping the Skip button will not function Helps pause a run Touching Pause changes the button to Touch to continue the run Helps stop a run After a run has completed or been aborted the Home screen appears again Chapter 3 Create and run experiments on the instrument...

Page 28: ...Run History screen touch the Run ID of the run you want to view The report is displayed 4 Touch Export to save the report on a USB drive Touch Print Remove the samples from the instrument Grasp the sample tray retainer assembly or reaction plate firmly with both hands or by using MicroAmp Multi Removal Tool Cat no 4313950 and gently rock it back and forth until the tubes or plate are free CAUTION ...

Page 29: ...ally see Cloud as one of your folder options 1 In the SimpliAmp Thermal Cycler Home screen touch Open Method to go to the Select Method screen Figure 23 Home screen 2 In the Select Method screen touch New Folders to create a new folder or Manage Folders to edit an existing method Figure 24 Select Method screen Chapter 3 Create and run experiments on the instrument Manage methods and folders 3 Simp...

Page 30: ...o another For example you can copy a run method from the Public folder into the New folder 1 You can also copy a run method from an existing folder into a new folder Note Back up your method files to a USB drive frequently or before sending in your SimpliAmp Thermal Cycler for service Chapter 3 Create and run experiments on the instrument Manage methods and folders 3 30 SimpliAmp Thermal Cycler Us...

Page 31: ...te Method c Touch Rename to rename a particular method folder name d Touch Delete to delete a particular method folder e Touch Done to save the changes and return to the Select Method screen Chapter 3 Create and run experiments on the instrument Manage methods and folders 3 SimpliAmp Thermal Cycler User Guide 31 ...

Page 32: ...gin any service procedure Always wear protective glasses and gloves when servicing the instrument Also make sure you disconnect the instrument from AC line power before you begin any service procedure CAUTION During instrument operation the temperature of the heated cover can be as high as 110 C based on the touchscreen maximum cover set point allowed and the temperature of the sample block s can ...

Page 33: ... returned for service Clean the heated cover Clean the heated cover once a month or as needed CAUTION During instrument operation the temperature of the heated cover can be as high as 110 C based on the touchscreen maximum cover set point allowed and the temperature of the sample block can be as high as 100 C Before performing the procedure keep hands away until the heated cover and sample block r...

Page 34: ...ore working on the instrument 2 Insert a small flat tip screwdriver into the slot in the upper portion of the power entry module and open the door 3 Pull out the fuse compartment to inspect the two fuses in the fuse compartment 4 Pull out the blown fuse s from the fuse compartment and replace with new Two UL Listed fuse rated 10A 250VAC size 5 x 20 mm 5 Place the fuse compartment back into the pow...

Page 35: ...urrent version from step 3 you do not need to upgrade the firmware Different from the current version from step 3 follow the steps below to download and upgrade the firmware 7 Insert a USB drive into the USB port on the computer to download the new firmware to the USB drive 8 Click the link in the Software column to download the file Select the USB drive as the location for the saved file 9 Remove...

Page 36: ...ument during the upgrade When the upgrade process is complete the instrument will restart automatically Use the Self Verification Test feature for the instrument to check the instrument hardware The check includes testing the block heated cover and other components Note Carry out the Self Verification test periodically or whenever there is an intermittent instrument error Figure 26 Self Verificati...

Page 37: ...een The test takes about 10 minutes Once the test is completed the test results will be displayed in the form of a report Note Contact your service representative in case of block failure 5 Touch Export to save the test report to a USB drive or Close to exit the screen Order kits and replacement parts Refer to Appendix B Parts and materials to obtain part numbers for kits and replacement parts Cha...

Page 38: ...ng from electrical hazards and the resultant loss of data Before installing the system decide what additional hardware if any you want to install Power line regulator 1 5 kVA Surge protector line conditioner 10 kVA Uninterruptible power supply 1 5 kVA Unpack the product IMPORTANT Save the packing materials and box in case you need to ship the instrument for service 1 To unpack the SimpliAmp Therma...

Page 39: ...nd twist your torso at the same time 3 Verify that the package containing the SimpliAmp Thermal Cycler Accessories includes the SimpliAmp Thermal Cycler Starter Kit Set up the system 1 Remove the packing material a Open the SimpliAmp Thermal Cycler heated cover b Using a can of compressed air deliver a blast of air into each well of the sample block s to remove any particles that may have collecte...

Page 40: ...impliAmp Thermal Cycler For instructions on setting up the wireless connection see Set up the wireless connection on page 43 Figure 28 USB port in the SimpliAmp Thermal Cycler unit 7 Toggle the power switch then wait for the instrument to start up The touchscreen displays the Main Menu indicating that the SimpliAmp Thermal Cycler startup is complete When you power on the instrument the instrument ...

Page 41: ...Thermal Cycler Settings screen 2 In the Settings screen touch Instrument Settings Figure 31 SimpliAmp Thermal Cycler Instrument Settings screen 3 In the Instrument Settings screen touch Network Connection Figure 32 SimpliAmp Thermal Cycler Network Connection screen Set up the wired connection Appendix A Install and connect to a network Set up the system A SimpliAmp Thermal Cycler User Guide 41 ...

Page 42: ...for the instrument the subnet mask and the default gateway Automatically Touch Obtain an IP address automatically using DHCP A check mark appears when DHCP is selected or Manually Touch Use the following IP Address then enter the appropriate IP addresses for the instrument the Subnet Mask and optionally the Default Gateway the Primary DNS Server and the Secondary DNS Server using the numeric edito...

Page 43: ...the IP address is automatically populated 3 Once a wireless connection has been detected a list of the available networks will be displayed in the Choose Network screen Touch the network name of your choice or touch Join Other Network If you choose Join Other Network the Configure and Join Network screen opens 4 In the Configure and Join Network screen enter the name and security type of the netwo...

Page 44: ...Sign In Required set to off you can use the instrument without signing in If you do not sign in to the instrument All actions are logged to Guest user profile You have access only to the Public folder for selecting and storing experiments You cannot transfer data to the Cloud only to USB or network drive In the home screen 1 Touch Sign In 2 Touch Get Started 3 Touch Name then enter a username and ...

Page 45: ...Amp Thermal Cycler to the internet using a wireless or wired connection Note See Set up the wired connection on page 41 and Set up the wireless connection on page 43 for setting up a wired and wireless connection Login as the Administrator login to link the instrument to the Cloud 1 Touch Sign In from the Main screen 2 Touch Sign In from the Sign In screen 3 Touch Administrator when asked to choos...

Page 46: ... profile to your Thermo Fisher Connect account allows you to Download methods stored in your Cloud account to the instrument Transfer methods from the instrument to your Cloud account Link your instrument profile to Thermo Fisher Connect 1 Sign in to your instrument profile 2 Touch My Profile 3 Touch Cloud 4 Enter your Thermo Fisher Connect username and password then touch Link Account 5 Touch Don...

Page 47: ...r by searching for Instrument Connect by Thermo Fisher Scientific 2 For Android devices download the application from Google Play by searching for Instrument Connect by Thermo Fisher Scientific 3 Log in to the instrument connect mobile application using your Thermo Fisher Connect login and password Appendix A Install and connect to a network Set up the system A SimpliAmp Thermal Cycler User Guide ...

Page 48: ...ote The Backup Restore and Restore Factory Settings are available only when you sign in as an administrator Instrument Name Touch the Instrument Name field and using the text editor enter up to 25 alphanumeric characters to identify the instrument Note The instrument name cannot have spaces Separate consecutive characters with a hyphen or underscore for example MyInstrument Recommended instrument ...

Page 49: ... On toggle button to disable or enable respectively the sleep mode In the On mode you can edit the time in minutes after which the instrument will go from the idling state into standby mode Network Connection Touch Network Connection to select the type of network connection You can select from the Wireless and Ethernet options For details on using the Wireless and Ethernet options see Set up the w...

Page 50: ...oggle button in the Remote Service screen to enable or disable respectively remote service The feature allows the instrument to periodically upload data to a remote server a To enable remote service touch On b Touch OK to save or touch Cancel to exit without saving the changes On clicking OK the system tests the connection to the Remote Server If the connection is successful the Remote Server Conn...

Page 51: ...CR Essentials app Remote Services must be switched on For more information on convenient access visit thermofisher com simpliamp Printer Configuration In the Printer Configuration screen enter the IP address of the printer in the Remote Printer IP Address After you have entered the IP address touch OK to save the change or Cancel to exit the screen Appendix A Install and connect to a network Set u...

Page 52: ...ttons to ignore or find respectively other instruments on the network Backup Restore for Admin only In the Backup Restore screen touch Backup Instrument to back up the instrument settings user accounts and methods on the instrument you are working to a USB drive Restore a Backup to view the files that you have backed up on a USB drive This feature can be useful in event of a hardware failure or wh...

Page 53: ...will be erased once factory settings are restored About Instrument Touching About Instrument will take you to the About Instrument screen where you can find out more information about the instrument as well as view the End User License Agreement EULA Touch About Instrument to find out more about the SimpliAmp Thermal Cycler In the About Instrument screen you can view information like firmware vers...

Page 54: ...ouch a particular Run ID to view the details of that run b Touch Export to save the run details to a USB device or Print to print the run details Note If you sign in as an Administrator you can manage the Run History For example deleting a run history Appendix A Install and connect to a network Set up the system A 54 SimpliAmp Thermal Cycler User Guide ...

Page 55: ... testing the block heated cover and other components See Chapter 4 Maintain the instrument for instructions on conducting the self verification test Export Instrument Log Touch Export Instrument Log to export the instrument logs to a USB Insert the USB into the USB drive before using this feature Block Verification Test Touch Block Verification Test to perform a block verification test Ensure that...

Page 56: ...t for each of your users and you must designate which methods you want these users to be able to run To select methods that you would like to allow your users to run log in as the administrator and save the desired methods into a folder called restricted After logging off as administrator only the users you have created will be allowed to use the machine and they will only be able to run not edit ...

Page 57: ...ministrator and Update software b Touch Save to save the change or Cancel to exit the screen When a USB device is plugged into the USB port a pop up dialog box with pre selected options is displayed Touch Do not show again to prevent the pop up from appearing when the USB device is inserted in the future or Close to dismiss the pop up screen Appendix A Install and connect to a network Set up the s...

Page 58: ...2 mL N8010840 MicroAmp Reaction Tube with Cap Autoclaved 0 2 mL N8010612 MicroAmp Reaction Tube without Cap 0 2 mL N8010533 N8011533 MicroAmp Reaction Tube without Cap Assorted Colors 0 2 mL N8010833 MicroAmp Optical Tube without Cap 0 2 mL N8010933 MicroAmp 96 Well Reaction Tube Tray Retainer Set 0 2 mL 403083 403086 Reaction Trays MicroAmp 96 Well Reaction Tray for VeriFlex Systems 4379983 Micro...

Page 59: ...Well Yellow Reaction Plate with Barcode 4483395 MicroAmp EnduraPlate Optical 96 Well Multicolor Reaction Plate with Barcode 4483355 4483356 MicroAmp EnduraPlate Optical 96 Well Clear GPLE Reaction Plate with Barcode 4483348 4483351 8 Well Strips MicroAmp 8 Tube Strip 0 2 mL N8010580 MicroAmp 8 Tube Strip Assorted Colors 0 2 mL N8010838 MicroAmp Optical 8 Tube Strip 0 2 mL 4316567 MicroAmp 8 Cap St...

Page 60: ...Part Name Cat No MicroAmp Splash Free 96 Well Base 4312063 MicroAmp Centrifuge Adapter N8013822 Appendix B Parts and materials Consumables B 60 SimpliAmp Thermal Cycler User Guide ...

Page 61: ... the printer IP address on the instrument matches the IP address from the system administrator Printer not connected to network Connect Ethernet cable to printer Instrument not connected to network Connect Ethernet cable to instrument Confirm network is functioning Ethernet cable bad Try a different Ethernet cable Confirm network is functioning When running on multiple instruments can t see instru...

Page 62: ...ent for service 1 Contact your local customer care center or technical support group to obtain a copy of the Certificate of Instrument Decontamination a service notification a service call number and if required packaging 2 Decontaminate the instrument IMPORTANT If the sample block s become contaminated with radioactivity use a commercially available decontaminant to remove the contamination If th...

Page 63: ...C power source receptacle Is away from water Environmental requirements Ensure that the installation site is maintained under the following conditions Table 8 Temperature and humidity requirements Condition Acceptable range Temperature 15 to 30 C 59 to 86 F Humidity 15 to 80 relative humidity non condensing Avoid placing the instrument adjacent to heaters cooling ducts or in direct sunlight Fluctu...

Page 64: ...4 C sec Maximum sample ramp rate 1 3 C sec Temperature accuracy 0 25 C 35 to 99 9 C Temperature range for protocol run 0 C to 100 0 C Temperature non uniformity 2 0 5 C Dimensions Height 21 cm 8 27 in Width 24 0 cm 9 45 in Depth 46 cm 18 11 in Weight 8 5 kg 18 3 lb PCR volume range Supported 10 100 µL Settable 1 100 µL Instrument memory USB on board Display interface 8 color TFT LCD Power 100 240 ...

Page 65: ...onnecting to USB enabled Wi Fi Card System specifications Table 11 Physical dimensions weight and power consumption Parameter Instrument footprint Recommended clearance Total Height 21 cm 8 27 in 24 cm 9 44 in 1 45 cm 17 71 in Width 24 0 cm 9 45 in 0 cm 0 in 24 0 cm 9 45 in Depth 46 cm 18 11 in 23 0 cm 9 in 2 69 cm 27 1 in Weight 8 5 kg 18 3 lb Power consumption 600 W Maximum consumption 164 W Ave...

Page 66: ...ing graphic displays the location of the power cord insertion point as well as the various ports provided in the instrument Appendix D Instrument specification and layout Location of power point and ports on the instrument D 66 SimpliAmp Thermal Cycler User Guide ...

Page 67: ...table lists the categories and the run methods they include Table 12 Pre defined categories and run methods Category Run method Blank Template General PCR Run Method Blank PCR 1 Blank PCR 2 Basic PCR AmpliTaq 360 Method AmpliTaq Method Basic PCR Taq Method Hot Start AmpliTaq 360 Method AmpliTaq Gold Method AmpliTaq Gold Fast PCR Run Method Platinum Taq DNA Polymerase Method Platinum Taq SuperMix M...

Page 68: ...thod Digital PCR only for Dual Flat block 3D OpenArray Genotyping These run methods cannot be edited or deleted but if you save them with a different name or to a different folder you can edit them The following sections provide the method details Note For illustration purpose the tables display maximum ramp rate These will however change with different block types AccuPrime PFX 2 Step Method Cycl...

Page 69: ...6 0 Temperature 68 0 Hold Time 60 AccuPrime Taq DNA Polymerase Method Cycle Step Stage Reaction volume µL Cover temp C 1 2 3 4 Cycles 1 25 1 50 105 0 Step 1 RampRate 6 0 6 0 6 0 Temperature 94 0 94 0 4 0 Hold Time 120 15 Infinite Step 2 RampRate 6 0 Temperature 55 0 Hold Time 15 Step 3 RampRate 6 0 Temperature 68 0 Hold Time 60 Appendix E Predefined run methods Location of power point and ports on...

Page 70: ...ate 6 0 Temperature 68 0 Hold Time 60 AmpliTaq 360 Method Cycle Step Stage Reaction volume µL Cover temp C 1 2 3 4 Cycles 1 35 1 50 105 0 Step 1 RampRate 6 0 6 0 6 0 Temperature 94 0 95 0 72 0 Hold Time 180 95 0 30 420 Step 2 RampRate 6 0 4 0 Infinite Temperature 58 0 Hold Time 30 Step 3 RampRate 6 0 Temperature 72 0 Hold Time 60 Appendix E Predefined run methods Location of power point and ports ...

Page 71: ...te 6 0 Temperature 72 0 Hold Time 60 AmpliTaq Gold Fast PCR Method Cycle Step Stage Reaction volume µL Cover temp C 1 2 3 4 Cycles 1 35 1 50 105 0 Step 1 RampRate 6 0 6 0 6 0 Temperature 95 0 96 0 72 0 Hold Time 600 3 10 Step 2 RampRate 6 0 6 0 Temperature 62 0 4 0 Hold Time 3 Infinite Step 3 RampRate 6 0 Temperature 68 0 Hold Time 5 Appendix E Predefined run methods Location of power point and po...

Page 72: ...mpRate 6 0 Temperature 72 0 Hold Time 30 AmpliTaq Method Cycle Step Stage Reaction volume µL Cover temp C 1 2 3 4 Cycles 1 35 1 50 105 0 Step 1 RampRate 6 0 6 0 6 0 Temperature 95 0 95 0 72 0 Hold Time 60 15 420 Step 2 RampRate 6 0 6 0 Temperature 55 0 4 0 Hold Time 15 Infinite Step 3 RampRate 6 0 Temperature 72 0 Hold Time 30 Appendix E Predefined run methods Location of power point and ports on ...

Page 73: ...72 0 Hold Time 30 BigDye Direct Cycle Sequence Method Cycle Step Stage Reaction volume µL Cover temp C 1 2 3 4 5 Cycles 1 1 1 25 1 50 105 0 Step 1 RampRat e 4 0 6 0 6 0 6 0 4 0 Temperat ure 37 0 80 0 96 0 96 0 4 0 Hold Time 900 120 60 10 Infinite Step 2 RampRat e 6 0 Temperat ure 50 0 Hold Time 5 Step 3 RampRat e 6 0 Temperat ure 60 0 Hold Time 75 Appendix E Predefined run methods Location of powe...

Page 74: ... 3 RampRate 6 0 Temperature 68 0 Hold Time 30 BigDye Kit Fast Run Method Cycle Step Stage Reaction volume µL Cover temp C 1 2 3 4 Cycles 1 25 1 50 105 0 Step 1 RampRate 6 0 6 0 6 0 Temperature 96 0 96 0 4 0 Hold Time 60 10 Infinite Step 2 RampRate 6 0 Temperature 50 0 Hold Time 5 Step 3 RampRate 6 0 Temperature 60 0 Hold Time 75 Appendix E Predefined run methods Location of power point and ports o...

Page 75: ...ycle Step Stage Reaction volume µL Cover temp C 1 2 3 4 Cycles 1 30 1 50 105 0 Step 1 RampRate 6 0 6 0 6 0 Temperature 94 0 94 0 4 0 Hold Time 30 30 Infinite Step 2 RampRate 6 0 Temperature 68 0 Hold Time 60 Elongase 3 Step Method Cycle Step Stage Reaction volume µL Cover temp C 1 2 3 4 Cycles 1 30 1 50 105 0 Step 1 RampRate 6 0 6 0 6 0 Temperature 94 0 94 0 4 0 Hold Time 60 30 Infinite Appendix E...

Page 76: ...e 95 0 95 0 72 0 Hold Time 60 15 420 Step 2 RampRate 6 0 6 0 Temperature 55 0 4 0 Hold Time 15 Infinite Step 3 RampRate 6 0 Temperature 72 0 Hold Time 30 Platinium PFX 2 Step Method Cycle Step Stage Reaction volume µL Cover temp C 1 2 3 4 Cycles 1 35 1 50 105 0 Step 1 RampRate 6 0 6 0 6 0 Temperature 94 0 94 0 4 0 Hold Time 120 15 Infinite Step 2 RampRate 6 0 Temperature 68 0 Appendix E Predefined...

Page 77: ...perature 55 0 Hold Time 30 Step 3 RampRate 6 0 Temperature 68 0 Hold Time 60 Platinium Taq DNA Polymerase Method Cycle Step Stage Reaction volume µL Cover temp C 1 2 3 4 Cycles 1 30 1 50 105 0 Step 1 RampRate 6 0 6 0 6 0 Temperature 94 0 94 0 4 0 Hold Time 30 30 Infinite Step 2 RampRate 6 0 Temperature 55 0 Hold Time 30 Step 3 RampRate 6 0 Temperature 72 0 Hold Time 60 Appendix E Predefined run me...

Page 78: ...pRate 6 0 Temperature 68 0 Hold Time 60 Platinium Taq SuperMix Method Cycle Step Stage Reaction volume µL Cover temp C 1 2 3 4 Cycles 1 30 1 50 105 0 Step 1 RampRate 6 0 6 0 6 0 Temperature 94 0 94 0 4 0 Hold Time 30 15 Infinite Step 2 RampRate 6 0 Temperature 55 0 Hold Time 15 Step 3 RampRate 6 0 Temperature 72 0 Hold Time 60 Appendix E Predefined run methods Location of power point and ports on ...

Page 79: ...getSeq Exome Enrichment Method Cycle Step Stage Reaction volume µL Cover temp C 1 2 3 4 Cycles 72 50 105 0 Step 1 RampRate 6 0 Temperature 47 0 Hold Time 3600 Time Release Method Cycle Step Stage Reaction volume µL Cover temp C 1 2 3 4 Cycles 1 40 1 50 105 0 Step 1 RampRate 6 0 6 0 6 0 Temperature 95 0 95 0 72 0 Hold Time 60 15 420 Step 2 RampRate 6 0 6 0 Temperature 55 0 4 0 Hold Time 15 Infinite...

Page 80: ...me 15 15 Step 2 RampRate 6 0 6 0 Temperature 65 0 55 0 Hold Time 30 30 AutoDelta Temperature 0 5 AutoDelta Starting Cycle 1 3D Cycle Step Stage Reaction volume nL Cover temp C 1 2 3 4 Cycles 1x 39x 1x 1 70 0 Step 1 RampRate 0 8 1 2 1 2 Temperature 96 0 60 0 60 0 Hold Time 600 120 120 Step 2 RampRate 0 8 1 2 Temperature 98 0 10 0 Hold Time 30 Appendix E Predefined run methods Location of power poin...

Page 81: ... 70 0 Step 1 RampRate 1 3 1 3 Temperature 94 0 99 0 Hold Time 600 30 Step 2 RampRate 1 1 Temperature 54 0 Hold Time 21 Step 3 RampRate 0 1 Temperature 57 0 Hold Time 90 Appendix E Predefined run methods Location of power point and ports on the instrument E SimpliAmp Thermal Cycler User Guide 81 ...

Page 82: ...this document Symbols on the instrument Symbols may be found on the instrument to warn against potential hazards or convey important safety information In this document the hazard symbol is used along with one of the following user attention words CAUTION Indicates a potentially hazardous situation that if not avoided may result in minor or moderate injury It may also be used to alert against unsa...

Page 83: ...onformer aux ordonnances locales sur les déchets municipaux pour les dispositions d élimination et communiquer avec le service à la clientèle pour des renseignements sur les options d élimination responsable Safety alerts on this instrument Additional text may be used with one of the symbols described above when more specific information is needed to avoid exposure to a hazard See the following ta...

Page 84: ... rear panel of the SimpliAmp Thermal Cycler Figure 36 Location of the safety label on the 96 Well Sample Block Location of safety labels on this instrument Appendix F Safety Safety alerts on this instrument F 84 SimpliAmp Thermal Cycler User Guide ...

Page 85: ...nstrument Disconnect power before servicing WARNING Sharp Edges The edges of this container are sharp WARNING Ensure appropriate electrical supply For safe operation of the instrument Plug the system into a properly grounded receptacle with adequate current capacity Ensure the electrical supply is of suitable voltage Never operate the instrument with the ground disconnected Grounding continuity is...

Page 86: ...netic compatibility EMC standards The instrument design and manufacture complies with the standards and requirements for safety and electromagnetic compatibility as noted in the following table Reference Description EU Directive 2006 95 EC European Union Low Voltage Directive IEC 61010 1 EN 61010 1 UL 61010 1 CSA C22 2 No 61010 1 Safety requirements for electrical equipment for measurement control...

Page 87: ...e contact with chemicals Wear appropriate personal protective equipment when handling chemicals for example safety glasses gloves or protective clothing Minimize the inhalation of chemicals Do not leave chemical containers open Use only with adequate ventilation for example fume hood Check regularly for chemical leaks or spills If a leak or spill occurs follow the manufacturer s cleanup procedures...

Page 88: ...and company institution requirements before working with potentially biohazardous materials Follow all applicable local state provincial and or national regulations The following references provide general guidelines when handling biological samples in laboratory environment U S Department of Health and Human Services Biosafety in Microbiological and Biomedical Laboratories BMBL 5th Edition HHS Pu...

Page 89: ...g user documentation from the product website and contact details for service and technical support SimpliAmp Thermal Cycler Starter Kit Insert A24829 Lists the samples of consumables necessary to start the SimpliAmp Thermal Cycler included in the kit and the ordering information for additional consumables Note For additional documentation see Customer and technical support on page 89 Customer and...

Page 90: ... warranty Life Technologies Corporation and or its affiliate s warrant their products as set forth in the Life Technologies General Terms and Conditions of Sale found on Life Technologies website at www thermofisher com us en home global terms and conditions html If you have any questions please contact Life Technologies at www thermofisher com support Documentation and support Limited product war...

Page 91: ......

Page 92: ...For support visit thermofisher com support or email techsupport lifetech com thermofisher com 30 June 2016 ...

Reviews: