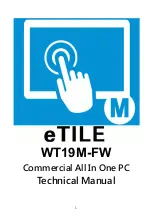
background image


WT19M-FW 

Commercial All In One PC 

Technical Manual


Summary of Contents for eTile wt19m-fw

Page 1: ...1 WT19M FW Commercial All In One PC Technical Manual...

Page 2: ...are invited to visit our homepage at www aopen com under Green Products WEEE www aopen com Green Products Instruktion til bortskaffelse Danish Af hensyn til vores milj bedes De ikke bortskaffe denne...

Page 3: ...nts Electriques et Electroniques DEEE ou WEEE vous tes invit visiter notre site www aopen com sous Green Products Entsorgungsanleitung German Zum besseren Schutze unseres Planeten schmeissen Sie elekt...

Page 4: ...ssa p gina na Internet em www aopen com sobre Green Products Instrucciones para depositar los productos electr nicos Spanish Para proteger mejor el medio ambiente por favor no deposite los productos e...

Page 5: ...any means electronically mechanically optically without the prior written permission of this company Disclaimer AOpen makes no warranties or representations either expressed or implied with respect t...

Page 6: ...d by qualified service personnel 8 If one of the following situations arises get the equipment checked by a service personnel a Liquid has penetrated into the equipment b The equipment has been expose...

Page 7: ...dio television technician for help Notice Shielded cables All connections to other computing devices must be made using shielded cables to maintain compliance with FCC regulations Notice Peripheral de...

Page 8: ...2 2 Rear View 12 2 3 I O ports 13 2 4 Dimension 13 3 System Assembly 15 3 1 HDD Replacement 15 3 2 RAM Replacement 17 3 3 CPU Replacement 18 3 4 Power Adapter Replacement 18 4 Peripheral Installation...

Page 9: ...9 5 Specification 21 6 RS232 Setting 24 Appendix A Drivers Installation 26 Appendix B Trouble Shotting 27...

Page 10: ...nual are for the purpose of illustrative conveniences and are possessed by their respective firms We regret not informing about any changes in usage standards and other related information AOpen Compa...

Page 11: ...d b e c a System b Utility and Driver c Power adapter 90W 120W by option d Power cord e Ultra Slim Wall Mount Option Notice The pictures may look slightly different from the product you purchased due...

Page 12: ...12 2 System View 2 1 Front View 2 2 Rear View...

Page 13: ...aution When you install devices or cables please removed DC jack at first to prevent inadvertently switched to cause system boot damage to system electric shock The HDMI connector is output port not i...

Page 14: ...14...

Page 15: ...15 3 System Assembly Please remove all screws of rear cover 3 1 HDD Replacement 1 Rear view after taking off rear cover...

Page 16: ...16 HDD by option M 2 SSD CPU DIMM mSATA SSD miniCard...

Page 17: ...r to the motherboard layout to find the memory compartment Swapping a RAM Module 2 Use both fingers to pull the ejector clips out of the sides of the module 3 Slide the memory module out of the memory...

Page 18: ...18 3 3 CPU Replacement Not support for BGA type 3 4 Power Adapter Replacement 1 Please turn off the system 2 Disconnect the power cable from the I O panel DC IN then can swap the adapter...

Page 19: ...plastic seat as A 2 Screw wall mount bracket and plastic seat as C 3 Screw VESA bracket on system by special VESA screws as D 4 Lift the system to align the VESA bracket into the wall mount bracket a...

Page 20: ...rt standard 100x100mm VESA mount so other VESA mount bracket followed this standard spec can be assembled Please use the system attached VESA screw M4 otherwise will be broken system s VESA screw hole...

Page 21: ...el WGI218LM Audio Realtek ALC269 Q Mini Card slot X2 support mSATA x1 Storage mSATA SSD M 2 SSD SATA HDD SYSTEM BIOS AMI BIOS Panel and Touch Panel Win 7 Premium above support 10 points PCT Multi Touc...

Page 22: ...am Option External cables No VESA wall mount kit Option OS No Rear Side I O USB 3 0 x4 GbE LAN RJ45 x1 Combo 3 5mm Jack Line out Mic in RJ50 Type RS232 x4 DC in 19V HDMI output connector x1 Accessory...

Page 23: ...23...

Page 24: ...24 6 RS232 Setting Open back cover and find it...

Page 25: ...TR 8 5 GND 9 6 DSR 3 7 RTS 5 8 CTS 7 9 RI 10 1 RS232 Pin Definition Pin Signal Pin Signal 1 Data Carrier Detect 6 Data Set Ready 2 Received Data 7 Request to Send 3 Transmitted Data 8 Clear to Send 4...

Page 26: ...ou have touch accuracy issue Don t use Windows build in tablet PC utility to calibration http global aopen com download aspx Select Product Warm Touch Select Model WT19M FB Select Categories Utility S...

Page 27: ...on 1 Check the power led at right rear side is turned on but still no booting screen after 3 minutes 2 Remove power line after 1 min connecting power line and power on system again If still no booting...

Page 28: ...ting device If system is booting without any problem it shows the hard drive may be crashed Please swap a new one System crash issue 1 The additional peripheral may be over loading for adapter and thi...

Reviews: